For a summary of all file layouts available, refer to
Processes
File Transfer
File Layouts
File Layout Summary
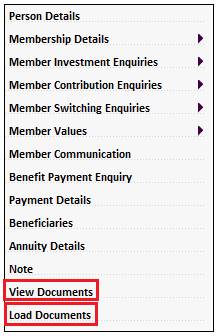
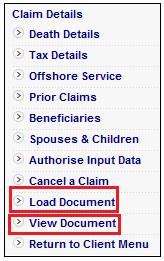
Member Documents and Letters may also be uploaded and viewed from the following locations:
Member
Members > Members > Load Documents
Manual Initiate
Accounting > Transaction Capture > Manual Accounting Transactions
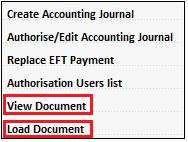
Accounting > Transaction Capture > Bank Account Allocations
Benefit Payment Process
Processes > Benefits > Process Benefit payment
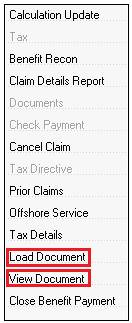
Processes > Annuities
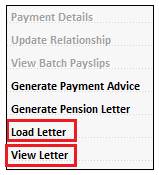
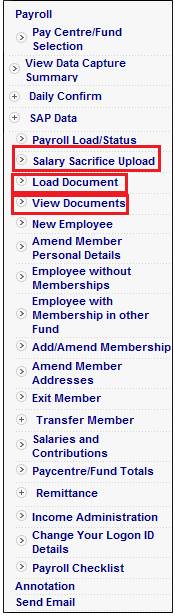
Pay Centre
Processes > Contributions > Payroll > Data Capture > (Select a Pay Centre) > Salary Sacrifice Upload
Processes > Contributions > Payroll > Data Capture > (Select a Pay Centre) > Load Document
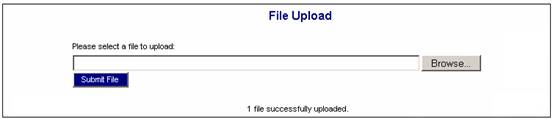
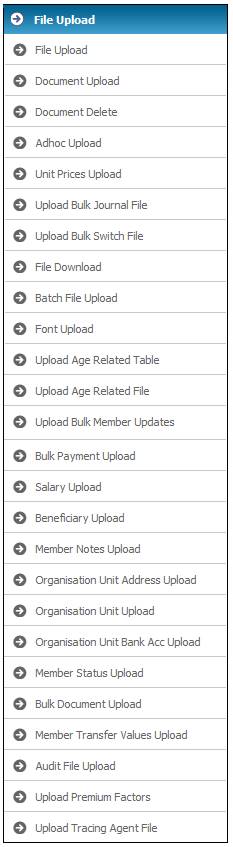
From the main menu on the top, click File Upload. A list of sub-menu options will be displayed on the left.

Select File Upload from the sub-menu. The File Upload screen will be displayed.
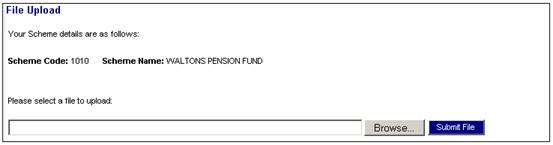
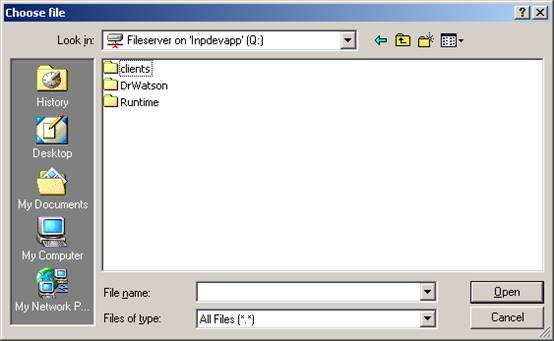
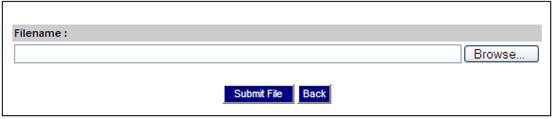
Click BROWSE. This will allow you to search the available drives (user network or local) for the file to be loaded.

Highlight the required file, then click OPEN.
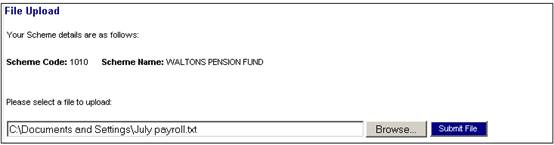
The file name will appear in the box. Click SUBMIT FILE.
A message will confirm that the file has been successfully uploaded.
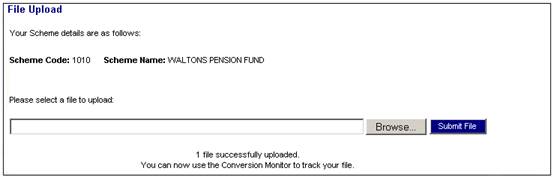
You will now be able to use the conversion monitor to track the progress of the file.
Select Document Upload from the sub-menu on the left.
The Document Upload screen will be displayed.
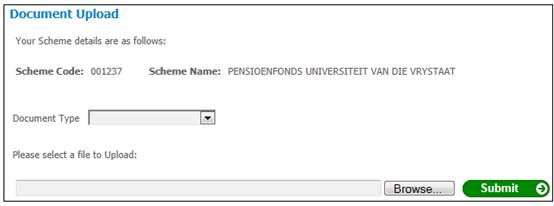
Click ![]() alongside Document Type, then select the required type of document to be uploaded from the drop-down box. The following types may be selected:
alongside Document Type, then select the required type of document to be uploaded from the drop-down box. The following types may be selected:
- Benefit Statement
- Investment Statement
- Scheme Rules
- Summary Rules
- Notices
- Investment Information
- Forms
- Membership Certificate
Note:
In the following table, when the Document Type is selected and files are uploaded, the files will appear on the following Websites:
|
File Type |
Website |
Website Menu |
|
Benefit Statement |
Member |
Member Details > Benefit Statement
Note: Only once the Benefit Statement has been authorised under Scheme Reports > Member > Authorise Benefit Statements |
|
Scheme Rules |
Member
Employer |
Scheme Info > Rules of Scheme
Scheme Info > Rules of Scheme |
|
Summary Rules |
Member
Employer |
Scheme Info > Summary of Rules
Scheme Info > Summary of Rules |
|
Notices |
Member
Employer |
Scheme Info > General Information
Scheme Info > General Information |
|
Investment Information |
Member
Employer |
Investment Info > General Information
Investments > General Information |
|
Forms |
Member
Employer |
Scheme Info > Forms
Scheme Info > Forms |
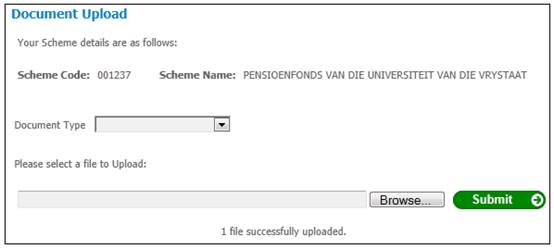
Use BROWSE (refer to File upload above) to find the document to be uploaded, then click SUBMIT. A message will confirm that the file has been successfully uploaded.
To delete documents that have been previously uploaded, select Document Delete from the sub-menu on the left.
The Document Delete screen will be displayed.
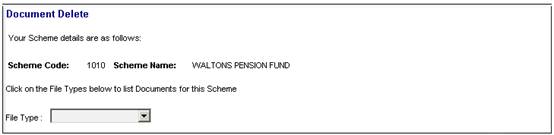
Click ![]() alongside File Type, then select the required type of file to be deleted (e.g. benefit statement, scheme rules, etc.) from the drop-down box. The lower portion of the screen will expand to display the files available for deletion.
alongside File Type, then select the required type of file to be deleted (e.g. benefit statement, scheme rules, etc.) from the drop-down box. The lower portion of the screen will expand to display the files available for deletion.
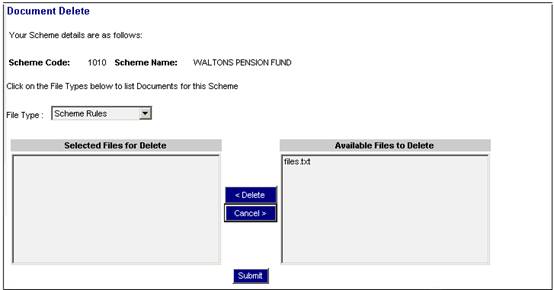
To select a document, highlight the required file name in the Available Files to Delete pane on the right and click DELETE. The selected file will be displayed in the Selected Files for Delete pane on the left.
To remove a selection, highlight the relevant file name in the Selected Files for Delete pane on the left and click CANCEL.
Once the required files have been selected for deletion, click SUBMIT. A message will be displayed, asking you to confirm the deletion.
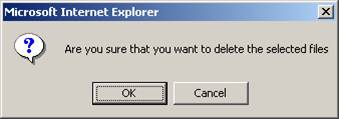
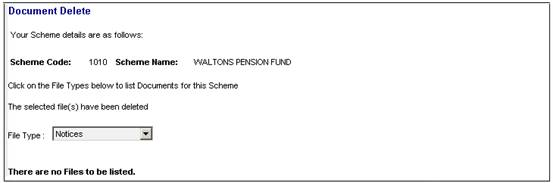
Click OK. A message will confirm that the file has been deleted.
Select Adhoc Upload from the sub-menu on the left.
The Adhoc Upload screen will be displayed.

Click BROWSE. This will allow you to search the available drives (user network or local) for the file to be loaded.
Highlight the required file, then click OPEN.
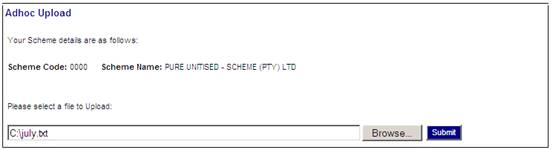
The file name will appear in the box. Click SUBMIT.
A message will confirm that the file has been successfully uploaded.
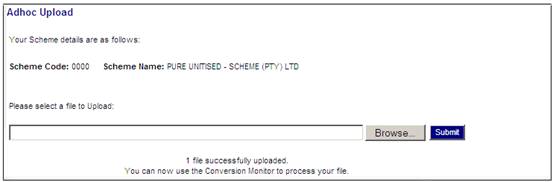
You will now be able to use the conversion monitor to track the progress of the file.
Select Unit Prices Upload from the sub-menu on the left.
The Unit Price Upload screen will be displayed.
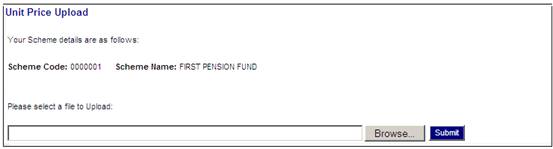
Click BROWSE. This will allow you to search the available drives (user network or local) for the file to be loaded.
Highlight the required file, then click OPEN.
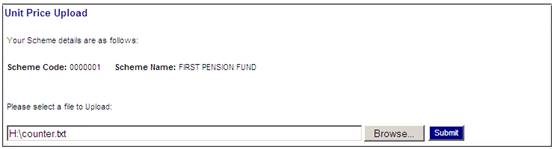
The file name will appear in the box. Click SUBMIT.
A message will confirm that the file has been successfully uploaded.

Once the file has been uploaded the batch job BJU3EJ must be submitted.
|
BATCHJOB92 |
UNIT PRICE LOAD |
JU3EJ_UNITS\BJU3EJO0.BAT |
For details of the file layout and the validations performed, refer to
Processes
File Transfer
File Layouts
Unit Prices Upload
This facility enables you to load different journals that have no relation to each other, or to load many journals for one membership. Once loaded, the BJU3ANBTLOAD batch run must be initiated.
Transactions captured on a Saturday
When a bulk journal file is processed in the BJU3AN Bulk Journal Load batch job and one of the Accounts in the Accounting Rule linked to the Accounting Activity is INVESTMEMB or INVSTMEMUNIT, or if the Money Movement Indicator on the Accounting Activity is Y and the Payment Method is EFT, the system will apply the existing Transaction Date validation i.e. if the Status of the Date on the Calendar is WEEKEND or PUBLIC HOLIDAY an error message will be displayed.
For all other Accounting Activities the system will read the Status on the Calendar for the Date equal to the Transaction Date, and if it is WEEKEND will check if the Date is a Saturday. If it is, the journal will be enabled to be saved.
To view the BJU3ANBTLOAD data take-on layout referred to here, refer to
Processes
File Transfer
File Layouts
Upload Bulk Journal File
Once the BJU3AN BTLOAD Batch Job has run, the System will create Pre-Authorised Business Transaction records.
These transactions can be viewed and authorised under the Bulk Journals menu selection. This is located using the following menu selections:
Accounting > Transaction Capture > Bulk Journals
For more details on the Bulk Journals menu selection, refer to Bulk Journals under
Accounting
Transaction Capture
To upload a bulk journal file, select Upload Bulk Journal File from the sub-menu on the left.
The File Upload screen will be displayed.

Click BROWSE. This will allow you to search the available drives (user network or local) for the file to be loaded.
Highlight the required file, then click OPEN.

The file name will appear in the box. Click SUBMIT FILE. A message will confirm that the file has been successfully uploaded.
For details of the file layout and the validations performed, refer to
Processes
File Transfer
File Layouts
Upload Bulk Journal File
This facility allows the uploading of a file for the bulk switching of members' investments.
Refer to
Reports
Member
Member Switches
Processes
File Transfer
File Layouts
Upload Bulk Switch File
Refer to
Reports
Member
Member Switches Completed
Select Upload Bulk Switch File from the sub-menu on the left.
The File Upload screen will be displayed.

The file is loaded by selecting a file from the file directory and then submitting the job as a batch run.
Click BROWSE. This will allow you to search the available drives (user network or local) for the file to be loaded.
Highlight the required file, then click OPEN. The file name will appear in the "Please select a file to upload:" box. Click SUBMIT FILE.
Once the file has been loaded, the bulk switch program can be submitted.
For information about submitting the bulk switch batch program, refer to Batch Runs under Reports
Locate the required JU3BG batch job from the list.
|
BATCHJOB38 |
Bulk Switch Load |
JU3BG_SWILOD\BJU3BGO0.bat |
To initiate the batch job, click Submit.
The progress of the batch job can be monitored in the error log (job name BJU3BG).
After the batch job has completed, the error log must be checked for any errors. For more information refer to
Reports
General
Error Log Report
For details of the file layout and the validations performed, refer to
Processes
File Layouts
Upload Bulk Switch File
This facility enables you to load members in respect of whom the fund is administered by a different administrator, i.e. external pensioner annuity details. Members can be loaded individually or via file upload.
For more details refer to Loading External Members under
Products
Annuity Fund
There are various steps to the bulk upload process:
- a file is uploaded to the application server
- the file is read into the conversion tables
- MEMBER.BAT is initiated
From the Products menu, click ![]() alongside Conversion on the sub-menu on the left. Additional options will be displayed.
alongside Conversion on the sub-menu on the left. Additional options will be displayed.
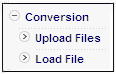
Upload files
Click Upload Files below Conversion. A screen for the file upload will be displayed.
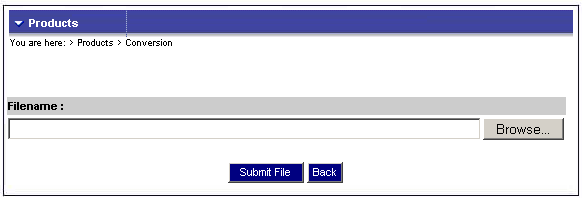
Click BROWSE. This will allow you to search the available drives (user network or local) for the file to be loaded.

Highlight the required file, then click OPEN.
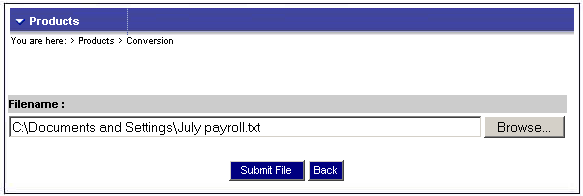
The file name will appear in the box. Click SUBMIT FILE. The file will be moved to the application server.
Load file
Click Load File below Conversion. The Annuity Batch Selection screen will be displayed, and a message will confirm that the batch run has started.
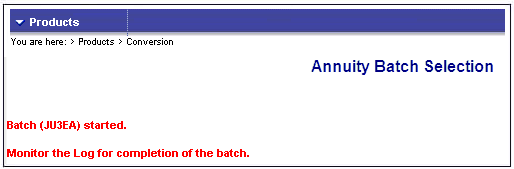
The file will be read into the conversion tables. The progress of the batch job can be monitored on the log.
Refer to
Supplements
Processes
Data Take-on Process for Pensioners
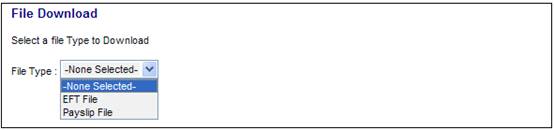
This facility enables you to obtain a list of EFT files and payslip files that have been created, and to select files to be downloaded.
Select File Download from the sub-menu on the left.

The File Download screen will be displayed.

Click ![]() and select a file type.
and select a file type.
The File Download screen will display the files available in the folder.
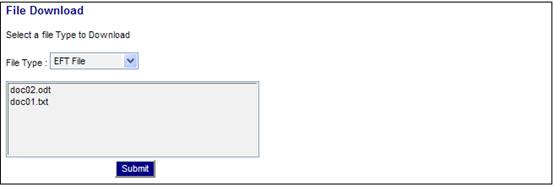
Select one or more files and click SUBMIT. A confirmation message will be displayed.

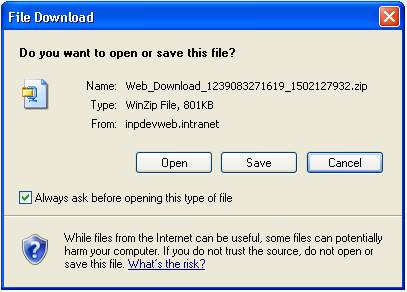
Click the here hyperlink to download the selected files. The File Download screen will be displayed, allowing you to open the file or save it.
This facility allows the uploading of files for batch jobs.
Select Batch File Upload from the sub-menu on the left.
The Batch File Upload screen will be displayed.
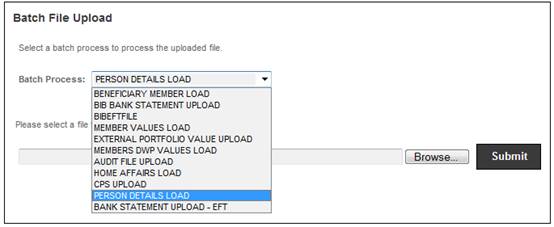
Select a one of the following Batch Processes from the drop-down list:
- BENEFICIARY MEMBER LOAD
- BIB BANK STATEMENT UPLOAD
- BIB EFT FILE
- MEMBER VALUES LOAD
- EXTERNAL PORTFOLIO VALUE UPLOAD
- MEMBERS DWP VALUES UPLOAD
- AUDIT FILE UPLOAD
- HOME AFFAIRS LOAD
- CPS UPLOAD
- PERSON DETAILS LOAD
- BANK STATEMENT UPLOAD - EFT
Use BROWSE (refer to File upload above) to find the document to be uploaded, then click SUBMIT. A message will confirm that the file has been successfully
Once the file has been loaded, the relevant batch job can be submitted.
For information about submitting batch jobs refer to
Reports
Overview
Batch Runs
Locate the required batch job from the list.
To initiate the batch job, click Submit in the action column.
The progress of the batch job can be monitored in the error log.
After the batch job has completed, the error log must be checked for any errors. For more information refer to
Reports
General
Error Log Report
For details of the file layout, refer to
Processes
File Transfer
File Layouts
Batch File Upload
For more details on uploading a file received from Home Affairs refer to
Supplements
Processes
Processing the Home Affairs File
This facility allows the uploading of fonts to be used in the production of documents and benefit statements.
Select Font Upload from the sub-menu on the left.
The Font Upload screen will be displayed.
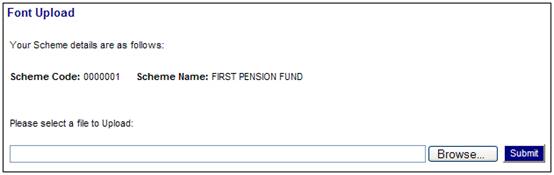
Click BROWSE (refer to File upload above) to find the fonts to be uploaded, then click SUBMIT. A message will confirm that the file has been successfully uploaded.
Once the file has been loaded, the relevant batch job can be submitted.
For information about submitting batch jobs refer to
Reports
Batch Runs
This section describes other uploads that can be done, but which are not accessed via a specific menu option.
This facility can be used to upload the following:
- medical aid rates.
- annuity payments to the principal member, or each dependant, and for each deduction to be paid to a third party.
- ad-hoc pension payments
- ad-hoc pension increases
For details of the file layout, refer to
Processes
File Transfer
File Layouts
Medical Aid Rates
Annuity Payment
Annuity Payment Detail Upload
Log in to the system from the Logon page.
Click processes, then click regular payments.
Select the required scheme.
Select Annuity Details File Upload from the sub-menu on the left. The Adhoc Upload screen will be displayed.
Click BROWSE. This will allow you to search the available drives (user network or local) for the file to be loaded.
Highlight the required file, then click OPEN.
The file name will appear in the box. Click SUBMIT to submit the file for upload.
Once the file has been submitted for upload, a batch job (BJU3EG) must be initiated. To do this, select Annuity Details Load from the sub-menu on the left. The Adhoc Upload screen will be displayed.
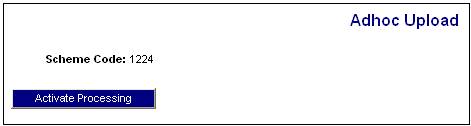
Click ACTIVATE PROCESSING in order to commence the processing. A message will confirm that processing has been activated.

You will now be able to monitor the progress of the batch job. For more information refer to
Reports
General
Error Log Report
This facility is used to upload bank structures (bank branches).
For details of the file layout, refer to
Processes
File Transfer
File Layouts
Bank Branches
Log in to the system from the Logon page.
Click clients then select Products from the top menu.
Click the required product name, i.e.
- Annuity Fund
- Debit Order Umbrella Fund
- Preservation Fund
- Retirement Fund
then select the required scheme.
Click ![]() alongside Conversion on the sub-menu on the left. Additional options will be displayed.
alongside Conversion on the sub-menu on the left. Additional options will be displayed.
Select Upload Files from the sub-menu on the left. The File Upload screen will be displayed.
Click BROWSE. This will allow you to search the available drives (user network or local) for the file to be loaded.
Highlight the required file, then click OPEN.
The file name will appear in the box. Click SUBMIT FILE to submit the file for upload.
The file will be moved to the application server.
Select Load File from the sub-menu on the left. The Umbrella Batch Selection screen will be displayed, and a message will confirm that the batch run has started.
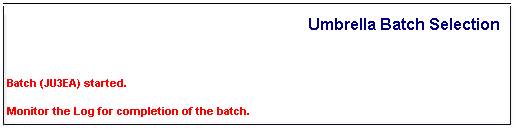
The file will be read into the conversion tables. The progress of the batch job can be monitored on the log.
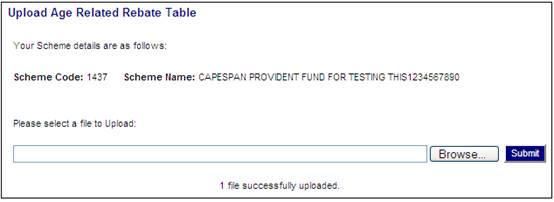
This facility allows the selection of a file of age related rebate rates to be loaded to the directory specified.
Note:
Only users who have been granted access on the system to use this menu option will be able to upload the file received.
Select Upload Age Related Table from the sub-menu on the left.
The Upload Age Related Rebate Table screen will be displayed.
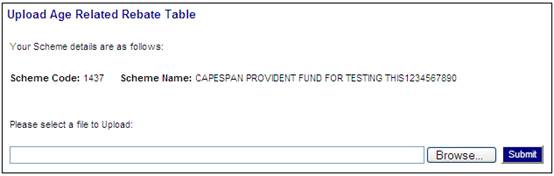
Click BROWSE. This will allow you to search the available drives (user network or local) for the file to be loaded.
Highlight the required file, then click OPEN.
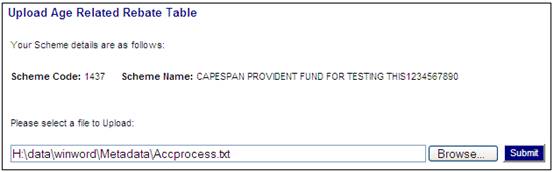
The file name will appear in the box. Click SUBMIT.
A message will confirm that the files have been successfully uploaded.
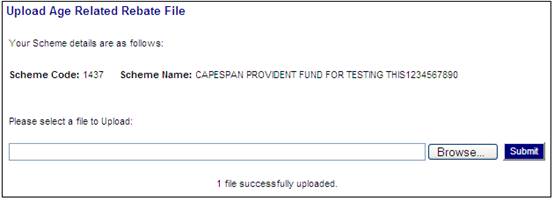
This facility allows the selection of a file of age related rebates to be loaded to the directory specified.
Note:
Only users who have been granted access on the system to use this menu option will be able to upload the file received.
Select Upload Age Related File from the sub-menu on the left.
The Upload Age Related Rebate File screen will be displayed.

Click BROWSE. This will allow you to search the available drives (user network or local) for the file to be loaded.
Highlight the required file, then click OPEN.
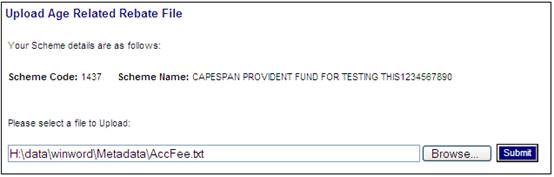
The file name will appear in the box. Click SUBMIT.
A message will confirm that the files have been successfully uploaded.
This facility enables the bulk updating of details for existing members.
This allows for the bulk updating of Pay Centre, Membership Groups, Voluntary Contributions and a selection of personal information fields, i.e. just those fields that are likely to be updated in bulk (not Surname and DOB, for example). The following is also included:
- Updating of paycentre in the mask to allow bulk transfer to unclaimed paycentre
- Updating of voluntary contributions to zero etc.
- Updating of membership groups
- Updating of personal information
- The creation of new members in bulk.
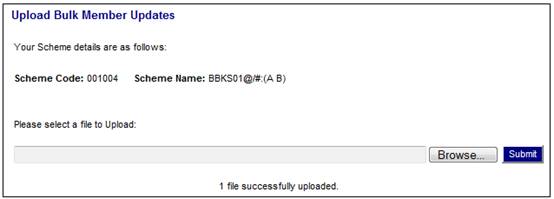
Select Upload Bulk Member Updates from the sub-menu on the left.
The Upload Bulk Member Updates screen will be displayed.
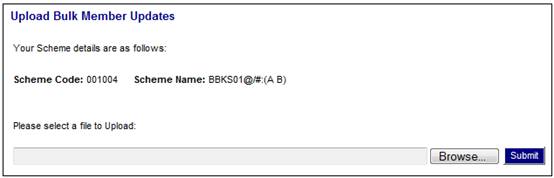
Click BROWSE. This will allow you to search the available drives (user network or local) for the file to be loaded.
Highlight the required file, then click OPEN.
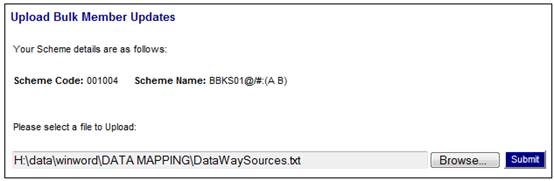
The file name will appear in the box. Click SUBMIT.
A message will confirm that the files have been successfully uploaded.
Once the file has been uploaded, the system will read in the file specified and apply the updates (Membership or Contributions) to existing members.
After the batch job has completed, the error log must be checked for any errors. For more information refer to
Reports
General
Error Log Report
For details of the file layouts and the validations performed, refer to
Processes
File Transfer
File Layouts
Membership Details
Contribution History
Contribution Updates
Debit Order Fund Members
When a file of Debit Order Member changes is uploaded via the File Transfer > Upload Bulk Member Updates menu, the BJU3RN batch job will create a new Membership Payment Detail record if there is a change in the Member’s Contribution Membership Group.
The system will read the Income Rule for the Income Type for which the value for Income Optionality is M (Mandatory) and Income Regularity is R (Regular) and for which the Group Type is CONTRIBUTION.
If the Calculation Type is FIXED AMOUNT, the system will create the Membership Payment Detail record with a value for Amount of Regular Payment equal to the value for Amount on the Income Rule for the new Membership Group for the Membership.
If the Calculation Type is % OF SALARYT, the system will calculate the Member’s contribution based on the Member’s latest Monthly Salary record and the value for Percentage on the Income Rule for the new Membership Group for the Membership. The Membership Payment Detail record will be created with a value for Amount of Regular Payment equal to the value calculated.
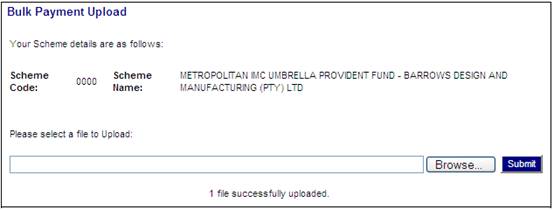
This facility allows the bulk uploading of payments for a scheme.
Select Bulk Payment Upload from the sub-menu on the left.
The Bulk Payment Upload screen will be displayed.
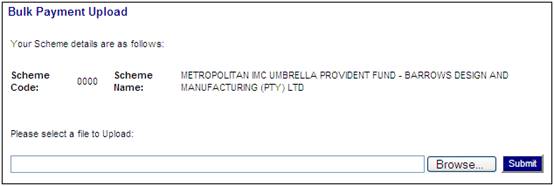
Click BROWSE. This will allow you to search the available drives (user network or local) for the file to be loaded.

Highlight the required file, then click OPEN.

The file name will appear in the box. Click SUBMIT.
A message will confirm that the files have been successfully uploaded.
Once the file has been uploaded, the BJU3EN batch job will automatically be run.
After the batch job has completed, the error log must be checked for any errors. For more information refer to
Reports
General
Error Log Report
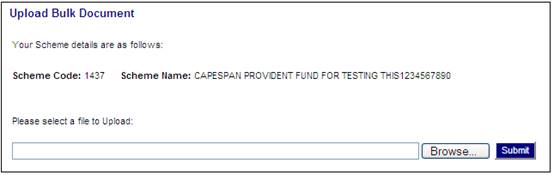
This facility allows the bulk uploading of documents for a scheme, e.g. benefit statements or claim related documents.
Note:
For information on the bulk document upload process, refer to
Supplements
Processes
Bulk Document Upload
Select Bulk Document Upload from the sub-menu on the left.
The Upload Bulk Document screen will be displayed.
Click BROWSE. This will allow you to search the available drives (user network or local) for the file to be loaded.
Highlight the required file, then click OPEN.
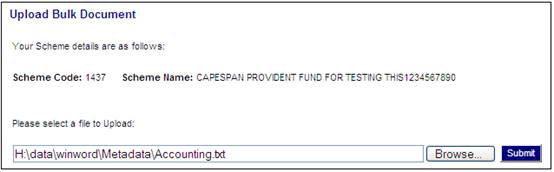
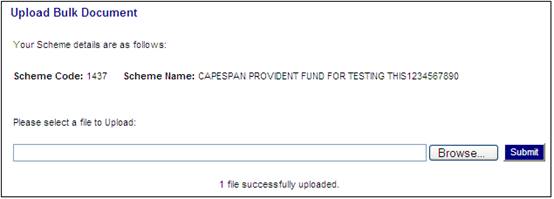
The file name will appear in the box. Click SUBMIT.
A message will confirm that the files have been successfully uploaded.
This facility allows the bulk uploading of the following for members:
- Salary History
- Monthly Earnings History
- Hours History
- Shift History
Select Salary Upload from the sub-menu on the left.
The Upload Salary screen will be displayed.
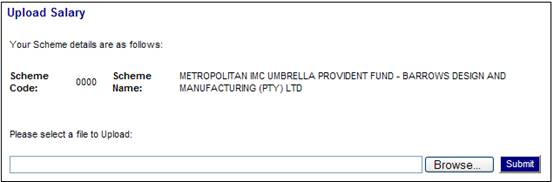
Click BROWSE (refer to File upload above) to find the salaries to be uploaded, then click SUBMIT. The JU3EA batch job will automatically be initiated. If no error is found in this job, then batch job JU5AA will automatically be initiated.
A message will confirm that the file has been successfully uploaded.
For details of the file layout and the validations performed, refer to
Processes
File Transfer
File Layouts
Hours History
Salary for Debit Order Umbrella Funds
Salary History
Shift History
This facility allows the bulk uploading of beneficiary details for members.
Select Beneficiary Upload from the sub-menu on the left.
The Upload Beneficiary screen will be displayed.
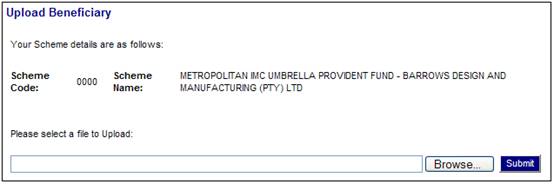
Click BROWSE (refer to File upload above) to find the beneficiaries to be uploaded, then click SUBMIT. The JU3EG batch job will automatically be initiated. If no error is found in this job, batch job JU5AA will automatically be initiated.
A message will confirm that the file has been successfully uploaded.
For details of the file layout and the validations performed, refer to
Processes
File Transfer
File Layouts
Beneficiaries
This facility allows the bulk uploading of member notes for members.
Select Member Notes Upload from the sub-menu on the left.
The Upload Member Notes screen will be displayed.
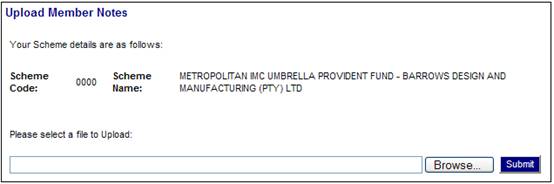
Click BROWSE (refer to File upload above) to find the member notes to be uploaded, then click SUBMIT. The JU3EG batch job will automatically be initiated. If no error is found in this job, then batch job JU5AA will automatically be initiated.
A message will confirm that the file has been successfully uploaded.
For details of the file layout and the validations performed, refer to
Processes
File Transfer
File Layouts
Notes
This facility allows the bulk uploading of details for schemes and companies.
Select Organisation Unit Upload from the sub-menu on the left.
The Organisation Unit Upload screen will be displayed.
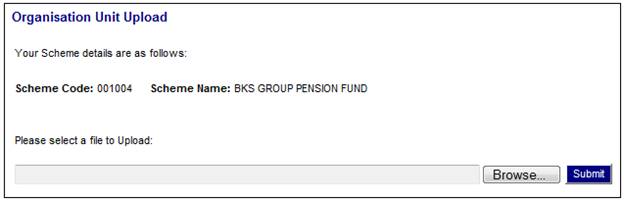
Click BROWSE (refer to File upload above) to find the organisation unit details to be uploaded, then click SUBMIT. A batch job will automatically be initiated.
A message will confirm that the file has been successfully uploaded.
Check on the Error Log that BJU3EA and BJU5AA ran successfully.
Select Infrastructure>Batch>Batch Jobs. Page down to BATCHJOB75 (JU3EB_LOAD). Click SUBMIT.
Perform the following checks:
· Check that the All OK message appears on the top left hand of the screen.
· Check on the Error Log that BJU3EB ran successfully.
· Check online that the record(s) have been loaded. (Check the first and last record of the input file).
For details of the file layout and the validations performed, refer to
Processes
File Transfer
File Layouts
Organisation Unit
This facility allows the bulk uploading of address details for schemes and companies.
Select Organisation Unit Address Upload from the sub-menu on the left.
The Organisation Unit Upload screen will be displayed.
Click BROWSE (refer to File upload above) to find the organisation unit address details to be uploaded, then click SUBMIT. A batch job will automatically be initiated.
A message will confirm that the file has been successfully uploaded.
Check on the Error Log that BJU3EA and BJU5AA ran successfully.
Select Infrastructure>Batch>Batch Jobs. Page down to BATCHJOB75 (JU3EB_LOAD). Click SUBMIT.
Perform the following checks:
· Check that the All OK message appears on the top left hand of the screen.
· Check on the Error Log that BJU3EB ran successfully.
· Check online that the record(s) have been loaded. (Check the first and last record of the input file).
For details of the file layout and the validations performed, refer to
Processes
File Transfer
File Layouts
Organisation Unit Address
This facility allows the bulk uploading of bank account details for schemes and companies.
Select Organisation Unit Bank Acc Upload from the sub-menu on the left.
The Organisation Unit Upload screen will be displayed.
Click BROWSE (refer to File upload above) to find the organisation unit bank account details to be uploaded, then click SUBMIT. A batch job will automatically be initiated.
A message will confirm that the file has been successfully uploaded.
Check on the Error Log that BJU3EA and BJU5AA ran successfully.
Select Infrastructure>Batch>Batch Jobs. Page down to BATCHJOB75 (JU3EB_LOAD). Click SUBMIT.
Perform the following checks:
· Check that the All OK message appears on the top left hand of the screen.
· Check on the Error Log that BJU3EB ran successfully.
· Check online that the record(s) have been loaded. (Check the first and last record of the input file).
For details of the file layout and the validations performed, refer to
Processes
File Transfer
File Layouts
Organisation Unit Bank Account
This file layout enables the bulk upload of changes in members’ status to unclaimed.
Select Member Status Upload from the sub-menu on the left.
The Upload Membership Status screen will be displayed.

Click BROWSE (refer to File upload above) to find the member status changes to be uploaded, then click SUBMIT. The JU3EA batch job will automatically be initiated.
A message will confirm that the file has been successfully uploaded.
Processing
When the file is uploaded, the Member’s Membership Status will be updated with the value in the file and with an Effective Date equal to the Effective Date in the file and the End Date will be updated on the existing record with the Effective Date of the new record less 1 day.
The system will read the current Membership Status and will only update the Membership Status if it is a permissible change as per the table below.
A ‘Y’ in a cell in the table below indicates that the Membership Status in the From row may be changed to the Membership Status in the To column.
|
To
From |
Deferred |
Def Annuitant |
Exit Finalised |
Exit in Process |
Live |
Unclaimed Ben |
|
Deferred |
|
N |
N |
|
N |
Y |
|
Deferred Annuitant |
N |
|
N |
|
N |
Y |
|
Exit in Process |
Y |
Y |
N |
N |
|
Y |
|
Live |
N |
N |
N |
N |
N |
Y |
|
Living Annuitant |
Y |
Y |
N |
N |
Y |
N |
|
PHI |
Y |
Y |
N |
Y |
Y |
|
|
Unclaimed Benefit |
Y |
Y |
N |
Y |
Y |
|
If the update is to a Status of DEFERRED or DEF ANNUITANT, the system will check the unit balance on the Member’s INVSTMEMUNIT account for unitized portfolios and the monetary balance on the Member’s INVESTMEMB account for non-unitised portfolios, and if the balances are zero the Membership Status will not be updated. If the Membership Status may not be updated, an error message will be written to the Error Log.
It the update is to a Status of UNCLAIMED BEN, the system will check the unit balance on the Member’s INVSTMEMUNIT account for unitized portfolios and the monetary balance on the Member’s INVESTMEMB account for non-unitised portfolios, and if the balances are zero the status will be updated to EXIT FINALISED and an information message will be written to the Error Log. If the Member’s current Membership Status is EXIT IN PROCESS, the Claim Status on the Benefit Request will be updated to COMPLETED.
If the update is to a Status of UNCLAIMED BEN the Payroll membership status will be updated to 8192.
This file layout enables the upload of member transfer values.
Select Member Transfer Values Upload from the sub-menu on the left.
The Upload Member Transfer Values screen will be displayed.
Click BROWSE (refer to File upload above) to find the tax file to be uploaded, then click SUBMIT.
Note:
Only a file with a .txt extension can be uploaded.
A message will confirm that the file has been successfully uploaded.
1 file successfully uploaded.
Processing
When the Member Transfer Values Upload batch job runs, the system will read the file and validate that the Pensionable Service Date is less than the CAR Start Date and that the value for Type of Transfer is equal to one of the values for the UDPV Object TRANSFER TYPE.
If there are no errors a Transfer Value Detail record will be created for the Scheme Code and Member Number in the file, as per the table below.
|
Upload Field |
Transfer Value Detail Field |
|
Transfer Date |
TRANSFER_DATE |
|
Type of Transfer |
C_UDPV_TRANSFER_TP |
|
Pensionable Service Date |
PENSIONABLE_SERVICE_DATE |
|
Member Contributions |
MEMBER_CONTRIBUTIONS |
|
Tax-Free Amount |
MEMBER_CONTRIBUTIONS. |
|
Withdrawal Amount |
WITHDRAWAL_AMOUNT |
|
Transferring Fund |
TRANSFERRING_FUND |
For details of the take-on layout refer to
Processes
File Transfer
File Layouts
This file layout enables the upload a file of all Staff bank details on a monthly basis.
This menu option will only be enabled if the user has the applicable security access.
Note:
A report is provided to display any of these bank accounts if they have been used in any payments. For more information refer to
System Reports
Audit
Bank Account Usage
A file in the following format must be provided with all of the user Bank Account details.
|
|
Field Name |
Field Size |
ATTR |
O/M |
Start |
End |
Description / Value |
|
1 |
ACCOUNT NUMBER |
16 |
Char |
M |
1 |
16 |
The bank account number. |
|
2 |
BRANCH CODE |
6 |
Char |
M |
17 |
22 |
Bank branch code. |
The full set of Accounts must be uploaded each month and the latest information will be accessed each month. This is to ensure that all new accounts and changes to existing accounts are uploaded.
The system will create a Bank Account Risk File Upload batch job to upload the file. When the file is uploaded, a Bank Account Risk table will be updated with the Branch Code, Account Number and an Effective Date equal to current date.
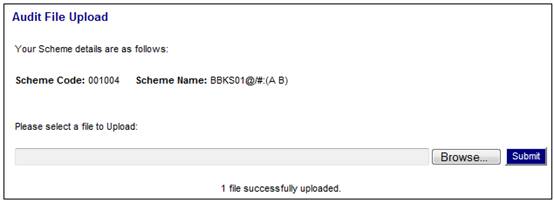
Select Audit File Upload from the sub-menu on the left.
The Audit File Upload screen will be displayed.
Click ![]() (refer to File upload above) to find the Bank Account file to be uploaded, then click SUBMIT.
(refer to File upload above) to find the Bank Account file to be uploaded, then click SUBMIT.
Note:
Only a file with a .txt extension can be uploaded.
The JU3SH_AUDLOD (Loading of Staff Bank Accounts) batch job will automatically be initiated.
A message will confirm that the file has been successfully uploaded.
Processing
The JU3SG_ACCUSG (Bank Account Usage) batch job will run daily. When the batch job runs, the system will read the Benefit Disposal Instruction records with a Claim Payment Type of EFT and with a Timestamp greater than the Timestamp on the latest Batch Control record for the Bank Account Risk batch job. If a Benefit Disposal Instruction is found with combination of DTI Branch Code and DTI Account Number equal to a combination of Bank Branch Code and Account Number on the User Bank Account table, the following details will be extracted from the Benefit Disposal Instruction and the Benefit Request to which it is linked:
|
Field |
Description |
|
Scheme Code |
|
|
Membership Reference Number |
|
|
Surname |
|
|
Initials |
|
|
ID Number |
|
|
Bank Account Number |
DTI Branch Code on Benefit Disposal Instruction |
|
Bank Branch Code |
DTI Account Number on Benefit Disposal Instruction |
|
Payee Name |
Payee Name on Benefit Disposal Instruction |
|
Amount |
Amount on Benefit Disposal Instruction |
|
User ID |
User ID on Benefit Disposal Instruction |
|
Timestamp |
|
The system will read the Pre-Authorised Business Transaction and Pre-Authorised Annuities records for which the value for Claim Payment Type is EFT and with a Timestamp greater than the Timestamp on the latest Batch Control record for the Bank Account Risk batch job. The system will read the Debit DTI Account Number and check if the number is equal to an Account Number on the latest User Bank Account record.
If a Pre-Authorised Business Transaction or Pre-Authorised Annuities record is found with a Debit DTI Account Number equal to an Account Number on the User Bank Account record, the following details will be extracted from the Pre-Authorised Business Transaction or Pre-Authorised Annuities:
|
Field |
Description |
|
Scheme Code |
|
|
Membership Reference Number |
Where applicable |
|
Accounting Activity |
|
|
Transaction Date |
|
|
Bank Account Number |
Debit DTI Account Number |
|
Bank Branch Code |
Debit Bank Sort Code |
|
Payee Name |
Payee Name |
|
Amount |
|
|
User ID |
|
|
Timestamp |
|
If there is a Membership Reference Number on the transaction the system will find the Surname, Initials and ID Number of the Natural Person record to which the Membership record is linked.
The system will read the EFT Instruction records with a Timestamp greater than the Timestamp on the latest Batch Control record for the batch job, and read the Credit DTI Account Number and check if the number is equal to an Account Number on the latest User Bank Account record.
If an EFT Instruction record is found with a Credit DTI Account Number equal to an Account Number on the User Bank Account record it will find the Business Transaction to which the EFT Instruction record is linked.
The following details will be extracted from the Business Transaction and EFT Instruction:
|
Field |
Description |
|
Scheme Code |
|
|
Membership Reference Number |
Where applicable |
|
Accounting Activity |
|
|
Transaction Date |
|
|
Bank Account Number |
Credit DTI Account Number on EFT Instruction |
|
Bank Branch Code |
Credit Bank Sort Code on EFT Instruction |
|
Payee Name |
Credit Name on EFT Instruction |
|
Amount |
|
|
User ID |
|
A report will be created in a csv file.
The system will read the value for Description for the Batch Parameter with a Transaction Code equal to the Report Name and send the csv file to an email with the email address found.
The report may be viewed under Reports > Audit > Bank Account Usage.
For more information refer to
System Reports
Audit
Bank Account Usage
This facility allows the uploading of premium factors.
Select Upload Premium Factors from the sub-menu on the left.
The Upload Premium Factors screen will be displayed.

Click BROWSE (refer to File upload above) to find the file to be uploaded, then click SUBMIT.
Note:
Only a file with a .txt extension can be uploaded.
A message will confirm that the file has been successfully uploaded.
Processing
When the SUBMIT button is selected, the system will upload the file to the directory specified.
A batch job will automatically be initiated.
The system will update the Global Percentage PREMRATES with data on the file to be loaded as follows:
|
File Field |
Value |
|
Effective Date |
Effective Date |
|
Type |
PREMRATES |
|
Calculation |
PREMRATES |
|
Term |
TERM RATES e.g. 1,2,3 etc. |
|
Age |
Age |
|
Amount |
Amount |
Example of Premiums to be uploaded as per the table below:
|
Age |
5 Year Term |
10 Year Term |
15 Year Term |
20 Year Term |
|
18 |
19.14 |
9.01 |
5.55 |
3.99 |
|
19 |
19.16 |
9.04 |
5.58 |
4.03 |
|
20 |
19.18 |
9.06 |
5.62 |
4.07 |
|
21 |
19.20 |
9.09 |
5.65 |
4.11 |
|
22 |
19.21 |
9.10 |
5.68 |
4.14 |
|
23 |
19.22 |
9.13 |
5.71 |
4.18 |
|
24 |
19.22 |
9.15 |
5.75 |
4.22 |
|
25 |
19.24 |
9.19 |
5.79 |
4.27 |
|
26 |
19.26 |
9.23 |
5.84 |
4.32 |
|
27 |
19.29 |
9.28 |
5.89 |
4.37 |
|
28 |
19.32 |
9.33 |
5.94 |
4.42 |
|
29 |
19.36 |
9.38 |
5.99 |
4.46 |
|
30 |
19.39 |
9.42 |
6.02 |
4.49 |
|
31 |
19.42 |
9.45 |
6.06 |
4.53 |
|
32 |
19.44 |
9.48 |
6.09 |
4.55 |
|
33 |
19.46 |
9.51 |
6.12 |
4.58 |
|
34 |
19.48 |
9.53 |
6.13 |
4.60 |
|
35 |
19.49 |
9.54 |
6.14 |
4.61 |
|
36 |
19.50 |
9.55 |
6.15 |
4.63 |
|
37 |
19.51 |
9.56 |
6.16 |
4.64 |
|
38 |
19.51 |
9.56 |
6.17 |
4.66 |
|
39 |
19.51 |
9.57 |
6.18 |
4.68 |
|
40 |
19.52 |
9.58 |
6.20 |
4.71 |
|
41 |
19.53 |
9.59 |
6.22 |
4.74 |
|
42 |
19.53 |
9.60 |
6.25 |
4.79 |
|
43 |
19.54 |
9.62 |
6.28 |
4.85 |
|
44 |
19.54 |
9.65 |
6.33 |
4.91 |
|
45 |
19.56 |
9.68 |
6.38 |
4.98 |
|
46 |
19.58 |
9.73 |
6.45 |
|
|
47 |
19.60 |
9.79 |
6.54 |
|
|
48 |
19.64 |
9.85 |
6.63 |
|
|
49 |
19.68 |
9.93 |
6.74 |
|
|
50 |
19.73 |
10.02 |
6.86 |
|
|
51 |
19.77 |
10.11 |
|
|
This facility allows for the uploading of notifications of pending exit received from a Tracing Agent as part of the pre-claim process. When the file is uploaded, if there has been a change in the status, the members’ pending claim records will be updated with the new status.
Note:
When a file is received from the Tracing Agents, it must first be converted to a csv file with a single worksheet, as it currently contains 20 separate worksheets for each status. The worksheet name i.e. the status, must be copied into the last column in the file and the file converted to a text file.
For more information refer to
Processes
File Transfer
File Layouts
Tracing Agent File Upload
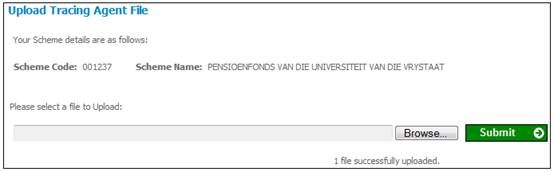
Select Upload Tracing Agent File from the sub-menu on the left.
The Upload Tracing Agent File screen will be displayed.
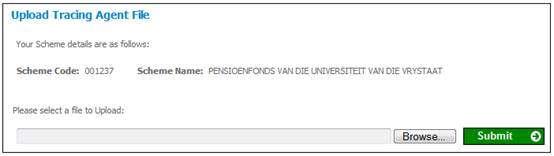
Click BROWSE (refer to File upload above) to find the file to be uploaded, then click SUBMIT.
Note:
Only a file with a .txt extension can be uploaded.
A message will confirm that the file has been successfully uploaded.
File successfully uploaded.
Processing
When the file is uploaded, the system will find the Benefit Request with a value for Claim Request of PRE CLAIM for the Membership record for the Scheme Code and Reference Number and read the value for Description on the latest Claims Details record linked to the Benefit Request.
If it is null or not equal to the value for Status on the file, the Description on the Claim Details record will be updated with the value for Status on the file and the Timestamp will be updated with the current date and time.
If it is equal to the value for Status on the file, the Claims Details record will not be updated.
If no Benefit Request record is found for a Membership Reference Number, an error message will be written to the Error Log and the next record will be processed.
The system will validate that the Surname and ID Number are correct for the Membership Reference Number and if not, the Claims Details record will not be updated and an error message will be written to the Error Log.
If there are values for the contact detail fields (postal address, street address, telephone number, cell phone number, email address or fax number), the system will create a Client Address record with an Address Type of POSTAL and if there is a value for the Date of Death field, the Date of Death on the Natural Person record will be updated.
The system will update the values as per the details in the System Value column in the table below.
|
|
Field Name |
System Value |
|
6 |
Status |
DESCRIPTION on Claims Details |
|
7 |
Date of Death |
DEATH_DATE on Natural Person to which the Membership is linked. |
|
8 |
Work Telephone |
TELEPHONE_NUMBER on Client Address with a Type of Address of BUSINESS |
|
9 |
Home Telephone |
TELEPHONE_NUMBER on Client Address with a Type of Address of RESIDENTIAL |
|
10 |
Cell Number |
CELLULAR_PHONE_NUMBER on Client Address with a Type of Address of RESIDENTIAL |
|
11 |
Postal Address 1 |
LINE_1 on Client Address with a Type of Address of POSTAL |
|
12 |
Postal Address 2 |
LINE_2 on Client Address with a Type of Address of POSTAL |
|
13 |
Postal Address 3 |
LINE_3 on Client Address with a Type of Address of POSTAL |
|
14 |
Postal Code |
POSTAL_CODE on Client Address with a Type of Address of POSTAL |
|
15 |
Street Address 1 |
LINE_1 on Client Address with a Type of Address of POSTAL Note: A post box or a street address is supplied in separate columns in the file from the Tracing Agent for postal address and therefore whichever is contained in the file must be recorded as the postal address. If a post box address and a street address are supplied for the same member then create a Client Address record with an Address Type of RESIDENTIAL for the Street Address. |
|
16 |
Street Address 2 |
LINE_2 on Client Address with a Type of Address of POSTAL |
|
17 |
Street Address 3 |
LINE_3 on Client Address with a Type of Address of POSTAL |
|
18 |
Postal Code |
POSTAL_CODE on Client Address with a Type of Address of POSTAL |
|
19 |
Email Address |
ELECTRONIC_ADDRESS_IDNETIFIER on Client Address with a Type of Address of RESIDENTIAL |
|
20 |
Fax Number |
FAX_NUMBER on Client Address with a Type of Address of RESIDENTIAL |
A Report record will be created with a Report Type of TRACING AGENT and Report Detail records with the details of the fields that were updated as well as the Benefit Event and Date of Exit on the Benefit Request and the Status on the Claims Details record.