Homepage > Products > List
Click on the NEW button.
The Product Details screen will be displayed.
Complete the following fields:
|
Code |
A short code to identify the product |
|
Name |
The registered product name |
|
Short Name |
A shortened version of the product name – if necessary |
|
Effective Date |
The launch date of the product on the system |
|
Commencement Date |
The date the product commenced |
|
Sponsor /Principal Employer |
The Principal Employer |

Click on the PRODUCT NATURE button at the bottom of the screen.

Complete the following fields:
|
Country |
South Africa |
|
Currency |
ZAR |
|
Language |
ENGLISH |
|
Product |
Defined Contribution |
|
Pooling Status |
Sub Umbrella |
|
Priority Status |
High or Normal |
|
Business Unit |
Evolution |
|
Type of Service |
Full Admin |
|
Type of Product |
Retirement Fund |
|
Type of Launch |
New Product |
|
Type of Retirement Product |
Provident / Pension |
|
Sector |
OTHER |
|
Flexible Investment |
This must be ticked if the product allows for switching |

Click on PRODUCT DETAILS on the bottom of the screen.
This will return you to the first screen that you completed.
Click on the BASIC PRODUCT DATA button on the bottom of that screen.

Complete the following fields:
|
Launch Date |
The launch date of the product |
|
Financial Year End |
The financial year end of the main umbrella |
|
Interest From |
Contribution interest will be calculated from this date |
|
Interest To |
Claims interest will be calculated till this date |
|
Administrator Branch |
Select the appropriate branch |
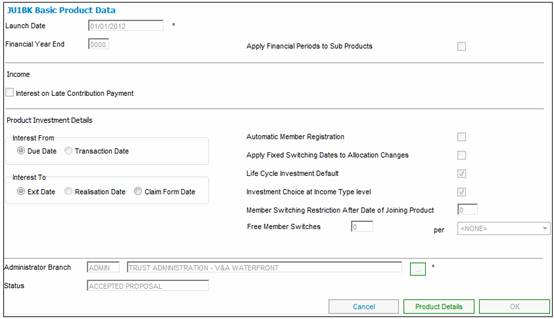
Click on the OK button.
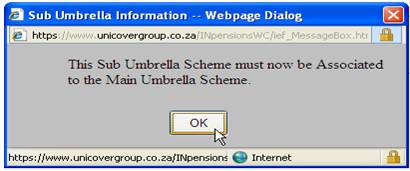
A message will be displayed, indicating that this is a SUB-UMBRELLA product that still needs to be linked to the MAIN product. We will do this later in the process.
The status of the product launch is ACCEPTED PROPOSAL.
![]()
Homepage > Security > Team Definition
From the TOP menu, click on TEAM DEFINITION.

Highlight the appropriate TEAM.
From the menu in the left, click on ASSOCIATE TO PRODUCT.
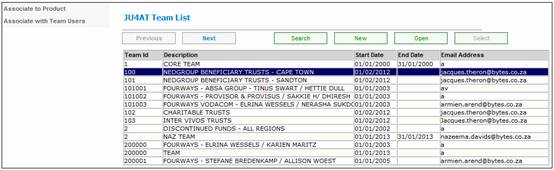
Your new product will be listed on the left (POTENTIAL PRODUCT).
Highlight the product and click on the INSERT button.
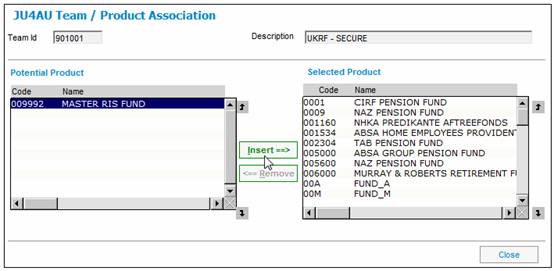
The new product is now linked to the team.
Homepage > Products > List
In this section we will complete the product rules.
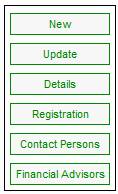
Highlight your product and click on the UPDATE button (on the right).
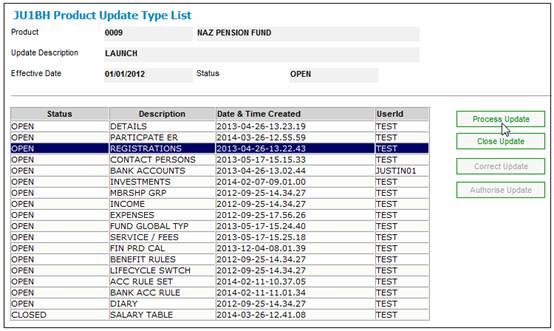
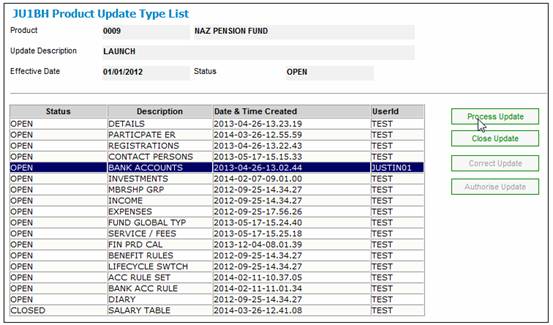
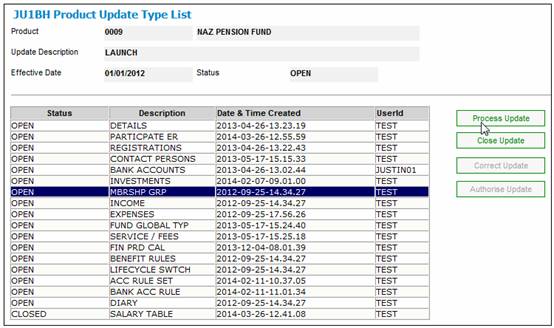
The first update for any product will be the LAUNCH.
Highlight this row and click on the PRODUCT UPDATE TYPE menu (on the left).

A list of UPDATE TYPES will be displayed.
Highlight the following updates and click on the CLOSE UPDATE button (on the right).
|
FUND GLOBAL TYP |
|
LIFE CYCLE SWITCH |
|
BANK ACC RULE |
|
DIARY |
|
SALARY TABLE |

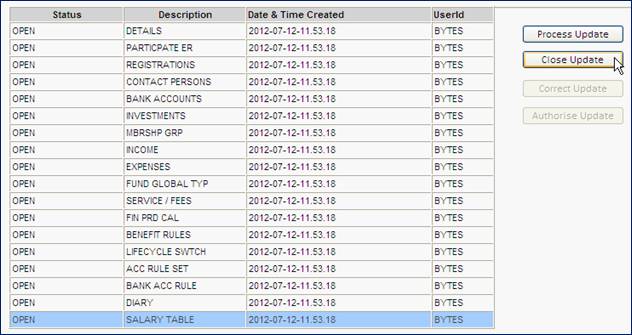
Highlight the DETAILS update type and click the CLOSE UDPATE button (these are the details that were setup earlier in this document), unless any changes are required.
In this section we link the Participating Employer to the Product.
Highlight the Participating Employer update type and click on the PROCESS UPDATE button.

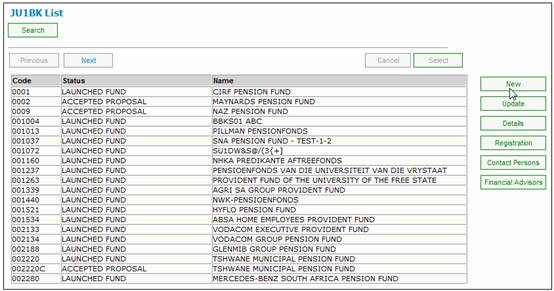
Click on the NEW button to link in a Participating Employer.
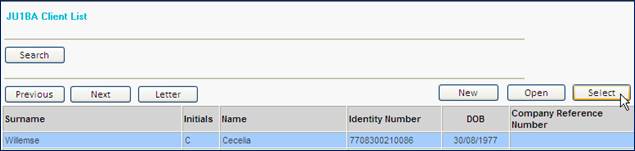
The list of Corporate Clients (Employers) will be displayed.
Highlight the Participating Employer and click on the SELECT button.
![]()
The Participating Employer is now linked to the product.
Now to link in the Pay Centres:
Highlight the row and click on the menu on the left: ASSOCIATE PAY CENTRES TO SCHEME.
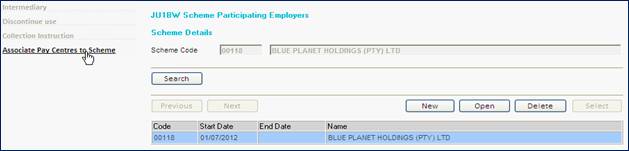
From the POTENTAL list on the left, insert the applicable pay centres.

Once the pay centres have been linked in, click on the CLOSE menu on the left of the screen.
![]()
And now click on the CLOSE button to return to the product update list.

Highlight the Participating Employer Update type and click on the CLOSE UPDATE button.
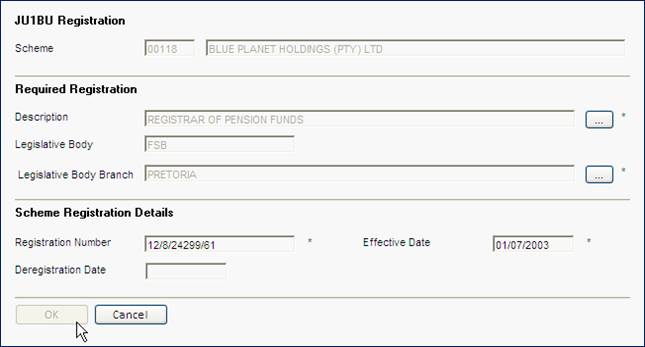
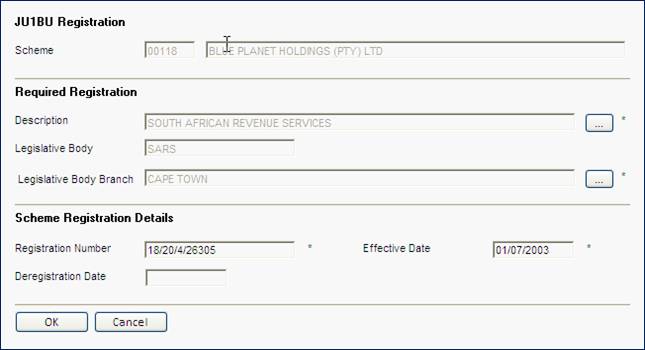
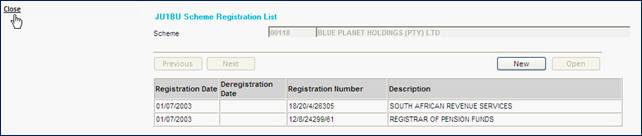
In this section we add in the FSB and SARS registration numbers.
Highlight the REGISTRATIONS update type, click on the PROCESS UPDATE button.
Click on the NEW button to add in a new registration.
Use the FLOW buttons to complete the following details.
|
Description |
FSB or SARS |
|
Legislative Branch |
The branch office used |
|
Registration Number |
Insert the applicable number |
|
Effective Date |
The date the product was registered at these bodies |
In this section we add in the Principal Officer and Trustees.
Highlight the CONTACT PERSONS update type and click on the PROCESS UPDATE button.

Click on the NEW button to add a Contact Person.

In all likelihood the P/O or Trustees may already exist.
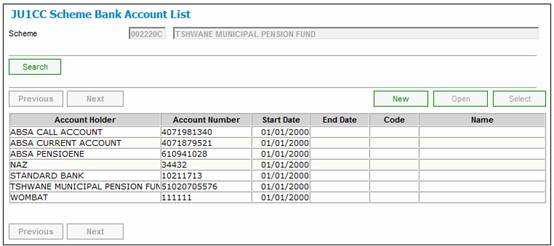
Click on the LIST button to flow to a list of Persons.
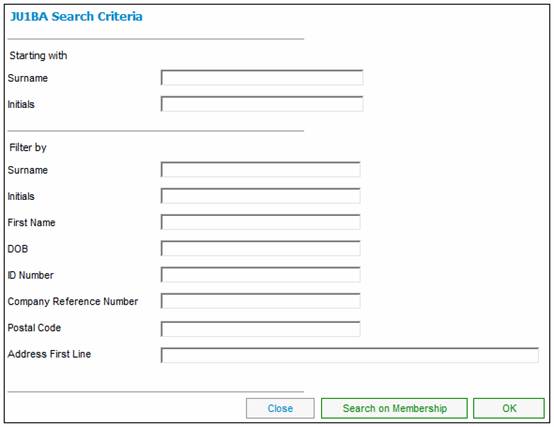
![]()
A search criteria window will be displayed, use the parameters to search for the person.
Once you have located the Contact Person, highlight the row and click SELECT.
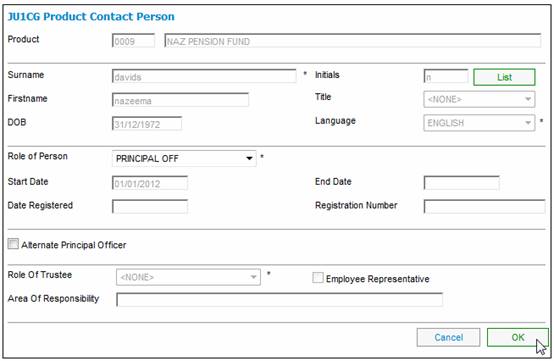
If you are adding a PRINCIPAL OFFICER, from the drop-down (ROLE OF PERSON) select PRINICPAL OFF.
Click the OK button to Save.
Repeat these steps to add a TRUSTEE.
Click on the NEW button.
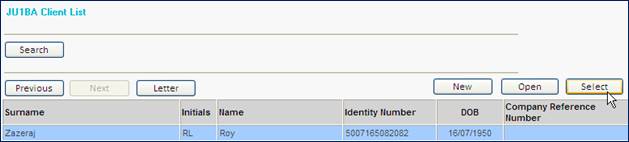
Click on the LIST button to flow to a list of Persons.
![]()
A search criteria window will be displayed, use the parameters to search for the person.
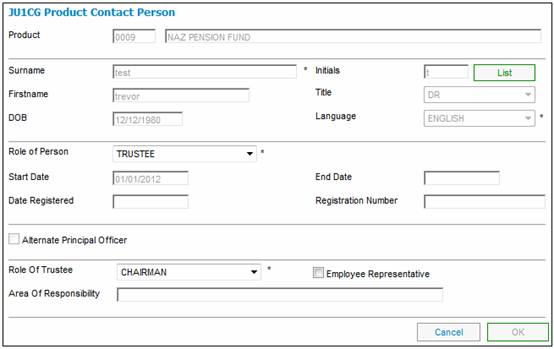
When adding TRUSTEE, not an additional section needs to be completed:
ROLE OF TRUSTEE
AREA OF RESPONSIBILITY

Once all the Contact Persons have been added, click on the CLOSE menu on the left.
Click on the CLOSE UPDATE button on the CONTACT PERSONS update type.
In this section we link the bank accounts of the:
Administrator
Underwriter
Asset Manager
Main Umbrella
Call Account
Intermediary
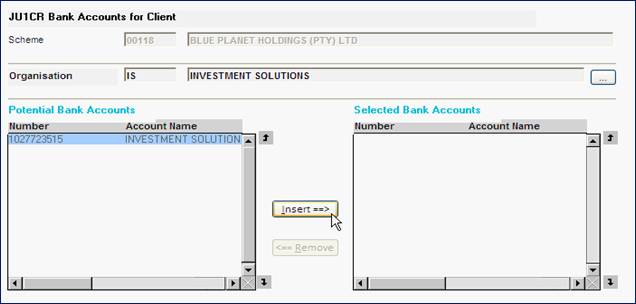
Highlight the BANK ACCOUNTS update type and click on the PROCESS UPDATE button.
Since many of the bank accounts may already be setup.
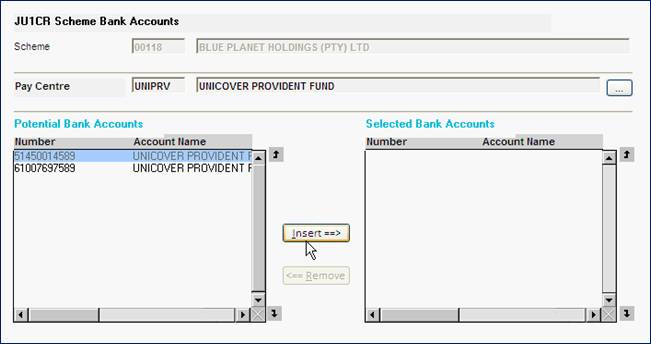
Click on the SELECT ADMINISTRATOR menu on the left.
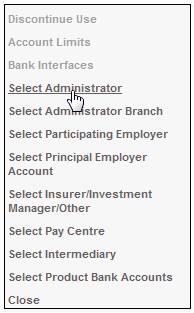
The administrator linked to the product will be displayed.
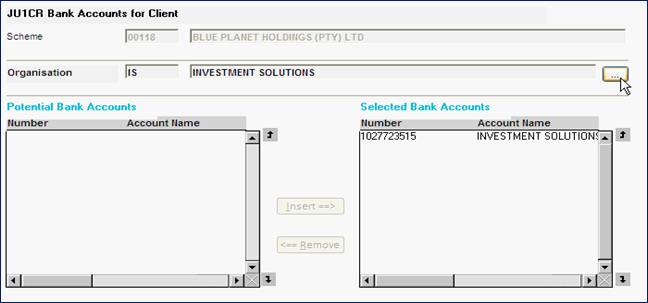
From the POTENTIAL list, insert the bank account.

Use the CLOSE menu to return to the previous screen.
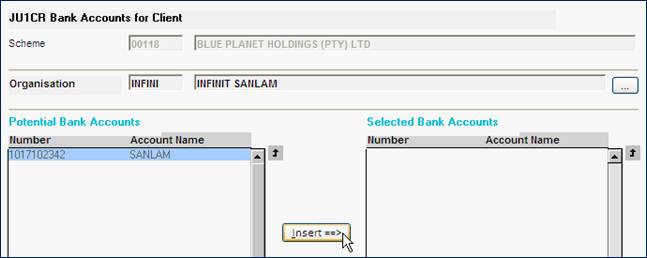
Click on the SELECT INSURER / INVESTMENT MANAGER / OTHER menu on the left.
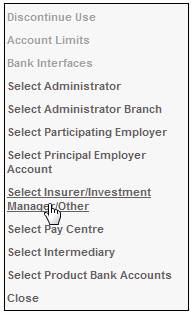
Use the FLOW button to find the Asset Manager. Click on the SELECT BUTTON.

From the POTENTIAL list, insert the bank account.
Use the FLOW button to locate the Underwriter and click on the SELECT button.
From the POTENTIAL list, insert the bank account.
Use the close/cancel menus to return to the previous screen.
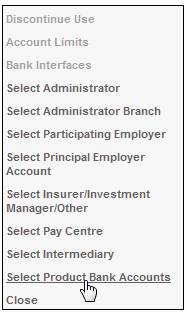
From the menu on the left, click on the SELECT PRODUCT BANK ACCOUNTS menu.
Use the FLOW button to select the Main Umbrella product.
Insert the Product bank account and Call Account.
Use the close/cancel menus to return to the previous screen.
From the menu on the left, click on the SELECT INTERMEDIARY menu.
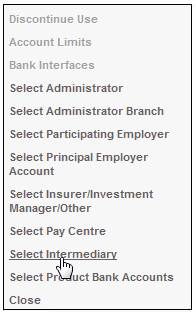
Use the FLOW button to select the Intermediary.
Insert the bank account.

Use the close/cancel menus to return to the previous screen.
All the bank accounts should be displayed.
In this section we link the Portfolios to the Product.
Highlight the INVESTMENTS update type and click on the PROCESS UPDATE button.

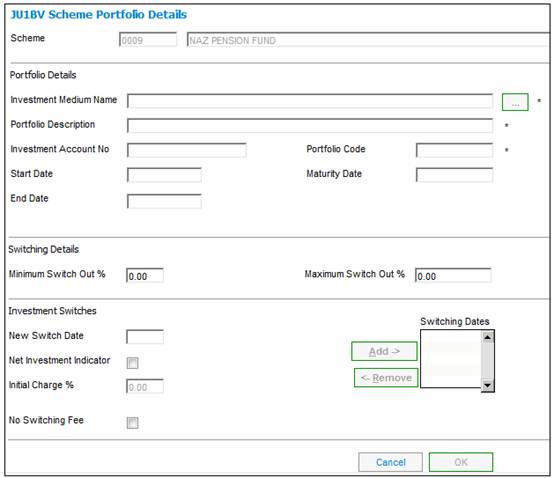
Click on the NEW button to add a Portfolio.
Complete the following fields:
|
Investment Medium Name |
Use the flow button to select the Investment Medium applicable to this product |
|
Portfolio Description |
A description of the portfolio (as indicated by the Asset Manager) |
|
Investment Account No |
The account number the Asset Manager has for the Product |
|
Portfolio Code |
An appropriate code |
|
Maximum Switch Out % |
100% |
There are two Mandatory Membership Groups:
BENEFITS
CONTRIBUTIONS
The Investment Category Membership Group is optional and dependant of the Investment Strategy employed by the product.
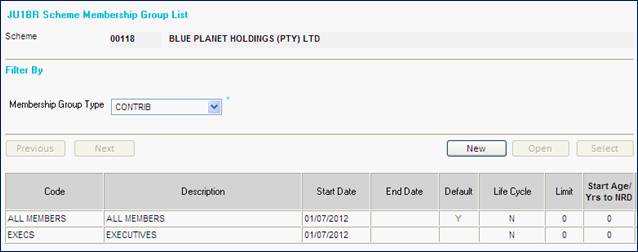
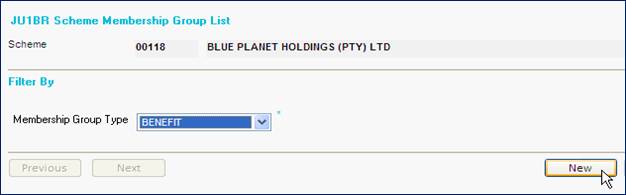
Highlight the MEMBERSHIP GROUP update type and click on the PROCESS UPDATE button.
[A] BENEFIT CATEGORIES
When adding a BENEFIT category, the following questions apply (this will help determine the number of benefit categories):
Who pays?
Are the rates the same?
Example:
|
|
NORMAL STAFF |
NO RISK |
PHI MEMBERS |
|
Fees |
X |
X |
X |
|
GLA Premium |
X |
|
X |
|
PHI Premium |
X |
|
|
|
GLA – Death Benefit |
X |
|
X |
|
DISABILITY |
X |
|
|
|
PHI |
X |
|
|
|
FUNERAL |
X |
|
X |
From the Membership Group Type, select BENEFT.
Click on the NEW button to add a Benefit Category.
Complete the following fields:
|
CODE |
A short code to identify the group of members |
|
DESCRIPTION |
A description |
|
DEFAULT |
At least 1 BENEFIT category needs to be the default |
|
MINIMUM YEARS PRIOR TO NRD |
The least numbers of years before retirement that a member can join the product |
|
MINIMUM AGE |
The minimum age a member can join a product |
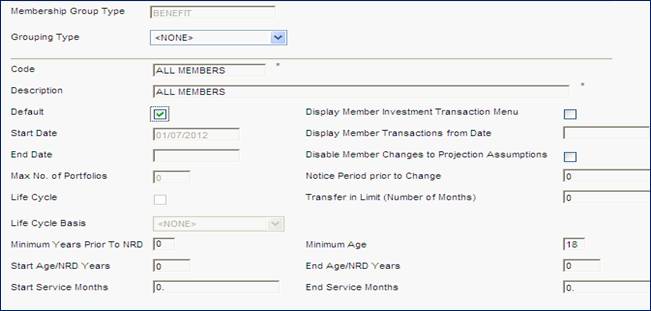
Click on the OK button to Save.
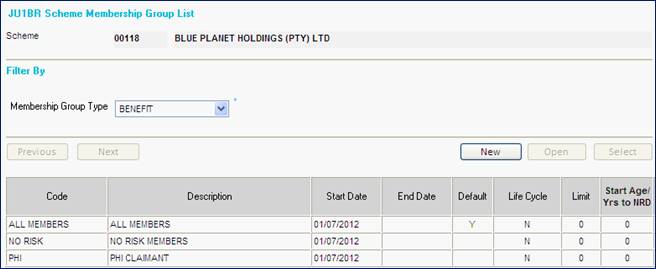
Repeat these steps to add additional benefit categories.
[B] CONTRIBUTION CATEGORIES
This applies to Employee and Employer Contributions, typically.
When adding a CONTRIBUTION category, the following questions apply (this will help determine the number of categories):
Do all members contribute at the same rate?
Are there members who do not contribute?
Example:
|
|
STANDARD RATE |
EXECUTIVE RATE |
|
Employee Contributions |
|
|
|
AVC’s |
X |
X |
|
Employer Contributions |
15% |
20% |
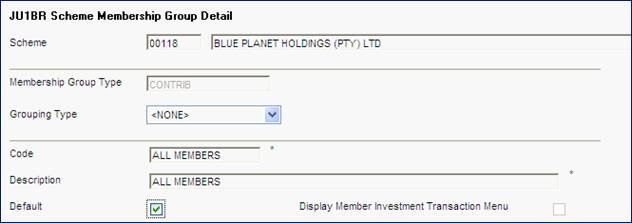
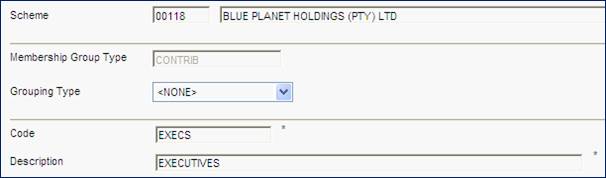
Select CONTRIB from the Membership Group Type.
Click on the NEW button to add a contribution category.
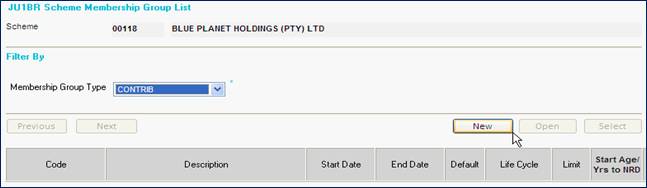
Complete the following fields:
|
CODE |
A short code to identify the group of members |
|
DESCRIPTION |
A description |
|
DEFAULT |
At least 1 CONTRIBUTION category needs to be the default |