Letters are divided into smaller elements so that they can be reused. These elements can be a paragraph, a sentence, a word, an image, a <TAG> or <bookmark>, a table or a signature.
By defining a letter into smaller objects, the system provides the facility for the user to manage both the quality and quantity of the letters. Changes can be made to these elements and once authorised, these elements will immediately be available in new letters that are produced. This makes these letters dynamic and provides for real-time letter changes.
This can be further refined by using the following features:
- Positioning of images in a document
- Positioning of tables in a document
- Positioning of paragraphs of text in a document
- Linking of database fields to pre-defined tags
- Insertion of tags into paragraphs of text
- Insertion of tags into tables
- Re-use of text, tables, annexures and images across multiple templates
- Definition of headers and footers that are repeatable over multiple pages
- Definition of page, size, orientation and margins
- Definition of orientation of tables
- Selection of fonts
- Selection of colours for element cells
- Assignment of templates to specific schemes
Within the definition of each of the elements is the facility to link in system generated data about the member.
Example
The settings provided on this screen could produce the result as shown on the screen that follows it.
Click ![]() alongside Document Templates on the sub-menu on the left. Additional options will be displayed.
alongside Document Templates on the sub-menu on the left. Additional options will be displayed.
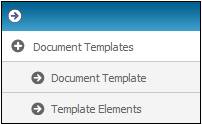
Select Template Elements below Document Templates. The JU1FL Template Element List screen will be displayed.
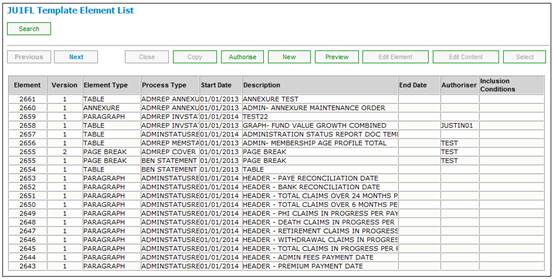
This screen displays a list of all existing elements.
In order to view the data in its end state, highlight an element and click PREVIEW. The system will display the text that has been captured, the image that has been selected and a table in text form.
Note:
The preview facility allows the created or edited data to be viewed before it is authorized.
In order to find a specific element or all elements of a specific type, click SEARCH. The JU1FL PDF Template Element Search screen will be displayed.
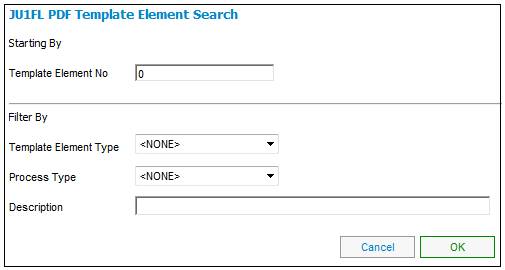
Capture data to be used for the search as follows:
|
Template Element No |
Enter the specific Template Element Number if known. |
|
Template Element Type |
Select a value from the drop-down list e.g. Annexure, Image, Paragraph, Table. |
|
Process Type |
Select a value from the drop-down list, e.g. Annuities, Benefits, Eligibility, Member, Product Allocation or Trust Payment etc. |
|
Description |
A text description of the Template Element. |
Once all details have been captured, click SUBMIT. The JU1FL Template Element List screen will display a list of those templates that fit the search criteria provided.
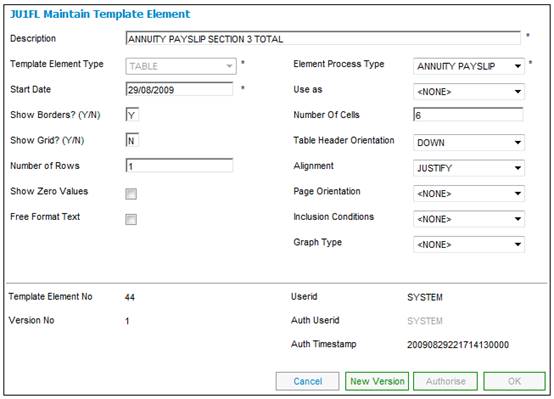
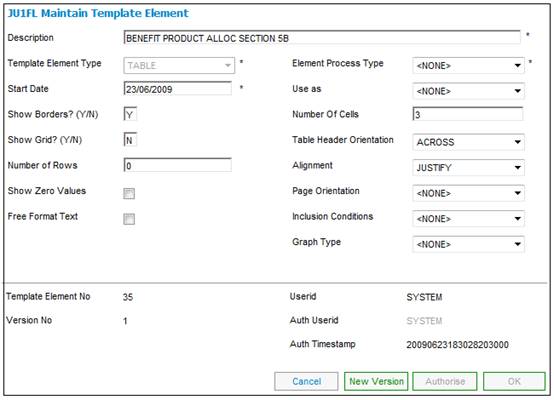
To create a new template element click NEW. The JU1FL Maintain Template Element screen will be displayed.

Capture data as follows:
|
Description |
Enter freeform text describing the element.
The completion of this field is mandatory. |
||||||||||
|
Template Element Type |
Select a value from the drop-down list, e.g. Annexure, Image, Paragraph, Table, etc.
The completion of this field is mandatory. |
||||||||||
|
Element Process Type |
Select a value from the drop-down list, e.g. Generic, Financial, Member, Benefits, etc.
The completion of this field is mandatory. |
||||||||||
|
Start Date |
The date from which this element is in effect.
The completion of this field is mandatory. |
||||||||||
|
Use as |
Select a value from the drop-down list, e.g. Footer, Header, etc. |
||||||||||
|
Show Borders? |
Capture Yes (Y) or No (N) to indicate whether or not borders must be displayed. |
||||||||||
|
Number Of Cells |
Capture the number of columns that must be displayed in a table |
||||||||||
|
Show Grid? |
Capture Yes (Y) or No (N) to indicate whether or not the grid lines of a table must be displayed. |
||||||||||
|
Table Header Orientation |
This field will only be enabled if TABLE has been selected for the TEMPLATE ELEMENT TYPE field. Select a value from the drop-down list e.g. Across, Down, etc. |
||||||||||
|
Number of Rows |
Capture the number of rows that must be displayed in a table |
||||||||||
|
Alignment |
The alignment of the element in the document. Select a value from the drop-down list, e.g. Justify, Left, Middle, Right, etc. |
||||||||||
|
Show Zero Values |
Click on the tick-box to indicate whether zero values must be displayed. |
||||||||||
|
Page Orientation |
Select a value from the drop-down list, i.e. Landscape, Portrait. |
||||||||||
|
Free Format Text |
Click on the tick-box to indicate whether the user will be able to add free format text in the process. Note: This will only apply to the paragraph element type for a member.
Refer to Free Format Text below. |
||||||||||
|
Inclusion Conditions |
Select one of the following values from the drop-down list:
Refer to the Inclusion / Exclusion Criteria section in this document.
|
||||||||||
|
Graph Type |
Select a value from the drop-down list. The following values are available for selection: BAR CHART BUBBLE CHART HYBRID LINE CHART PIE CHART STACKED BAR |
Click SUBMIT. The JU1FL Template Element List screen will be displayed with the new element defined.
Once a new element or a new version of an existing element has been created, the element must be authorized.
From the JU1FL Template Element List screen, highlight an element that has not yet been authorized, then click EDIT ELEMENT. The JU1FL Maintain Template Element screen will be displayed.
Different screens will be displayed depending on the element type for which they have been defined. The following examples show screens displayed per element type:
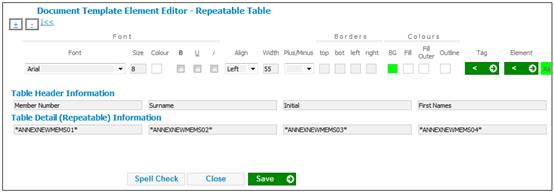
Example of table element type
Example 1 (Table Header Orientation Down)
Example 2 (Table Header Orientation Across)
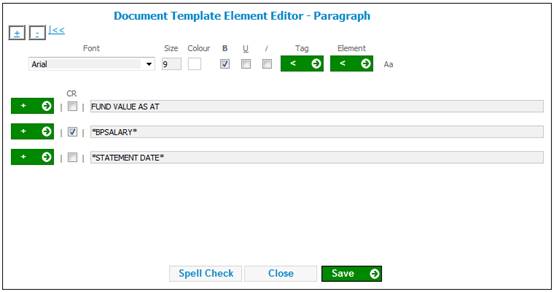
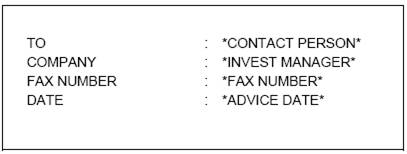
Example of paragraph element type
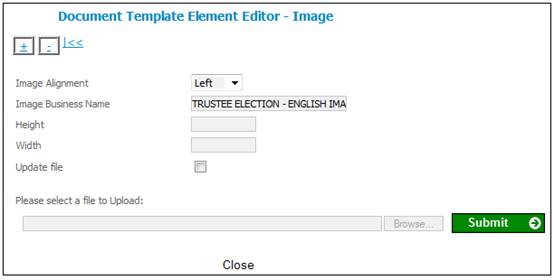
Example of image element type
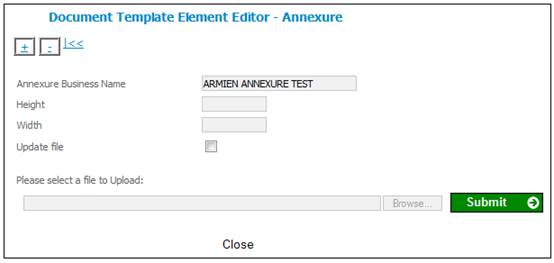
Example of annexure element type
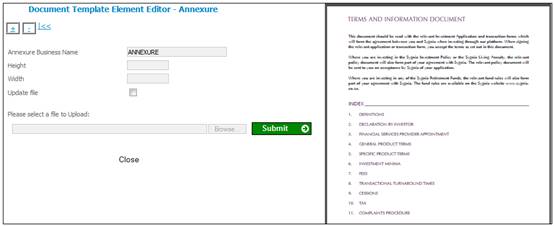
In each case, a preview of the Table, Paragraph, Image or Annexure will be displayed in PDF format on the right-hand side of the screen.
Note:
The size of the PDF preview screen can be adjusted using the functions displayed in the top left-hand corner of the screen.
|
PDF Size
|
Click
Click
Click
Click |
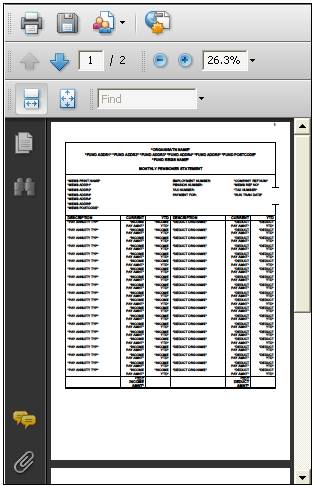
Example of table element type PDF preview
Example of paragraph element type PDF preview
Example of image element type PDF preview

Example of annexure element type PDF preview
Regardless of whether the template element is authorized or not, certain template element fields may not be modified. This is dependant on the template element type applicable.
Note:
The table below shows the fields that may not be modified. A tick (ü) indicates that the field cannot be modified for the template element type in which it appears.
|
|
Template Element Type |
||||
|
TEMPLATE ELEMENT TYPE |
IMAGE |
PARAGRAPH |
TABLE |
ANNEXURE |
|
|
Number Of Cells |
ü |
ü |
|
ü |
|
|
Show Grid? |
ü |
ü |
|
ü |
|
|
Table Header Orientation |
ü |
ü |
|
ü |
|
|
Number of Rows |
ü |
ü |
|
ü |
|
Note:
The number for the Template No field will be allocated by the system.
To modify an authorized template element, make the necessary field changes and click NEW VERSION. The JU1FL Template Element List screen will be displayed. The selected element will be displayed as an unauthorized element. A new number will be displayed in the Version column.
To modify an unauthorized template element, make the necessary field changes, then click OK. The JU1FL Template Element List screen will be displayed with the modified element defined as an unauthorized element. A new number will be displayed in the version column.
Refer to Free Form Text below
Refer to Member Communication under
Members
Members
Supplements
Processes
Setting up Template Elements for Benefit Statements
Once a new element or a new version of an existing element has been created, the element must be authorized.
From the JU1FL Template Element List screen, highlight an element that has not yet been authorized, then click EDIT ELEMENT. The JU1FL Maintain Template Element screen will be displayed.
Click AUTHORISE. The JU1FI Template List screen will be displayed with the user ID of the authorizer in the Authoriser column.
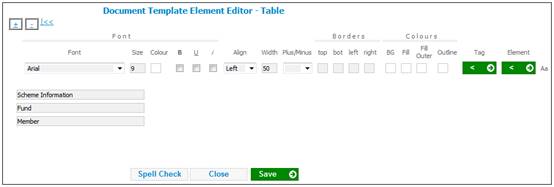
In order to edit the content defined for an element, select an unauthorized element on the JU1FL Template Element List screen and click EDIT CONTENT. Different screens will be displayed depending on the element type for which they have been defined. The following examples show screens displayed per element type:
Example of table element type
Example 1

Example 2
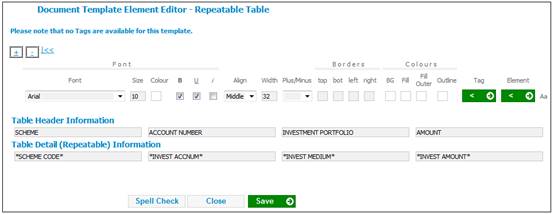
Tables and Paragraphs
Capture selections and settings as follows:
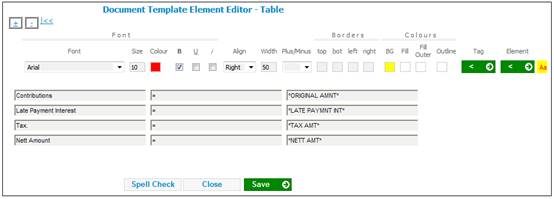
FONT
|
Font |
Select a text font from the drop-down list, e.g. Arial, Courier, Times-Roman, etc.. |
|
Size |
Enter the size of the text to be displayed. |
|
Colour |
Click on the Colour box to define the colour of the text. The Colour pallet will be displayed.
Select a colour from the pallet. |
|
B (Bold) U (Underline) i (Italics) |
Tick any or all of the Bold, Underline and Italic boxes to set the font as bold, underlined or italic. |
ALIGN, WIDTH, PLUS / MINUS (Only applies to Tables)
|
Align |
Select a value from the drop-down list. Values may be left, middle or right. |
||||||||||||
|
Width |
Enter the width of the text to be displayed. |
||||||||||||
|
Plus/Minus |
Select Plus or Less from the drop-down list.
The Plus/Minus selection will only be displayed when the Table Header Orientation field on the JU1FL Maintain Template Element screen has a value of DOWN.
This field must be applied to each tag defined in order to indicate whether the amount that each tag represents in a table must be added or subtracted. These amounts are then summed in the table and a total is produced.
|
BORDERS (Only applies to Tables)
|
Borders
(Top Bottom Left Right) |
These fields define the display of borders around paragraphs or tables.
Capture the width required for the border being defined in each of the following fields: - Top - Bottom - Left - Right These fields will only be displayed if the SHOW BORDER field on the JU1FL Maintain Template Element screen was ticked. |
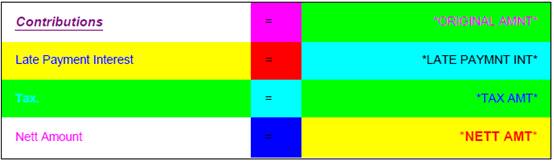
COLOURS (Only applies to Tables)
|
Colours |
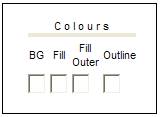
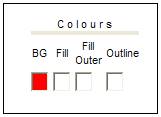
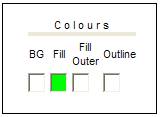
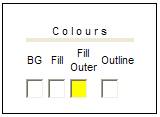
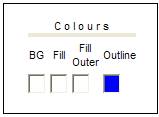
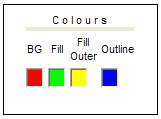
Click on each box to display the Colour Pallet and select a colour for the cell that contains the element. The following selections can be made: - BG (Background) - Fill - Fill Outer - Outline
Refer to the element cell samples in Colour below. |
Colours
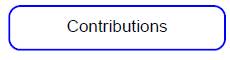
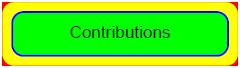
The following table illustrates the effect of the various selections under the Colour section on the element cell:
|
COLOURS SELECTIONS |
ELEMENT PREVIEW |
|
|
|
|
|
|
|
|
|
|
|
|
|
|
|
|
|
|
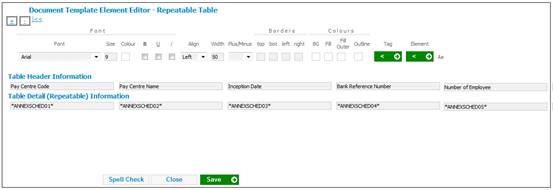
TAGS and ELEMENTS
|
Tag |
A tag is a bookmark, and is used when a paragraph is defined. It is used to specify where application variables need to be embedded into paragraph text.
The Tag must be captured on a separate line and whether it appears on its own or within a line of text will depend on whether a carriage return is selected for the previous line and for the tag line.
Click
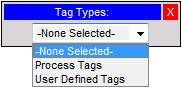
Note: Process Tags are defined by Developers on the system and cannot be changed by the User. User Defined Tags can be defined and maintained by the User.
Click Process Tags or User Defined Tags to display and select a value from the drop-down list.
Click
Refer to Example of Tag / Carriage Return below.
UK Schemes The order in which the tags are selected on the Document Template Element Editor – Table screen is the order in which they will appear in the extract.
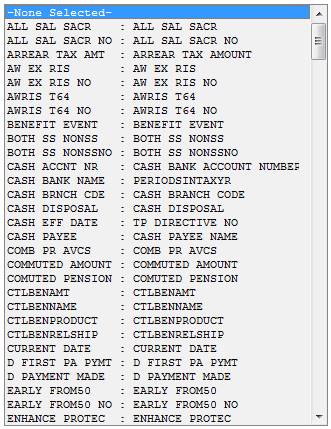
When the Tag List option is selected, the system will display all of the Tags associated to the Process Type of BEN STATEMENT and will display the Text Description together with the Text Value.
For the purposes of the UK benefit statement, set up a Template Element with a Template Element Type of TABLE, a Process Type of BEN STATEMENT, Number of Cells equal to 2.and a Table Header Orientation of ACROSS. The name of the column in the extract must be captured in the first column and the applicable Tag selected in the second column.
For more information on benefit statements for UK schemes, refer to Special note for UK schemes in Benefit Statement Formats under Product Launch Requirements Additional Menu Options Income
For a list of Tags used for Benefit Statements, refer to Supplements Tags Benefit Statements |
|
Element |
Click
Click
|
|
CR (Carriage Return) |
Tick the box to indicate whether or not the text must start on a new line.
Note: Only displayed for a Paragraph.
Refer to Example of Tag / Carriage Return below. |
TEXT AND SPELL CHECK
|
Text |
Capture the text that must be displayed for the line selected. |
|
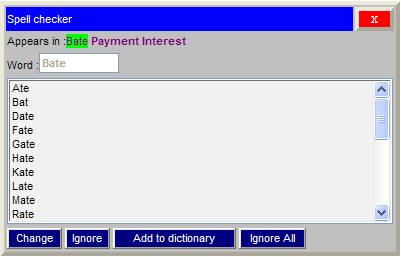
Spell Check |
Click SPELL CHECK to check the spelling of text that appears in the text cells.
The Spell checker screen will be displayed.
Select the correct word from the list and click CHANGE.
Click |
Images
Capture selections and data as follows:
|
Image Alignment |
Click on the drop-down to select the position of the image.
|
|
Image Business Name |
Capture the business name of the image. |
|
Upload File |
Tick the box in order to enable the upload of a new image |
|
Upload / Submit |
Click SUBMIT to capture the image settings.
If the UPLOAD FILE box has been ticked, then BROWSE will be enabled. Click BROWSE to select a new file to upload, and click SUBMIT. |
For additional information, refer to
Supplements
Processes
Setting up Template Elements for Benefit Statements
Annexures
The Document Template Element Editor – Annexure screen is displayed.
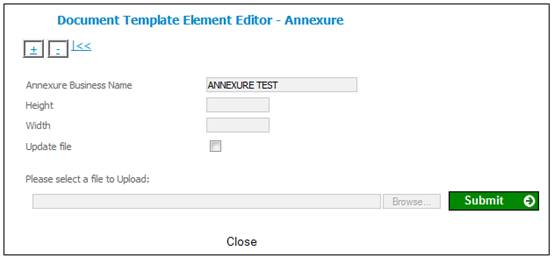
Capture selections and data as follows:
|
Annexure Business Name |
Capture the business name of the annexure. |
|
Please select a file to Upload: |
Capture the address of the image or click BROWSE and select from the list displayed.
Note: The file to be uploaded as an annexure must be a PDF file.
The sequencing of the annexures will be determined by the order number on the Template / Element Association.
Click SUBMIT to capture the annexure business name. |
Click PREVIEW to view the data captured, in its end state. The paragraph element content is displayed.
Example 3
Example 4

Example 5

Example 6

Once all necessary data has been captured, click SAVE. A message on the PDF Table Editor screen will confirm that the page has been saved successfully.
Click CLOSE to return to the JU1FL Template Element List screen.
Example of paragraph element type
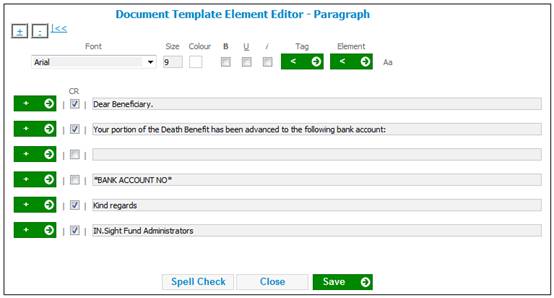
Refer to Edit content above for details on how to use this screen.
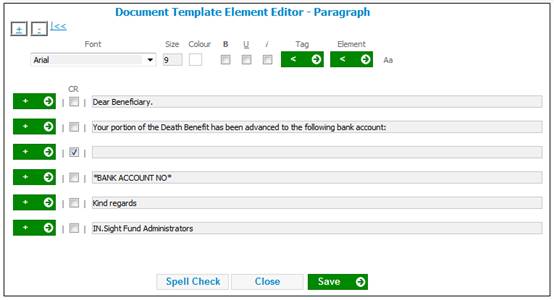
Example of Tag / Carriage Return
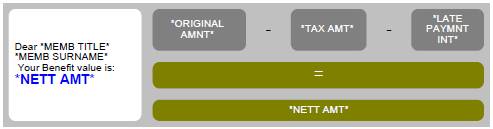
If the line of text in the template is
Dear <<MemTitle>> <<MemSurname>>
when the report is generated, it would appear as

In order to correctly define this, the tag must be captured on a separate line and whether is appears on its own or within a line of text will depend on whether a carriage return is selected for the previous line and for the tag line.
In the example below, the text all appears in one line as no carriage returns have been selected.
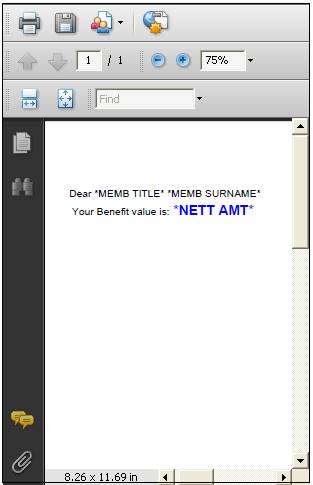
Click PREVIEW to view the data captured, in its end state. The paragraph element content is displayed.
Once all necessary data has been captured, click SAVE. A message on the Document Template Element Editor – Paragraph screen will confirm that the page has been saved successfully.
Click CLOSE to return to the JU1FL Template Element List screen.
Example of image element type
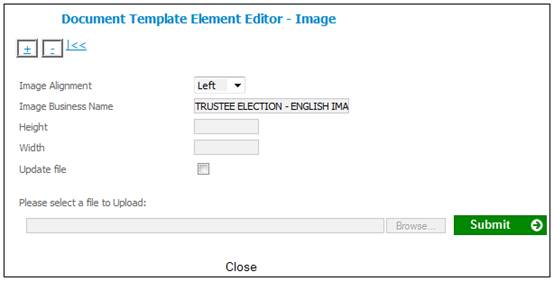
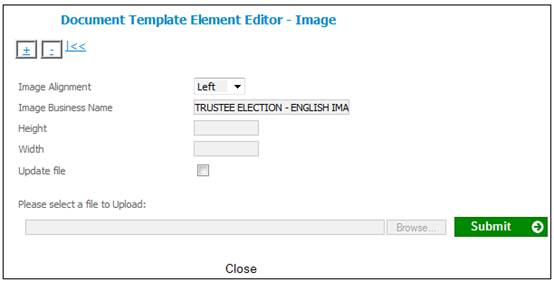
Capture data as follows:
|
Image Alignment |
Select a value from the drop-down list to define the positioning of the image, i.e. Left, Middle, Right. |
|
Image Business Name |
Capture text as a name for the image. |
|
Update file |
If the file to be uploaded must be selected using the browse button, place a tick in the UPDATE FILE box. |
|
Please select a file to Upload: |
Capture the address of the image or click BROWSE and select from the list displayed. The browse button will only be enabled if the UPDATE FILE box is ticked.
Click SUBMIT. |
Click PREVIEW to view the data captured, in its end state. The image element content is displayed.

Once all necessary data has been captured, click SUBMIT. A message on the Document Template Element Editor - Image screen will confirm that the page has been saved successfully.
If an attempt is made to load an image file with an extension that is not one of the following, an error messages will be displayed.
- .bmp
- .gif
- .jpg
- .png
- .tiff
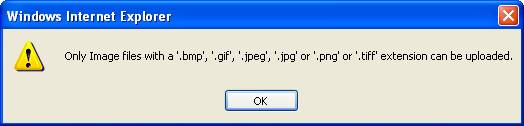
Click OK to remove the message, then load an image file with the correct extension.
Click CLOSE to return to the JU1FL Template Element List screen.
This facility allows the definition of specific criteria to be used to determine whether Template Elements must be included in a document for members.
To define inclusion criteria, select Inclusion/Exclusion Criteria from the sub-menu on the left.
![]()
Note:
This sub-menu selection will only be enabled when the Inclusion Conditions field on the JU1FL Maintain Template Element screen has one of the following values for the Template Element selected:
CRITERIA
EXCL CRITERIA
VALUE INCL
VALUE EXCL
Definitions:
|
Inclusion Conditions Value |
Description |
|
CRITERIA |
If the criteria are met, the system will include the Template Element in the document for all members. |
|
EXCL CRITERIA |
If the exclusion criteria are met, the system will include the Template Element in the document only for those members who do not meet the exclusion criteria. |
|
VALUE INCL |
If the inclusion criteria are met, the system will return a Y in the paragraph in which it applies.
If the inclusion criteria are not met, the system will return an N in the paragraph in which it applies. |
|
VALUE EXCL |
If the exclusion criteria are met, the system will return a Y in the paragraph in which it applies.
If the exclusion criteria are not met, the system will return an N in the paragraph in which it applies. |
The JAJV Template Element Inclusion List screen will be displayed.
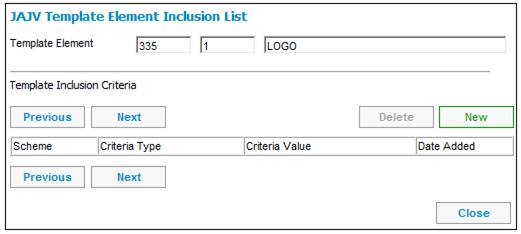
To add a new inclusion criterion, from the JAJV Template Element Inclusion List screen, click NEW. The JAJV Template Element Inclusion Criteria screen will be displayed.
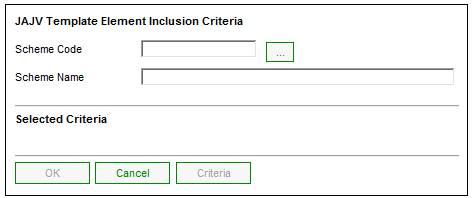
Select a Scheme Code by clicking LIST. The system will flow to the JU1BP Scheme List screen to select a Scheme from the list.
Once a Scheme has been selected, the CRITERIA button will be enabled. Click CRITERIA. The JAJV Template Element Inclusion Criteria screen will be displayed.
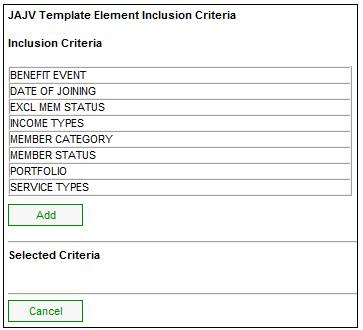
To select a criterion, click on one of the inclusion criteria listed and click ADD.
Depending on the criterion selected, the system will flow to the following screens for selections to be made:
|
INCLUSION CRITERIA |
FLOWS TO |
|
Date of Joining |
The JAJV Batch Date Selection screen to capture a From Date and (optionally) a To Date. |
|
Income Types |
The JU1BX Scheme Income Type List screen to select an Income Type. |
|
Member Category |
The JU1BR Scheme Membership Group List screen to select a Membership Group from the list. |
|
Member Status |
The JALS Permitted Value List screen to select a Member Status from the list. |
|
Portfolio |
The JU1BV Scheme Portfolio List screen to select a Portfolio from the list. |
|
Service Types |
The JAJV Classification Selection screen to select a Service Type from the list. |
Example:
If a paragraph must only appear in a Benefit Statement if the member is deferred, then Member Status must be selected as a criteria, and the Status of “Deferred” must be selected from the list of Member Statuses displayed.
Once each selection has been made, the JAJV Template Element Inclusion Criteria screen will be displayed with the selected criteria listed under the Selected Criteria portion of the screen.
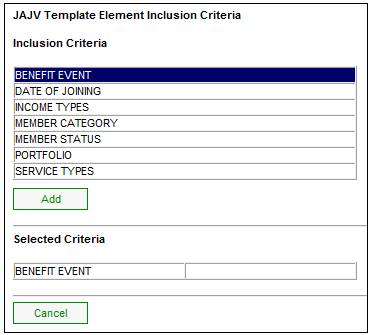
Continue adding additional criteria using the same procedure. When all required criteria have been selected, click CANCEL.