This section explains the processing of the debit order run for the collection of retirement annuity fund contributions.
A batch job (JU3CM_INDDO) is scheduled to run every day to find the retirement annuity fund members for which a contribution is to be collected via debit order on a pre-defined number of days in the future.
A global parameter with a Parameter Type of D/O RUN DAYS is used to define the number of days prior to the members’ payment day that the debit order run must process the debit orders.
When the batch job runs it finds all of the active retirement annuity members linked to a Pay Centre for which there is a Collection Instruction record with a Collection Method of INDIVIDUAL DO and with a payment day equal to the batch run date plus the number of days in the D/O RUN DAYS global parameter.
If there are members to process the Debit Order batch job (BJU3BM) is started which processes the debit orders.
Note:
When the Debit Order Collection batch job runs, it will exclude Policyholders with a Membership Status of PARTIAL MATURITY.
When it has completed it creates a workflow item called a Service Request to inform the authoriser that processing has taken place.
For more information refer to
My Work
Process SR
Debit Orders
If the Member’s Pay Day is equal to a date that is not valid for the current month, it will be set to the first valid day immediately prior to the Pay Day e.g. if Pay Day is 31 and the current month is June the Member’s Pay Day is set to 30.
Log in to the system from the Logon page.
Click my work.
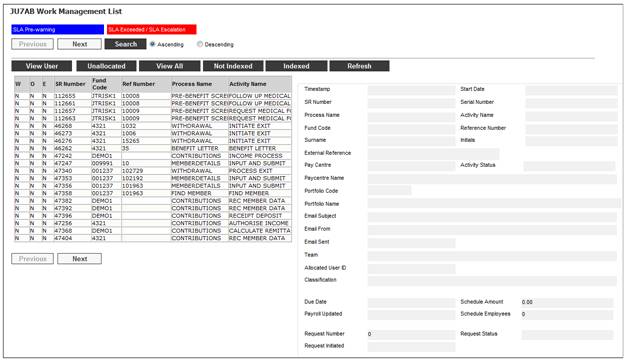
The JU7AB Work Management List screen will be displayed.
Click VIEW ALL or UNALLOCATED
The Service Request with a Process of DEBIT ORDERS and an Activity of AUTHORISE D/O will appear in the list.
Click on the Service Request and the details will be display on the right.

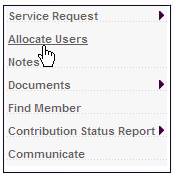
Click on the Allocate Users menu on the left.
The JU7AB Allocate Users screen will be displayed.
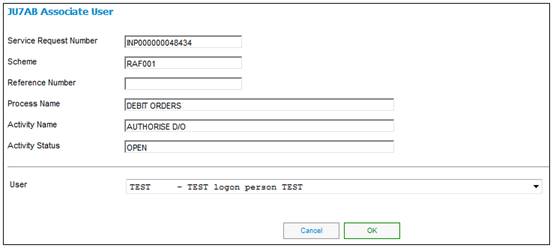
Click on the User drop down and select the user who will authorise the debit order run.
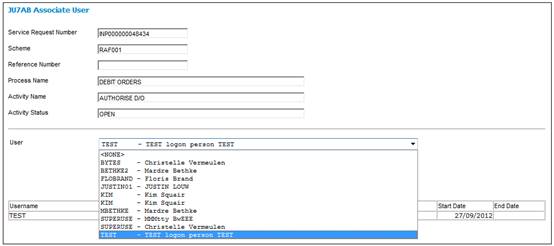
Click on the User and click OK.
Click on the Service Request menu on the left.
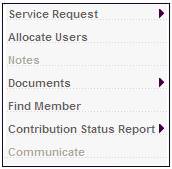
Click on the Process sub menu.
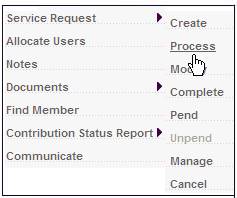
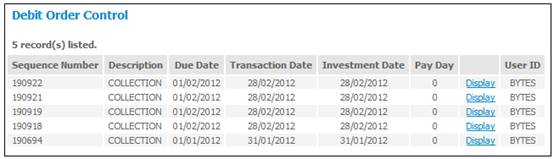
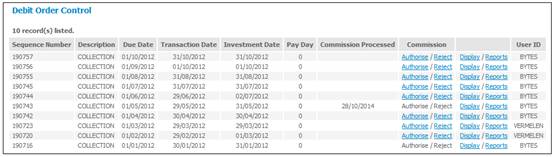
The Debit Order Control screen will be displayed.
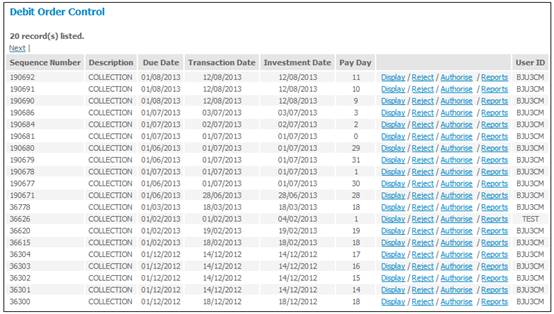
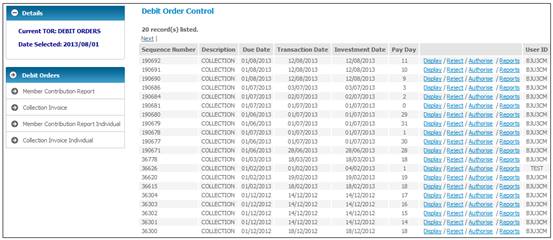
To view the details of the members that were processed in the run click Reports.
To view all of the transactions generated in the run click on the Member Contribution Report Individual menu on the left.
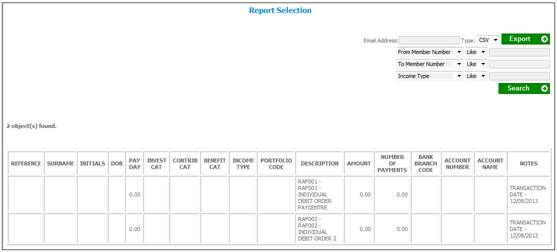
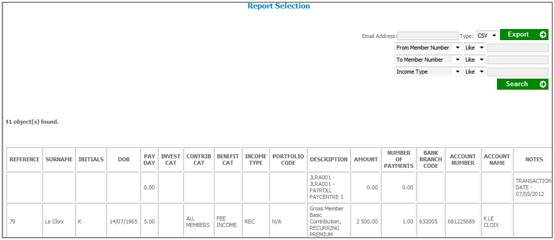
The Report Selection screen will be displayed.

Click on display in the Action column to view the report.
The following report is displayed.
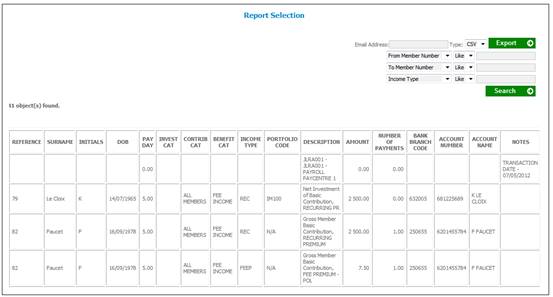
The following columns are displayed:
- Reference number
- Surname
- Initials
- Date of birth
- Pay Day
- Investment category
- Contribution category
- Benefit category
- Income type
- Portfolio code
- Description
- Amount
- Number of Payments
- Bank Account Branch Code
- Bank Account Number
- Bank Account Name
- Notes
A row is displayed for the gross amount of each Income Type (contribution) per member, fee amount to be deducted from the contribution, and the net amount to be invested.
Where the member’s net contribution amount is to be invested in more than one investment portfolio a row is displayed for each portfolio.
To extract the report type in your email address in the Email Address field at the top and click EXPORT.
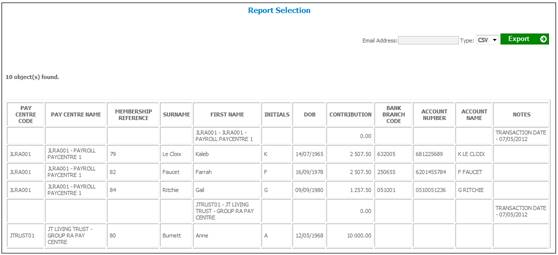
To view the EFT transactions that will be generated click the Collection Invoice Individual menu on the left.
The Report Selection screen is displayed.

Click on display in the Action column to view the report.
The following report will be displayed.
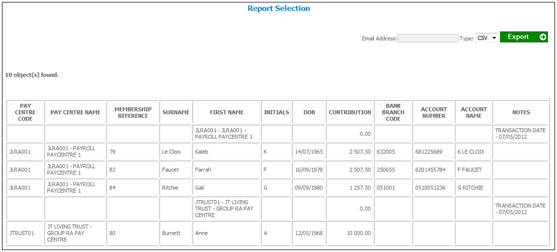
The following columns are displayed:
- Pay centre code
- Pay centre name
- Reference number
- Surname
- First name
- Initials
- Date of birth
- Contribution
- Bank Account Branch Code
- Bank Account Number
- Bank Account Name
- Notes
To extract the report type in your email address in the Email Address field at the top and click EXPORT.
To reject a record, click Reject alongside the relevant record. The Debit Order Control screen will be displayed, and the rejected record will be listed together with any other records that have been rejected. A message will be displayed advising that the request should be monitored in the error log (see Monitor batch run below).
To authorise a record, click Authorise alongside the relevant record. The Debit Order Control screen will be re-displayed. A message will be displayed advising that the request should be monitored in the error log. Once the record has been authorised, the transactions will be created, and the EFT file will be written to a location on the application server as specified in the batch parameter.
When Authorise is selected on the Debit Order Control screen and the Transaction Date is equal to the current date, the system will read the value for Description on the Global Parameter with a Parameter Type of EFT CUT-OFF. If the current time is greater than the value found the following message will be displayed:
It is after the cut-off time for EFT collections. The transaction date will be set to the next working day
When the OK button is selected on the message, the Batch Jobs SJU4DR and BJU3BU will be started, which will create the Business Transactions. If the Transaction Date for the run is current date and it is after the cut-off time the business transactions will be created with the Transaction Date and Effective Date equal to the next working day.
If the batch job completes without any errors the Date of Last Payment field on the member’s JU4DD Payment Detail Maintain record will be updated with the Transaction Date and the Status on the Service Request will be set to COMPLETED.
To check if the batch job completed successfully view the error log (see Monitor batch run below).
Click on Infrastructure on the main menu then click on System Management menu.
Click on System Logs.
Click the General Error Log sub-menu.
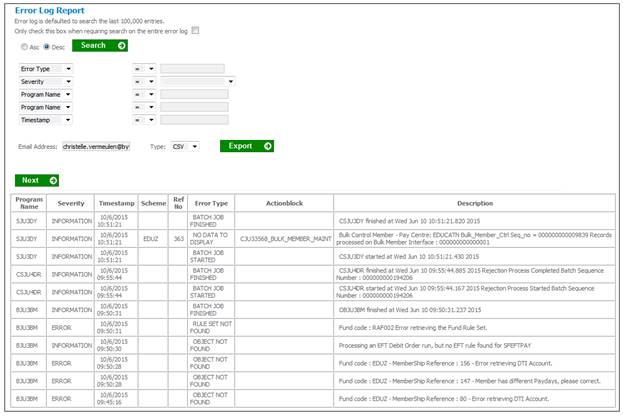
The Error Log Report menu will be displayed.
Type the batch name BJU3BU in the Program Name field and click SEARCH.

The following columns are displayed:
- Program Name
- Severity
- Timestamp
- Scheme
- Reference Number
- Error Type
- Action Block
- Description
The EFT file extract batch jobs run at defined times in the batch schedule depending on the cut-off time for the various EFT interfaces. The following batch jobs extract the EFT transactions and create the EFT files for the bank and the interface indicated:
Bank Interface Batch Job Number
Absa LDC BJU2AQ_LDC TCHJOB80
Metropolitan (internal) CPY BJU2AR_CPY BATCHJOB81
BureauFocus ACB BJU2AS_BF BATCHJOB82
Barclays BIB BJU2BA_BIB BATCHJOB100
Nedbank CPS BJU2BQ_NBKCPS BATCHJOB142
The EFT file report can be viewed under Accounting > Bank > EFT Report.
If, for any reason, it is necessary to manually schedule a debit order run click processes, then click debit orders.
The Scheme Selection screen will be displayed.
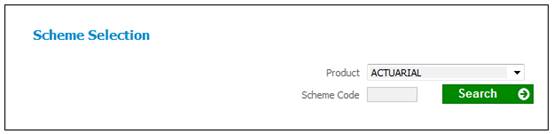
Select RETIREMENT ANNUITY from the Product field drop-down list and click SEARCH.
The schemes for the selected Product will be displayed for selection.
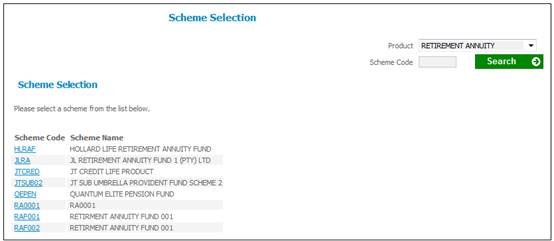
To find a specific scheme, insert the scheme code in the Scheme Code field.
The Debit Orders sub-menu will be displayed on the left.
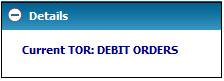
The current type of run (TOR) is indicated in brackets.
Transactional security
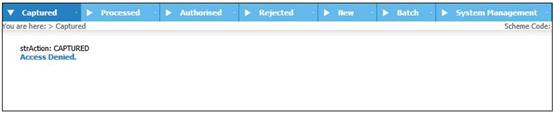
The following menu items are displayed on the menu on top for selection:

- Captured
- Processed
- Authorised
- Rejected
- New
- Batch
- System Management
Note:
Transactional security is applied when any of these menu options is selected. If the User is not authorised for the transaction, the following message will be displayed on the screen:
Access Denied.
To select a different scheme, click Scheme Selection above the main menu on the top.
Select New from the menu on the top. The Debit Order Control screen will be displayed.

A sub-menu will be displayed on the left.
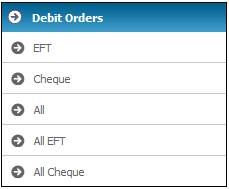
The available pay centres can be filtered based on the payment method, and the display of the pay centres can be sorted.
To filter the pay centres, select EFT,Cheque or All from the sub-menu on the left. Only pay centres with the selected payment method will be displayed.
Note:
The payment method is determined from the Collection Instruction Details screen. Refer to Add new instruction in Creating Collection Instructions under
Processes
Debit Orders
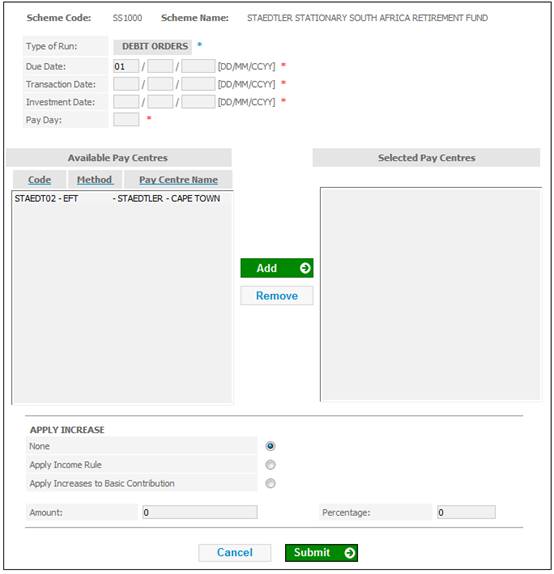
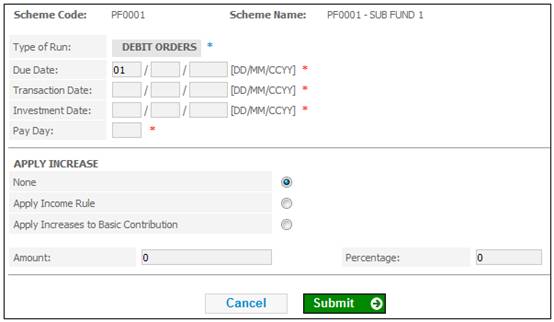
A screen will be displayed, allowing for the capture of data. This screen is used for the capturing of debit order information, and the creation of the debit order control record.
This screen will initiate batch runs that will
– calculate the amounts to be collected from the members
– produce a report of the amounts that will be collected
– process the investment advice, member contribution transactions, investment transactions, fee transactions
– create the EFT file
To filter the pay centres again, select EFT,Cheque or All from the sub-menu on the left. All pay centres with the selected payment method will be displayed.
To sort the display of the pay centres, click the hyperlinked Column Heading for Code, Method or Pay Centre Name.
Descriptions of the input fields appear below:
|
Due Date |
The due date of the contributions. Note: This date is mandatory. |
|
Transaction Date |
The date of collection of the contributions. |
|
Investment Date |
The date the contributions are to be invested. |
|
Pay Centres |
The pay centres to which the debit order applies. |
|
APPLY INCREASE |
|
|
None |
No increase is applicable. |
|
Apply Income Rule |
The increase will be based on the income rule. |
|
Apply Increases to Basic Contribution |
The increase will apply to the basic contributions only. |
|
Amount |
The monetary amount of the increase. (Either an increase amount or an increase percentage may be captured, but not both). Note: This field will be disabled if APPLY INCOME RULE is selected. |
|
Percentage |
The increase percentage. (Either an increase amount or an increase percentage may be captured, but not both).
Note: This field will be disabled if APPLY INCOME RULE is selected. |
To select a pay centre, highlight the required pay centre in the Available Pay Centres pane on the left and click ADD. The selected pay centre will be displayed in the Selected Pay Centres pane on the right.
To remove a selection, highlight the relevant pay centre in the Selected Pay Centres pane on the right and click REMOVE.
Note:
If no pay centres are specifically selected, all pay centres will be included by default.
Once all the necessary data has been completed, click SUBMIT.
If you have indicated that increases are to apply to contributions, and no amount or percentage is provided (or both, an amount and a percentage are provided), and error message will be displayed.
Please capture either an increase percentage of an increase amount.
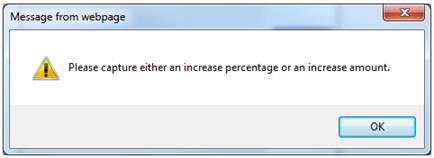
Click OK to remove the message and capture either an increase percentage of an increase amount.
ClickSUBMIT.
The Debit Order Control screen will be displayed.

If an unprocessed or unauthorized record already exists, an error message will be displayed:
Either an Unprocessed or Unauthorised control record already exists for this Scheme and Pay Centre: NDO - Batch Sequence Number: xxxxxx

NOTE: If a debit order batch run is scheduled via the Processes > Debit Orders menu the members that will be processed are those with a Payment Date equal to the Transaction Date captured i.e. it will not take into account the D/O RUN DAYS parameter.
If you wish to process all pay centres without first listing them, select All EFT or All Cheque from the sub-menu on the left. Pay centres with the selected payment method will be selected for processing, but will not be displayed.
The following screen will be displayed:
Continue as described above (refer to Method 1 – display pay centres).
New records that have been captured will remain available for viewing and rejecting until the batch run has been successfully completed.
To view records that have already been captured, from the menu on the top, select Captured. The Debit Order Control screen will be displayed.

To view the original input screen click Display alongside the required record.
To reject a record, click Reject alongside the relevant record. The Debit Order Control screen will be displayed, and the rejected record will be listed together with any other records that have been rejected. Refer to Rejected below.
You can view rejected records.
From the menu on the top, select Rejected. The Debit Order Control screen will be displayed.
To view the original input screen click Display alongside the required record.
A batch job for debit order processing must be initiated.
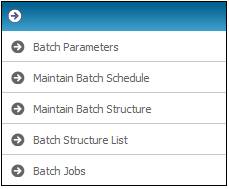
Select Batch from the menu on the top.
A sub-menu will be displayed on the left.
Note:
The Batch menu and these sub-menu items are also available for selection under Infrastructure > Batch
For more information on these menu items, refer to
Infrastructure
Batch
To submit a batch run job, select Batch Jobs from the sub-menu on the left.
The Batch Job Submission screen will be displayed.

To schedule the run, locate the JU3CM_INDDO batch job from the list:
![]()
Click Submit in the Action column.
Once JU3CM_INDDO has run, locate the JU3BM_UMBR batch job from the list:
![]()
Click Submit in the Action column.
You are able to monitor the progress of the batch.
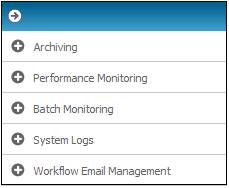
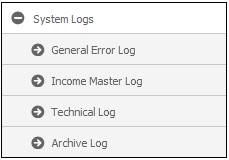
Click ![]() alongside System Logs on the sub-menu on the left. Additional options will be displayed.
alongside System Logs on the sub-menu on the left. Additional options will be displayed.
Select General Error Log from the menu at the top. The Error Log Report menu will be displayed on the left.
The following columns are displayed:
- Program Name
- Severity
- Timestamp
- Scheme
- Reference Number
- Error Type
- Action Block
- Description
Once the batch job has finished, return to the debit orders section on the web.
From the menu on the top, select Processed. The Debit Order Control screen will be displayed.

To view the original input screen click Display alongside the required record.
To reject a record, click Reject alongside the relevant record. The Debit Order Control screen will be displayed, and the rejected record will be listed together with any other records that have been rejected. Refer to Rejected above. A message will be displayed advising that the request should be monitored in the error log.
To authorise a record, click Authorise alongside the relevant record. The Debit Order Control screen will be re-displayed. Refer to Authorised below. A message will be displayed advising that the request should be monitored in the error log. Once the record has been authorised, the transactions will be created, and the ACB file will be written to a location on the application server as specified in the batch parameter.
When Authorise is selected on the Debit Order Control screen for a Type of Run of DEBIT ORDERS, and if the Transaction Date is equal to the current date, the system will read the value for Description on the Global Parameter with a Parameter Type of EFT CUT-OFF. If the current time is greater than the value found the following message will be displayed:
It is after the cut-off time for EFT collections. The transaction date will be set to the next working day
When the OK button is selected on the message, the Business Transactions will be created with the Transaction Date and Effective Date equal to the next working day.
Note:
When the EFT file is created, the system will read the value for Description on the Global Parameter with a Parameter Type of EFT CUT-OFF. If the current time is greater than the value found and the Date Effective on the EFT Instruction is less than or equal to current date, the value for Action Date on the EFT file will be set to the next working day.
To view reports, click Reports alongside the required record. Refer to Reports below.
From the menu on the top, select Authorised. The Debit Order Control screen will be displayed.
The income has now been processed, and the EFT file has been created.
The system will update the FORMAT TYPE field on the JU2BM EFT Instructions List screen with an indicator to identify that the entry was created for the purpose of collections.
From the Debit Order Control screen, click Reports alongside the required record.
A sub-menu will be displayed on the left, and the available reports will be listed.
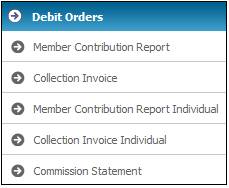
Member Contribution Report Individual
Click Member Contribution Report Individual on the sub-menu on the left.
The Report Selection screen will be displayed.

The following columns are displayed:
- Scheme code
- Timestamp
- Date captured
- Report type
- Report sequence number
- Header sequence number
- Action
Display
Click display in the Action alongside the required report. The Report Selection screen will show the member contribution details.
The following columns are displayed:
- Reference number
- Surname
- Initials
- Date of birth
- Pay Day
- Investment category
- Contribution category
- Benefit category
- Income Category
- Portfolio Code
- Description
- Amount
- Number of Payments
- Bank Account Branch Code
- Bank Account Number
- Bank Account Name
- Notes
Collection Invoice Individual
Click Collection Invoice Individual on the sub-menu on the left.
The Report Selection screen will be displayed.

The following columns are displayed:
- Scheme code
- Timestamp
- Date captured
- Report type
- Report sequence number
- Header sequence number
- Action
Click display in the Action alongside the required report. The Report Selection screen will show the collection invoice details.
The following columns are displayed:
- Pay centre code
- Pay centre name
- Membership reference
- Surname
- First name
- Initials
- Date of birth
- Contribution
- Bank Branch Code
- Account Number
- Account Name
- Notes