This facility allows the processing of service requests for the launching of a New Employer
When you select ![]() from the main functionality menu, the JU7AB Work Management List screen will be displayed.
from the main functionality menu, the JU7AB Work Management List screen will be displayed.
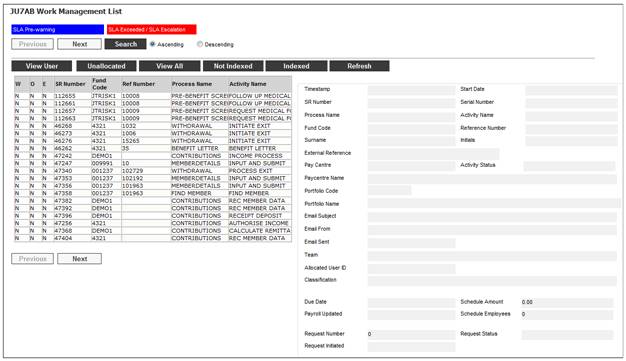
This screen displays a list of the service requests allocated to you.
For detailed information on the JU7AB Work Management List screen and the functionality of the action buttons, refer to Service Requests.
The System will drive the user through the steps necessary to complete the processing of a new employer. Select Service Request from the sub-menu on the left. When the drop-down list is displayed, select Process.
The system will display the screens requiring processing and return to the JU7AB Work Management List screen once processing has been completed. Selecting the Process menu item again will flow to the next Process Step and display the next set of screens requiring processing until the processing of contributions has been completed.
Each step of the Process is indicated by the Activity Name. The following Process steps are generated:
|
Step No. |
Processing |
Service Request Activity Name |
|
1 |
A Service Request has been created on My Work with a Process Name of NEW EMPLOYER.
NO is selected from the dialog message box: Have you received the necessary Employer Information?
(The Status of the Service Request will change to PEND). |
REGISTER EMPLOYER |
|
2 |
YES is selected from the dialog message box: Have you received the necessary Employer Information? |
CREATE EMPLOYER |
|
3 |
The JU1AP Corporate Client screen is displayed and the Corporate Client, Client Address, Contact Details and Pay Centre Details have been captured |
UPDATE SCHEME |
|
4 |
The user has closed the Product Update. |
AUTHORISE UPDATE |
|
5 |
The update and the Employer Confirmation Letter have been authorised on the JU1BH Product Update Type List screen. |
SETUP COMPANIES |
|
6 |
The Client Company has been added on the Client Company screen (Processes>Contributions>Payroll>Client Administration Page>Client Companies>Client Company screen). |
LINK PAYCENTRE TO BRANCH |
|
7 |
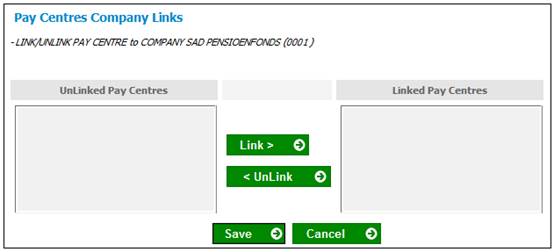
The Pay Centre has been linked to the Branch and the SAVE Button is selected for the New Client Company added on the Pay Centre Company Links screen. |
LINK USER TO PAY CENTRE |
|
8 |
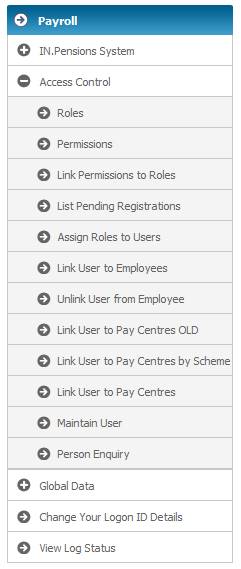
The user has been linked to the Pay Centre on the Link User to Pay Centres by Scheme screen and the SAVE Button has been selected on the screen.
(Processes>Contributions>Payroll>System Administration >Access Control>Link User to Pay Centres by Scheme). |
COMPLETED |
When a Service Request has been created on My Work with a Process Name of NEW EMPLOYER, the Activity Name of the Service Request will be REGISTER EMPLOYER.
When the Service Request is processed, the following dialog message box will be displayed:
Have you received the necessary Employer Information?
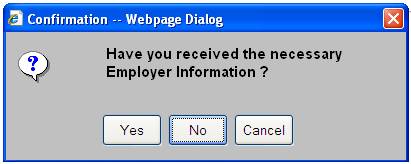
If NO is selected, the Activity Name will remain as REGISTER EMPLOYER and the Status of the Service Request will change to PEND.
If YES is selected, the Activity Name of the Service Request will be updated to CREATE EMPLOYER.
Create Employer
When the Service Request is processed, the JU1AP Corporate Client screen will be displayed.
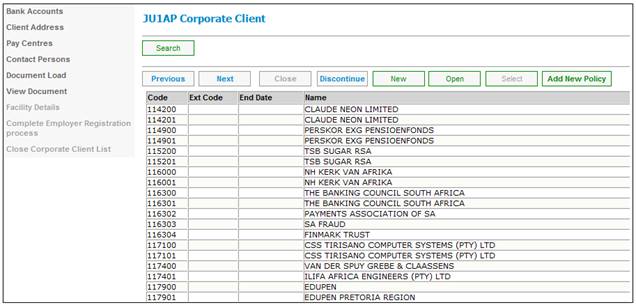
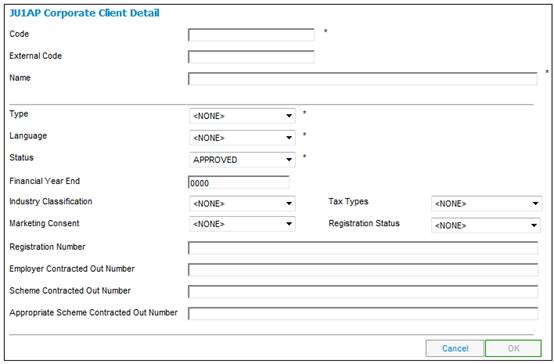
Create a new Corporate Client by selecting NEW on the JU1AP Corporate Client screen. The JU1AP Corporate Client Detail screen will be displayed.
For detailed information, refer to
Infrastructure
System Entities
Corporate Client
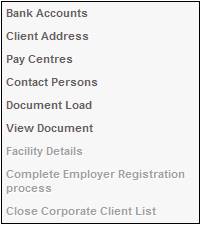
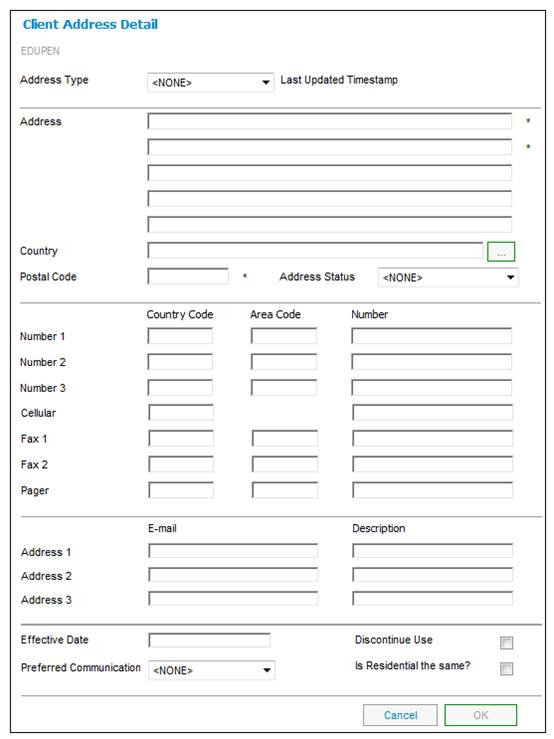
Capture Client Address details by selecting Client Address from the sub-menu on the left.
The Client Address Detail screen will be displayed.
For detailed information, refer to
Infrastructure
System Entities
Corporate Client
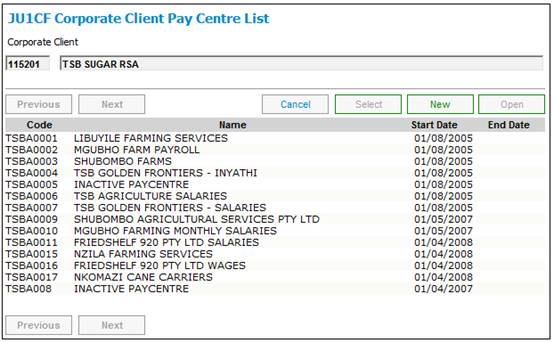
Capture Pay Centre details by selecting Pay Centres from the sub-menu on the left.
The JU1CF Corporate Client Pay Centre List screen will be displayed.
For detailed information, refer to
Infrastructure
System Entities
Corporate Client
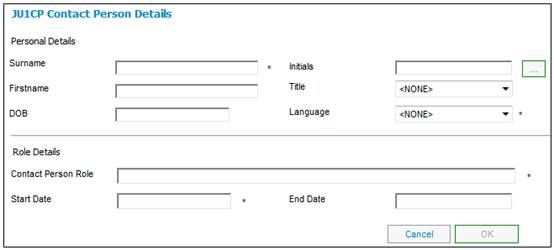
Capture contact person details by selecting Contact Persons from the sub-menu on the left.
The JU1CP Contact Person Details screen will be displayed.
For detailed information, refer to
Infrastructure
System Entities
Corporate Client
Once the JU1AP Corporate Client screen data has been captured, the Service Request Activity Name will be updated to UPDATE SCHEME.
Update Scheme
When the Service Request is processed, the JU1BH Product Update Type List screen will be displayed.
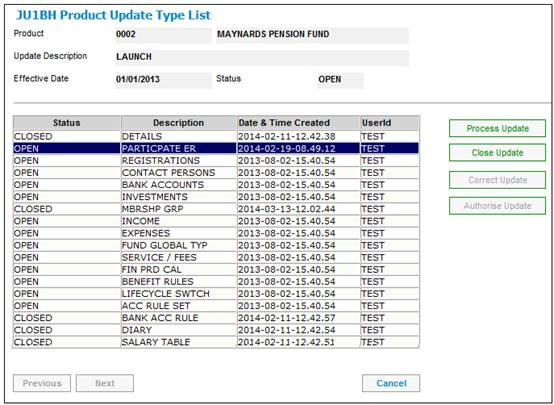
Select Product Update Type: PARTICIPATE ER and click PROCESS UPDATE. The JU1BW Scheme Participating Employers screen will be displayed.
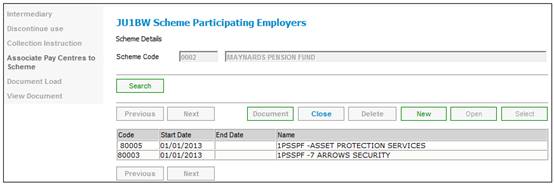
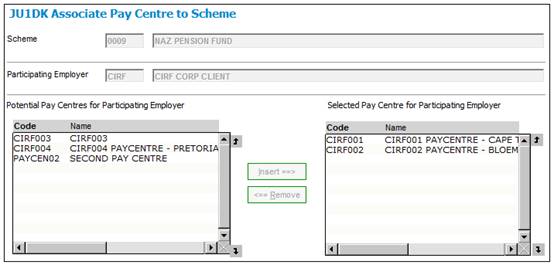
Highlight a Participating Employer and select Associate Pay Centres to Scheme from the sub-menu on the left.
The JU1DK Associate Pay Centre to Scheme screen will be displayed.
For detailed information, refer to
Product Launch Requirements
Scheme Update
Product Update Type: Participating Employer
The Employer Confirmation Letter can also be selected during this step.
To select a PDF document click the DOCUMENT button on the JU1BW Scheme Participating Employers screen. The Employer Letter screen will be displayed
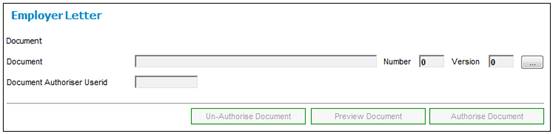
Select a PDF document.
When the LIST button is selected, the JU1F1 Template List screen will be displayed from where an Employer Registration Template Letter can be selected.
When the Product Update is closed for Product Update Type: PARTICIPATE ER, the Service Request Activity Name will be updated to AUTHORISE UPDATE.
Authorise Update
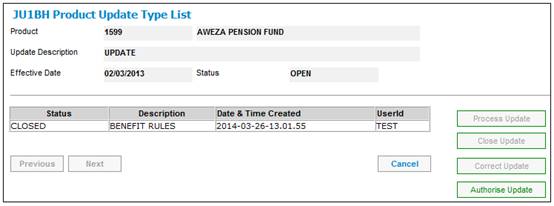
The Product Update Type: PARTICIPATE ER must be closed and then authorised.
On the JU1BH Product Update Type List screen, select the Process Update Type to be closed and click CLOSE UPDATE.
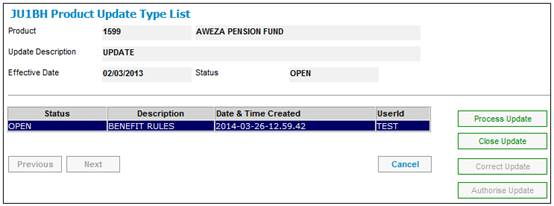
Once the process update type has a status of CLOSED, click AUTHORISE UPDATE.
For detailed information, refer to
Product Launch Requirements
Product Update
Authorising the Product Update
The Service Request Activity Name will be updated to SET UP COMPANIES.
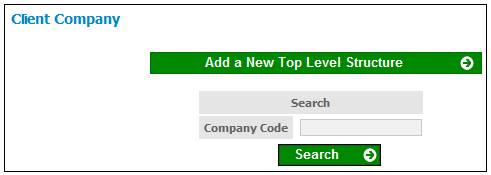
Set up Companies
When the Service Request is processed, the Client Company screen will be displayed. (Navigation: Processes > Contributions > Payroll > Client Administration screen > Client Companies > Client Company screen).
For detailed information, refer to
Product Launch Requirements
Company Structure and Initial Load
Company Structure Setup
Once the Client Company has been added, the system will update the Service Request Activity Name to LINK PAYCENTRE TO BRANCH
Link Paycentre to Branch
When the Service Request is processed, the system will flow to the Pay Centre Company Links screen for the New Client Company added. (Navigation: Processes > Payroll > Client Administration > Pay Centre to Branch Link).
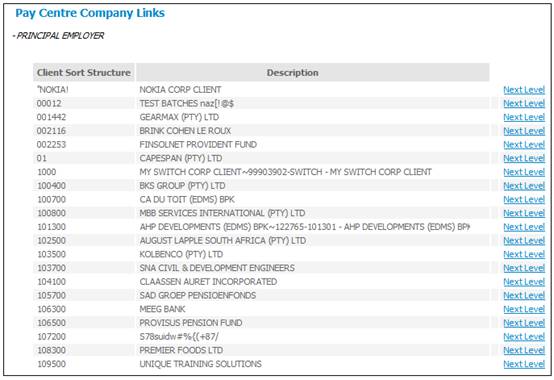
When the Pay Centre has been linked to the Branch and the SAVE Button on the Pay Centres Company Links screen is selected, the Activity Name of the Service Request will be updated to LINK USER TO PAY CENTRE.
For detailed information, refer to
Product Launch Requirements
Company Structure and Initial Load
Initial Load
Link User to Pay Centre
When the Service Request is processed, the Link User to Paycentre by Scheme screen will be displayed from where the user will be linked to the Pay Centre.
(Navigation: Processes > Contributions > Payroll > System Administration > Access Control>Link User to Pay Centres by Scheme).
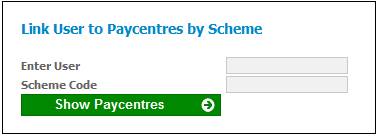
Capture the User Id and the Scheme Code and click SHOW PAYCENTRES. The Link User to Paycentre by Scheme screen will be displayed.

When the SAVE Button is selected on the screen, the Activity Status of the Service Request will be updated to COMPLETED.
For detailed information, refer to
Security
Access
Data Level Security