This facility allows the processing of service requests for the contribution process.
Note:
The AdHoc Income Process is also available on My Work.
Refer to
My Work
Process SR
AdHoc Income
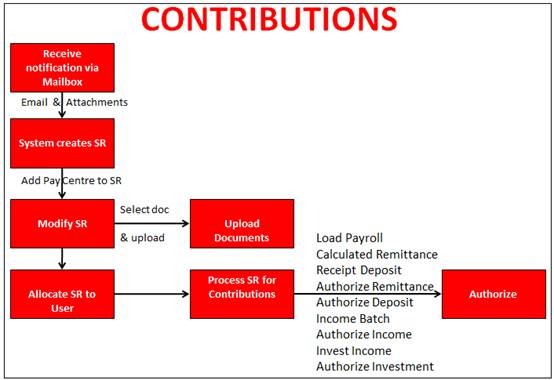
High Level Process Flow
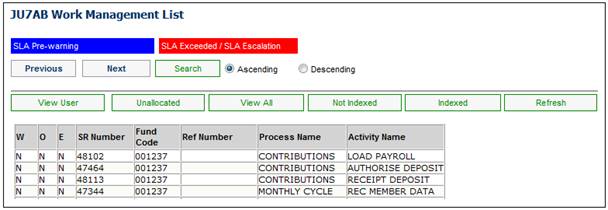
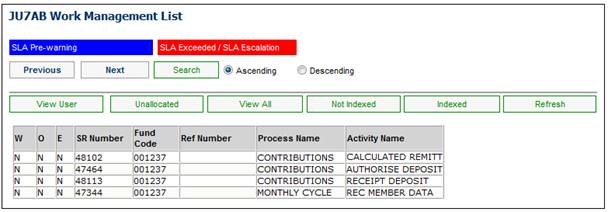
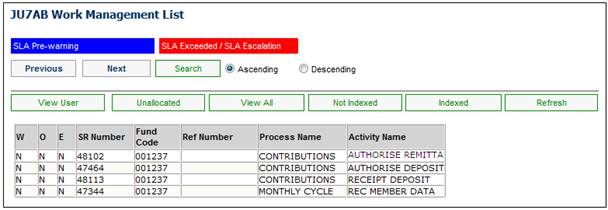
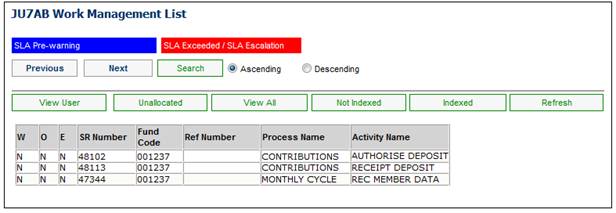
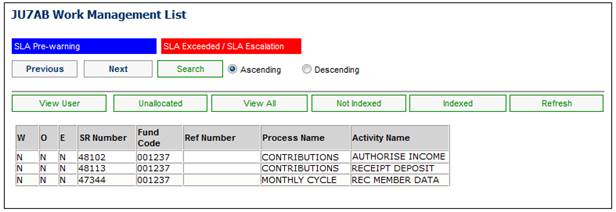
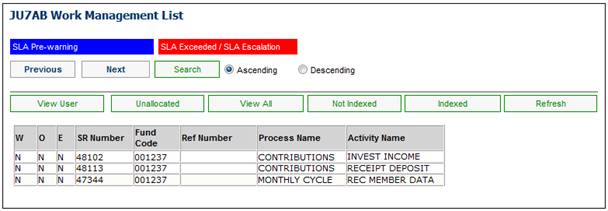
When you select my work from the main functionality menu, the JU7AB Work Management List screen will be displayed.
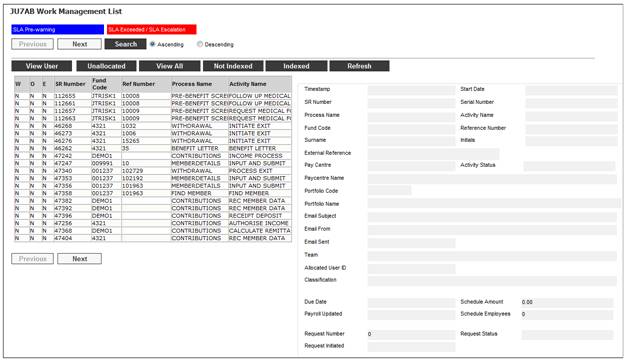
This screen displays a list of the service requests allocated to you.
For detailed information on the JU7AB Work Management List screen and the functionality of the action buttons refer to
My Work
Service Requests
When the Activity is updated for a Service Request i.e. the process is moved to the next step, the system will read the Business Process Template with a Business Process of CONTRIBUTIONS and read the value for Member SMS and Member Email for the Process Function (Activity Name) equal to the latest Activity Name for the Service Request.
If the value for Member SMS is Y, the system will read the value for the Preferred Communication field on the latest Client Address Detail screen for the member with an Effective Date less than or equal to current date.
If the value for the Preferred Communication field is SMS and the value for Member SMS on the Business Process Template for the Process Function is Y, an SMS record will be created with the information in the table below:
|
Information |
Source |
|
Timestamp |
Date and Time the record was created |
|
Scheme Code |
Scheme Code |
|
Process |
Set to CONTRIBUTIONS |
|
Cell phone number |
The latest value of the cellular number captured on the Preferred Address Field on the Client Address Detail screen. |
|
Message Content |
Read the Document Template SMS linked to the Activity Name on the Business Process Template for the sub-process Contributions and where the Member SMS box has been selected. |
If the value selected for the Preferred Communication field on Client Address Detail screen is equal to E-MAIL and the value for Member Email on the Business Process Template for the Activity Name is Y, the system will read the Document Template linked to the Activity Name.
The system will read the member’s latest email address on the latest Client Address Detail screen and send the Email with the message content in the Document Template.
If the value selected for the Preferred Communication field on the Client Address Detail screen is equal to LETTER, neither an SMS nor E-MAIL will be sent.
If the value for the Preferred Communication field on the Client Address Detail screen is NULL, neither an SMS nor E-MAIL will be sent.
Note:
For each Failed communication, a Service Request will be created with a process of FAILED COMMUNICATION and with an Activity Name equal to FAILED COMMUNICATION. For more information refer to
My Work
Process SR
Failed Communication
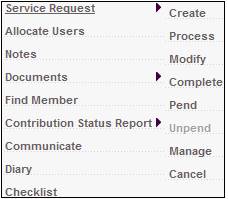
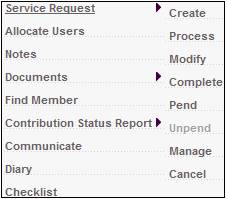
The System will drive the user through the steps necessary to complete the processing of contributions. Select Service Request from the sub-menu on the left. When the drop-down list is displayed, select Process
The system will display the screens requiring processing and return to the JU7AB Work Management List screen once processing has been completed. Selecting the Process menu item again will flow to the next Process Step and display the next set of screens requiring processing until the processing of contributions has been completed.
Each step of the Process is indicated by the Activity Name. The following Process steps are generated:
|
Step No. |
Processing |
Service Request Activity Name |
|
1 |
An Email has been received for contributions and a service request has been created. |
REC MEMBER |
|
2 |
The service request has been modified to update the Pay centre and Due Date fields and the Payroll Updated field has been changed to YES.
The Payroll file has been uploaded and the Pay Centre is in Calculate Remittance State. |
LOAD PAYROLL. |
|
3 |
The remittance advice has been calculated on Payroll. |
CALCULATED REMITTANCE |
|
4 |
The Deposit Allocation has been captured and the first authorisation of the remittance has occurred. |
RECEIPT DEPOSIT |
|
5 |
The second authorisation of the remittance has occurred. |
AUTHORISE REMITTANCE |
|
6 |
The Remittance has been authorized and the Deposit Allocation is ready for authorization. Authorise the Deposit Allocation. Select the Income Batch. |
AUTHORISE DEPOSIT |
|
7 |
The Deposit Allocation has been authorized. |
INCOME BATCH |
|
8 |
The Income batch has been selected and submitted. Authorize the Income Batch. |
AUTHORISE INCOME |
|
9 |
The Income Batch has been authorized. (This will flow to the Payment Allocation screen where a User will capture the payment of the investment to the Asset Manager). |
INVEST INCOME |
|
10 |
The Payment has been captured. (As with the Deposit Allocation; if more than one Authorizer is required, the Service Request will remain in this state until both Authorizations have occurred). |
AUTHORISE INVESTMENT |
|
11 |
The Investment has been authorized. |
CLOSED |
Workflow
The View Data Capture Summary screen will not be displayed in Core and will only be accessible from My Work if either the Global Parameter or the Scheme Parameter for WORKFLOWENABLED has been set and the Parameter is equal to YES.
This is because the Contribution Process has been switched off on Core and can only be accessed through My Work.
For more information, refer to the Switch off Core for Benefit Payment and Contribution processes section under
Product Launch Requirements
Additional Menu Options
Parameters
Error Messages
For Processes that require the Pay Centre to be captured, the system will validate the pay centre captured against the scheme code captured on the JU7AB Create/Update New Service Request screen. This validation takes place when the Process menu item is selected for a service request. If the pay centre captured is not valid, the following message will be displayed:
Invalid Paycentre for the Scheme. Unable to continue with processing.
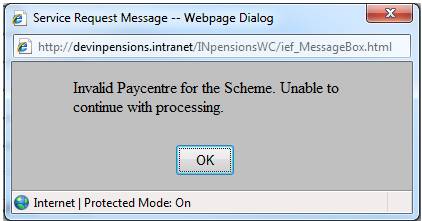
Click OK to remove the message and capture a valid pay centre on the JU7AB Create/Update New Service Request screen.
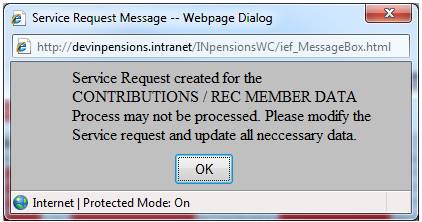
When the Process menu item is selected for a service request, and the Classification field value is NOT INDEXED, the following message will be displayed to indicate that mandatory data is missing for the service request:
Service Request created for the CONTRIBURIONS / REC MEMBER DATA Process may not be processed. Please modify the Service Request and update all necessary data.
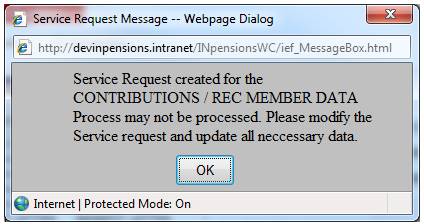
Click OK to remove the message. Use the Modify menu selection for the service request to capture the missing data on the JU7AB Create/Update New Service Request screen.
Receive Member Data
Once an email has been received for contributions, and a service request has been created, the Activity Name on the JU7AB Work Management List screen will be REC MEMBER.
If the Service request is highlighted and Service Request > Process is selected, the following message will be displayed:
Service Request created for the CONTRIBURIONS / REC MEMBER DATA Process may not be processed. Please modify the Service Request and update all necessary data.
Click OK to remove the message. Use the Create menu selection for the service request to capture the missing data on the JU7AB Create/Update New Service Request screen.
Select Service Request from the sub-menu on the left. When the drop-down list is displayed, select Create.
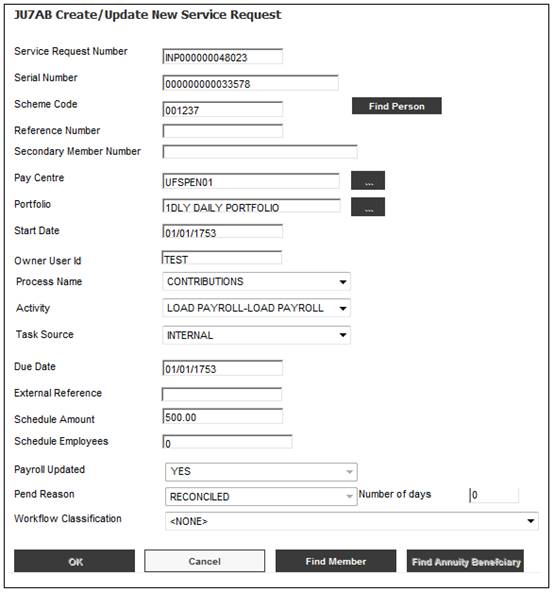
The JU7AB Create/Update New Service Request screen will be displayed.
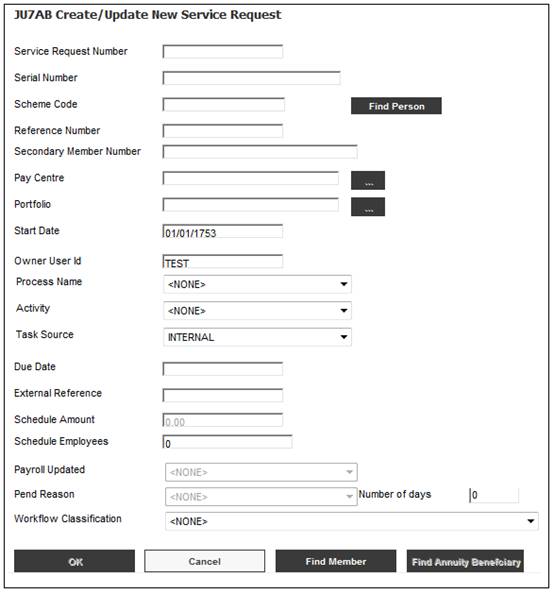
Capture the Scheme Code and select “Contributions” from the Process Name drop-down list field. Select YES from the drop-down list for the Payroll Updated field. Click OK.
The following message will be displayed:
Would you like to allocate the Service Request to a user?
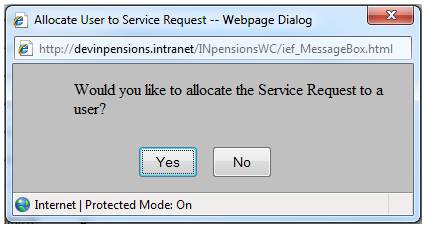
Click YES.
The JU7AB Associate User screen will be displayed.
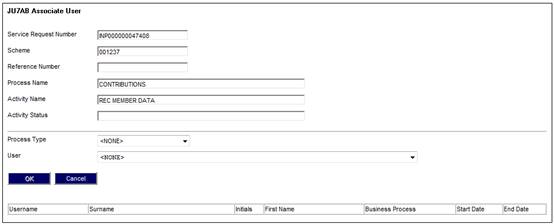
Select Monthly Cycle from the Process Type drop-down list and select a user from the User drop-down list. Click OK.
For more detailed information on the creation of the service request refer to
My Work
Service Requests
To modify the service request, highlight the Service Request and select Service Request from the sub-menu on the left. When the drop-down list is displayed, select Modify.
The JU7AB Create/Update New Service Request screen will be displayed.
Note:
The System has allocated a value in the Service Request Number field.
Capture values for the Pay Centre and Due date fields and click OK.
The service request will be displayed on the JU7AB Work Management List screen with an Activity Name of LOAD PAYROLL.
Load Payroll
Once the service request has been modified to update the Pay centre and Due Date fields and the Payroll Updated field has been changed to YES, the Activity Name on the JU7AB Work Management List screen will be LOAD PAYROLL. The Remittance Advice must now be calculated on Payroll.
Highlight the service request on the JU7AB Work Management List screen and select Service Request from the sub-menu on the left. When the drop-down list is displayed, select Process.
Note:
The following message will be displayed when mandatory data required for the Contributions Process has not been captured:
Service Request created for the CONTRIBUTIONS / REC MEMBER DATA Process may not be processed. Please modify the Service Request and update all necessary data.
Click OK to remove the message. Select Service Request from the sub-menu on the left. When the drop-down list is displayed, select Modify. Check the data on the screen, e.g. a Pay Centre and / or Due Date must be captured for the Contributions Process.
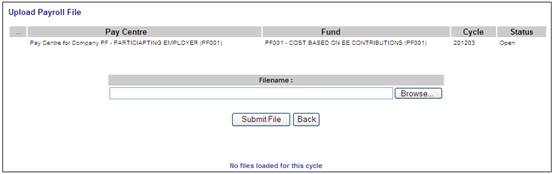
If the necessary data for the Contributions Process has been defined, the Upload Payroll File screen will be displayed. This screen allows a file of contributions to be uploaded for the selected service request.
Note:
If the contributions file was received as an e-mail attachment via the mailbox, the contribution file will not be displayed for selection here unless it has first been uploaded using the Upload Documents menu option. Refer to Upload Documents.
The contributions file will be processed into the current cycle.
For more information, refer to Loading the Payroll File under
Processes
Contributions
Payroll
Payroll Processing and Field Conversion
Also refer to
Supplements
Processes
Payroll Processing
If the service request selected has not yet been allocated to a user, the following message will be displayed:
Service Request may not be processed until it is allocated to a user.
Click OK to remove the message. Allocate the service request to a user first before attempting to process.
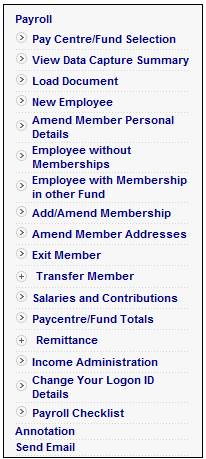
Select Salaries and Contributions from the sub-menu on the left.
The Select Company Node screen will be displayed.
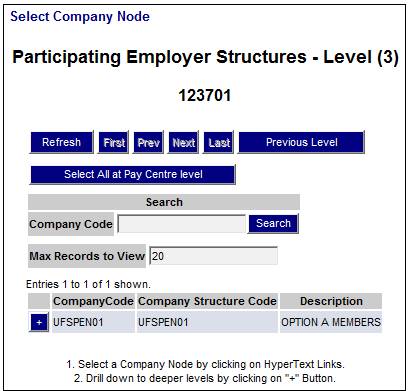
Click SELECT ALL AT PAY CENTRE LEVEL.
The Salaries & Contributions screen will be displayed.
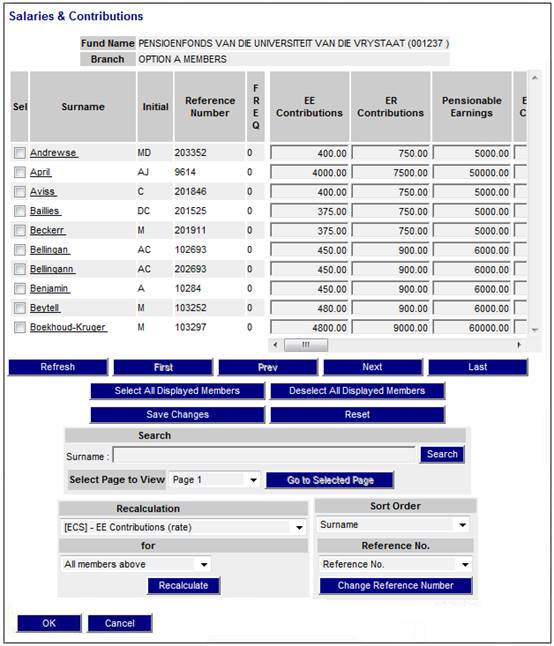
For more information, refer to Membership and Salaries and Contributions under
Processes
Contributions
Payroll
Data Capture
Click ![]() alongside Remittance on the sub-menu on the left. Additional options will be displayed.
alongside Remittance on the sub-menu on the left. Additional options will be displayed.
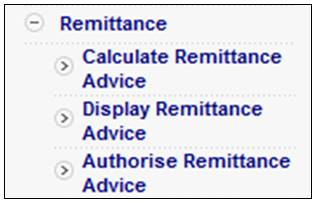
Select Calculate Remittance Advice from the menu. The Calculate Remittance Advice screen will be displayed.

For more information, refer to Remittance Advice under
Processes
Contributions
Payroll
Data Capture
The SR Status will be updated to CALCULATED REMITTANCE.
Calculate Remittance
Once the Remittance has been calculated, the Activity Name on the JU7AB Work Management List screen will be CALCULATED REMITTANCE. The first authoriser must now authorise the Remittance Advice.
On the JU7AB Work Management List screen, highlight the service request and select Service Request from the sub-menu on the left. When the drop-down list is displayed, select Process.
To authorise the Remittance Advice, select Authorise Remittance Advice from the sub-menu.
The Authorise Remittance Advice screen will be displayed.

Click CONFIRM.
The following message will be displayed:
Have the Investment Splits been checked prior to authorization? Press OK to confirm.
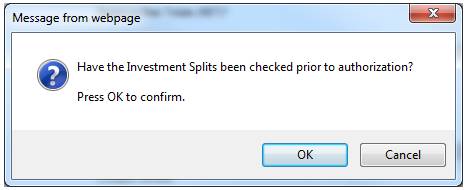
Click OK to confirm that the Investment Splits have been checked. A message will confirm the Remittance Advice has been successfully closed:
Remittance Advice Confirmed. Remittance Advice Admin advised by email.

For more information, refer to Authorise remittance under
Processes
Contributions
Payroll
Data Capture
A Service Request cannot to be closed unless all of the items on the checklist have been completed.
Payroll Checklist
When the Activity Name on the JU7AB Work Management List screen is AUTHORISE REMITTANCE and the Remittance is being authorised, the system will not allow the Remittance to be authorised if all of the items on the Payroll Checklist have not been completed.
The following message will be displayed if all of the items on the Payroll Checklist have not been completed:
The remittance cannot be authorised as all the items on the payroll checklist have not been completed.
Income Checklist
When the Activity Name on the JU7AB Work Management List screen is AUTHORISE INCOME and the Income Batch is being authorised, the system will not allow the Income Batch to be authorised if all of the items on the Income Checklist have not been completed.
The following message will be displayed if all of the items on the Income Checklist have not been completed:
The income batch cannot be authorised as all the items on the income checklist have not been completed.
Once authorisation has been successfully completed, the SR Status will be updated to RECEIPT DEPOSIT.
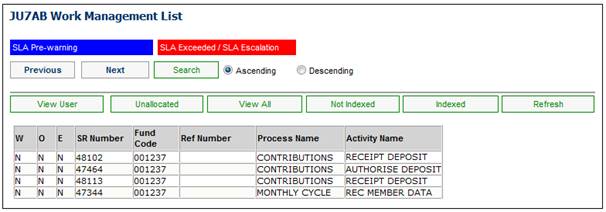
Receipt Deposit
Once the Remittance has been calculated and the first Authorisor has authorised, theActivity Name on the JU7AB Work Management List screen will be RECEIPT DEPOSIT. The second authoriser must now authorise the Remittance Advice.
On the JU7AB Work Management List screen, highlight the service request and select Service Request from the sub-menu on the left. When the drop-down list is displayed, select Process.
The following message will be displayed:
List is empty.
Click OK to remove the message.
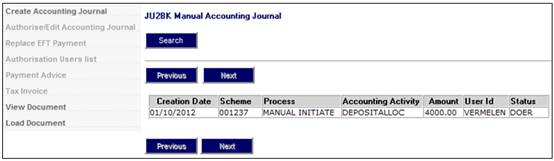
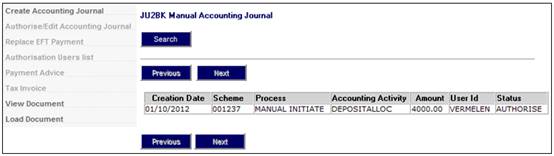
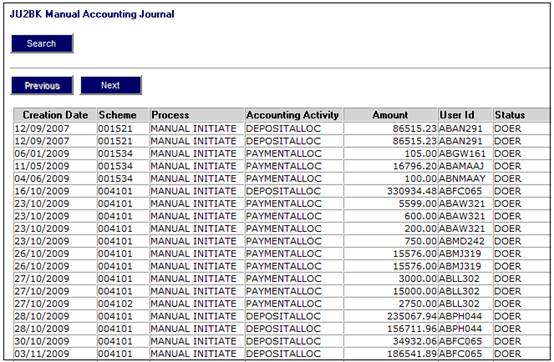
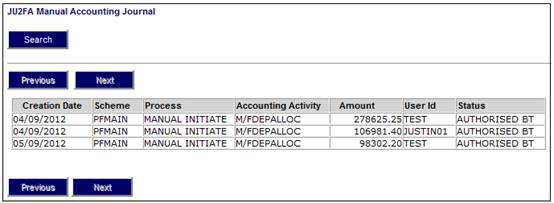
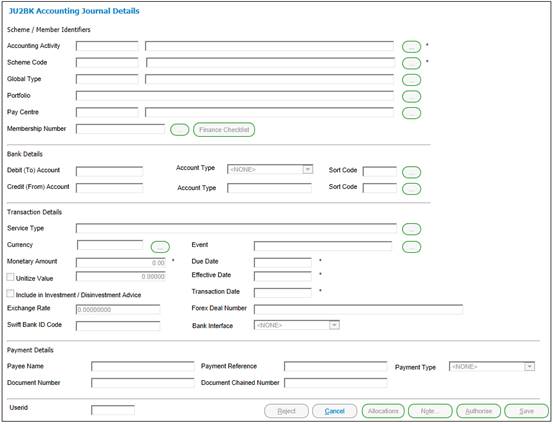
The JU2BK Manual Accounting Journal or JU2FA Manual Accounting Journal screen will be displayed.
Non-Umbrella Funds:
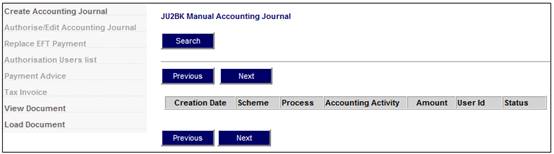
Umbrella Funds:

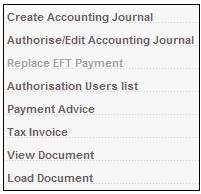
Select Create Accounting Journal from the sub-menu on the left.
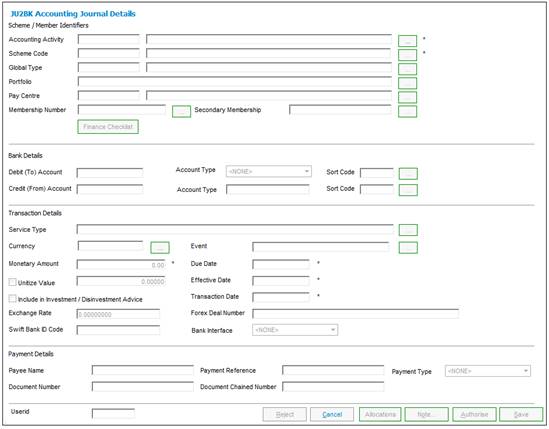
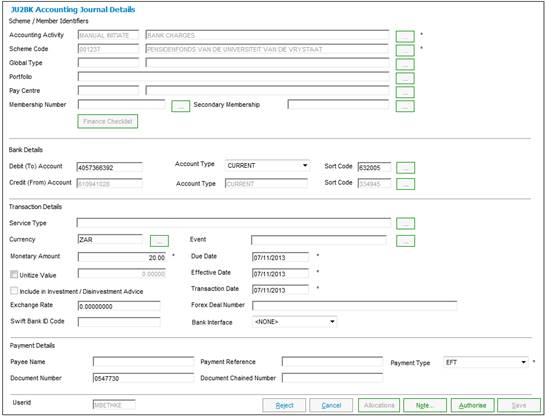
The JU2BK Accounting Journal Details or JU2FA Accounting Journal Details screen will be displayed.
Non-Umbrella Funds:

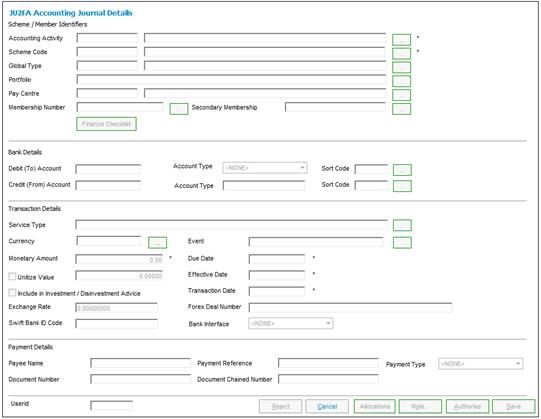
Umbrella Funds:

Capture the necessary details.
Note:
Values must be captured for the Pay Centre and Due Date fields. The value in the Due Date field must be the same as the SR due date.
For more information, refer to
Accounting
Transaction Capture
Note:
For the Accounting Activity field, select DEPOSITALLOC from the JU2AF Accounting Activity List screen.
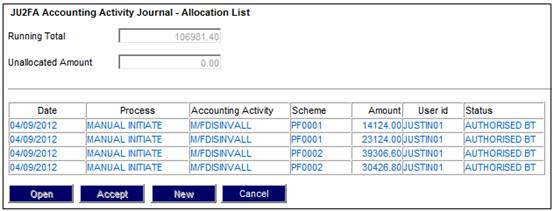
Click ALLOCATIONS. The JU2BK Accounting Activity Journal - Allocation List or JU2FA Accounting Activity Journal - Allocation List screen will be displayed.
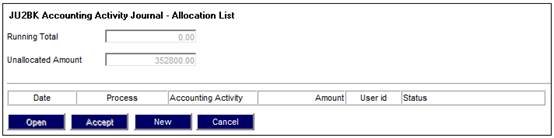
Click NEW.
The JU2BK Accounting Activity Journal or JU2FA Accounting Activity Journal screen will be displayed.
Non-Umbrella Funds:
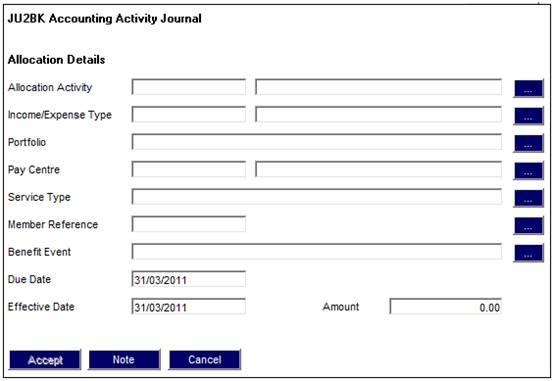
Umbrella Funds:
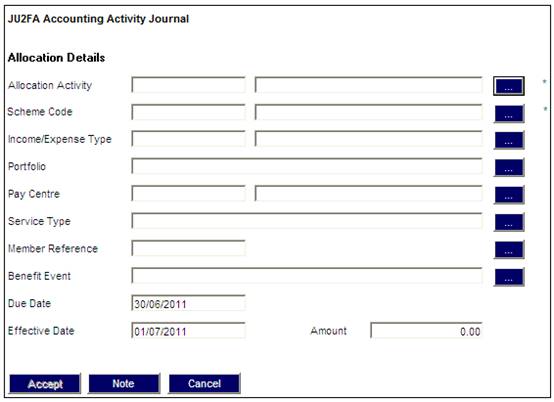
Capture the necessary details for the Pay Centre in respect of the following:
ECS (Employee Contributions)
RCS (Employer Contributions).
Note:
For the Accounting Activity field, select CONTRIBALLOC from the JU2AF Accounting Activity List screen.
Click ACCEPT. The captured details will be displayed on the JU2BK Accounting Activity Journal - Allocation List or JU2FA Accounting Activity Journal - Allocation List screen
Non-Umbrella Funds:
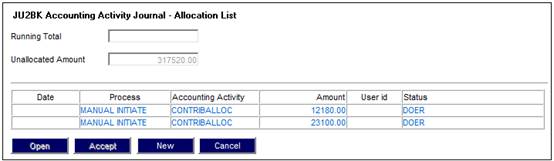
Umbrella Funds:

Once all the required information has been completed, click ACCEPT.
The JU2BK Accounting Activity Journal Details or JU2FA Accounting Activity Journal Details screen will be displayed. Click SAVE.
The following CONFIRMATION box will be displayed:
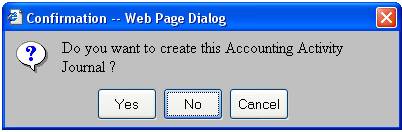
Click YES to confirm that an accounting activity journal must be created. The JU2BK Manual Accounting Journal or JU2FA Manual Accounting Journal screen will be displayed.
For more information, refer to Allocations under
Accounting
Transaction Capture
The SR Status will be updated to AUTHORISE REMITTANCE.
Authorise Remittance
Once the receipt deposit has been completed and the second Authorisor has authorised, the Activity Name on the JU7AB Work Management List screen will be AUTHORISE REMITTANCE. The Remittance Advice must now be authorised.
Select Display Remittance Advice from the menu. The Display Remittance Advice screen will be displayed.
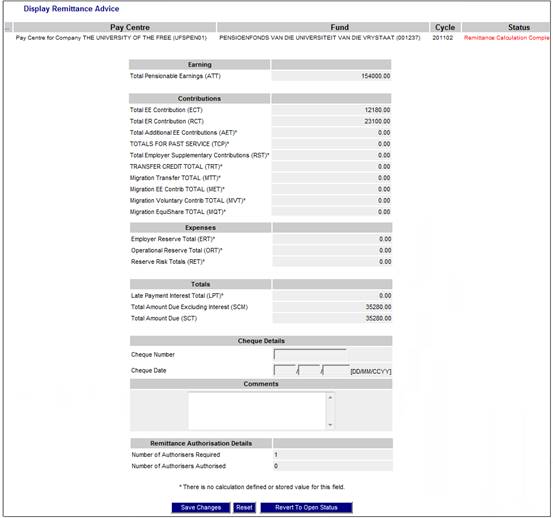
Capture values in the Cheque Number and Cheque Date fields. Click SAVE CHANGES.
The screen confirms that information has been saved.

To authorise the Remittance Advice, select Authorise Remittance Advice from the sub-menu.
The Authorise Remittance Advice screen will be displayed.

Click CONFIRM.
The following message will be displayed:
Have the Investment Splits been checked prior to authorization? Press OK to confirm.

Click OK to confirm that the Investment Splits have been checked. A message will confirm the Remittance Advice has been successfully closed.

For more information, refer to Authorise remittance under
Processes
Contributions
Payroll
Data Capture
The SR Status will be updated to AUTHORISE DEPOSIT.
Authorise Deposit
Once the Deposit Allocation has been captured, the Activity Name on the JU7AB Work Management List screen will be AUTHORISE DEPOSIT.
Note:
If more than one Authoriser is required for the process, this service request will remain in this state until both Authorizations has been completed.
On the JU2BK Manual Accounting Journal or JU2FA Manual Accounting Journal screen, select Authorise / Edit Accounting Journal from the sub-menu on the left.
The JU2BK Accounting Journal Details or JU2FA Accounting Journal Details screen will be displayed. Click AUTHORISE.
The following message will be displayed:
This action cannot be reversed. Do you want to authorise this Accounting Activity Journal?
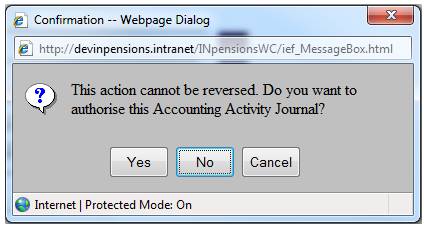
Click YES to confirm that this must be authorised.
For more information, refer to Authorise / edit accounting journal under
Accounting
Transaction Capture
Manual Accounting Transactions
The Status will be updated to AUTHORISE.
The SR Status will be updated to INCOME BATCH.

Payroll Checklist
The Payroll Checklist allows the user to tick off a step in the monthly cycle process as and when it is completed.
Select Payroll Checklist from the sub-menu on the left.
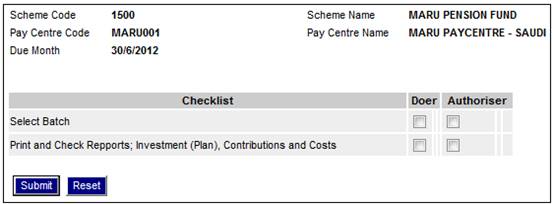
The following screen displays a Checklist with separate tick boxes for the Doer and the Authorizer.
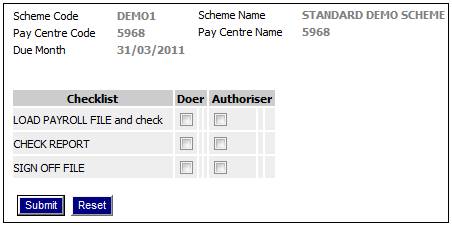
Click the appropriate boxes and click SUBMIT.
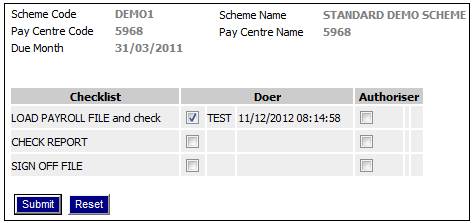
The User ID and Date Timestamp will be displayed.
Processing
When the Checklist screen is opened, the system will retrieve and display the data as per the Document Template, i.e. display the Heading and row per checklist item containing the text, tick box indicator, Date and Timestamp, and User ID.
If any item has been ticked previously then a value of Y will appear in the Tick column, the date and timestamp it was ticked in the Date column and the User ID of the person who ticked the item in the User ID column.
The data will be enabled for update.
Note:
If an item was ticked and then subsequently un-ticked, the Date and Timestamp will indicate that it was previously ticked and subsequently un-ticked. The Date and Timestamp will be that of the date and time it was un-ticked and the User ID will be that of the person who un-ticked it.
Income Batch
Once the Deposit Allocation has been authorized, the Activity Name on the JU7AB Work Management List screen will be INCOME BATCH.
Highlight the service request on the JU7AB Work Management List screen and select Service Request from the sub-menu on the left. When the drop-down list is displayed, select Process.
The Select Batch for Processing screen will be displayed.
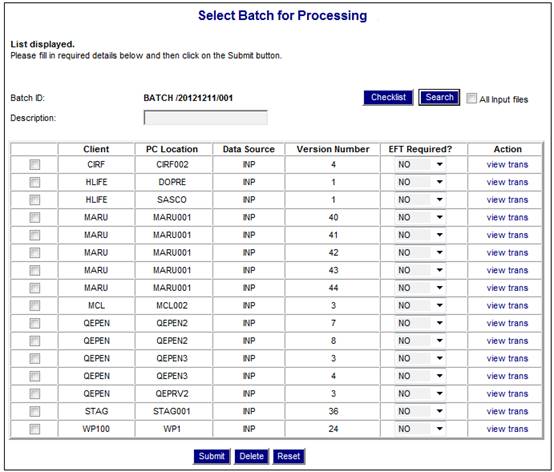
To view the Checklist, click on the tick box to select a single batch and click CHECKLIST.
The Checklist allows the user to tick off a step in the process as and when it is completed.
The following screen displays a list of Checklist items with a tick box for the Doer and the Authoriser.
If CHECKLIST is selected but none of the batch tick boxes were selected, the following message will be displayed:
No batches selected. Only one batch must be selected to continue with Checklist.
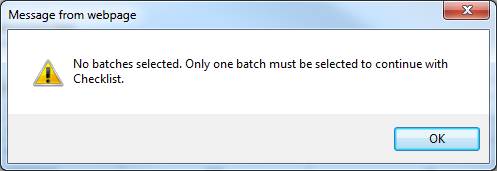
Click OK to remove the message. Select a single batch and click CHECKLIST.
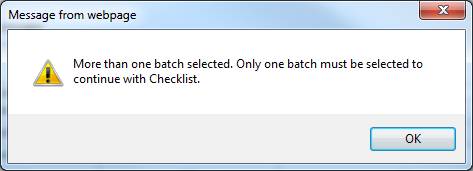
If CHECKLIST is selected and more than one of the batch tick boxes were selected, the following message will be displayed:
More than one batch selected. Only one batch must be selected to continue with Checklist.
Checklist processing
When the Checklist screen is opened, the system will retrieve and display the data as per the Document Template, i.e. display the Heading and row per checklist item containing the text, tick box indicator, Date and Timestamp, and User ID.
If any item has been ticked previously then a value of Y will appear in the Tick column, the date and timestamp it was ticked in the Date column and the User ID of the person who ticked the item in the User ID column.
The data will be enabled for update.
Note:
If an item was ticked and then subsequently un-ticked, the Date and Timestamp will indicate that it was previously ticked and subsequently un-ticked. The Date and Timestamp will be that of the date and time it was un-ticked and the User ID will be that of the person who un-ticked it.
Select the required Batch on the Select Batch for Processing screen and click SUBMIT.
The following message will be displayed:
Are you sure you want to Submit selected batches?
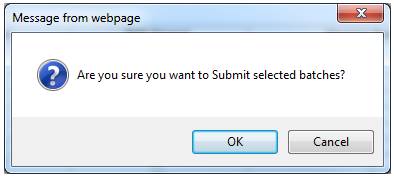
Click OK to confirm that the batches must be submitted.
The Select Batch for Processing screen will be displayed.
For more information, refer to
Processes
Contributions
Income
Supplements
Processes
Income Processing
The SR Status will be updated to AUTHORISE INCOME.
Authorise Income
Once the Income batch has been selected and submitted, the Activity Name on the JU7AB Work Management List screen will be AUTHORISE INCOME.
Highlight the service request on the JU7AB Work Management List screen and select Service Request from the sub-menu on the left. When the drop-down list is displayed, select Process.
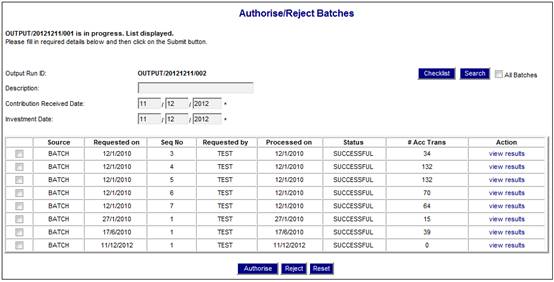
The Authorise/Reject Batches screen will be displayed.
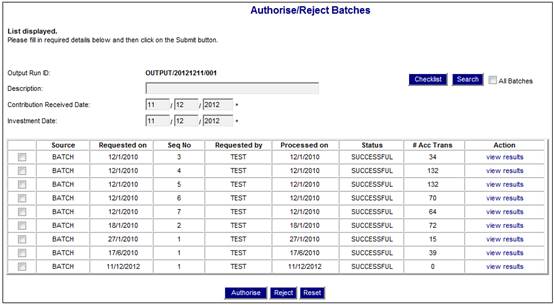
This screen lists all batches that have not yet been authorise for that scheme.
To view the Checklist, click on the tick box to select a single batch and click CHECKLIST.
The Checklist allows the user to tick off a step in the process as and when it is completed.
The following screen displays a list of Checklist items with a tick box for the Doer and the Authoriser.

If CHECKLIST is selected but none of the batch tick boxes were selected, the following message will be displayed:
No batches selected. Only one batch must be selected to continue with Checklist.
Click OK to remove the message. Select a single batch and click CHECKLIST.
If CHECKLIST is selected and more than one of the batch tick boxes were selected, the following message will be displayed:
More than one batch selected. Only one batch must be selected to continue with Checklist.
Checklist processing
When the Checklist screen is opened, the system will retrieve and display the data as per the Document Template, i.e. display the Heading and row per checklist item containing the text, tick box indicator, Date and Timestamp, and User ID.
If any item has been ticked previously then a value of Y will appear in the Tick column, the date and timestamp it was ticked in the Date column and the User ID of the person who ticked the item in the User ID column.
The data will be enabled for update.
Note:
If an item was ticked and then subsequently un-ticked, the Date and Timestamp will indicate that it was previously ticked and subsequently un-ticked. The Date and Timestamp will be that of the date and time it was un-ticked and the User ID will be that of the person who un-ticked it.
Select the batches to be authorised on the Authorise/Reject Batches screen and click AUTHORISE.
The following message will be displayed:
Are you sure you want to Authorise selected batches?
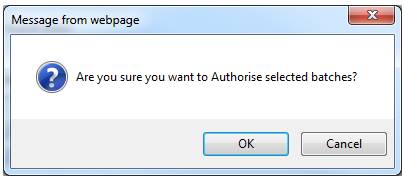
Click OK to confirm that the batches must be authorised.
The Authorise / Reject Batches screen will be displayed.
For more information, refer to Authorising Batches under
Processes
Contributions
Income
Supplements
Processes
Income Processing
When the payroll file has been uploaded and income has been authorised, the Payroll Updated and Reason fields must be updated as follows on the JU7AB Create / Update New Service Request screen:
|
Payroll Updated |
Reason |
|
YES |
RECONCILED |
|
NO |
UNDERPAYMENT QUERIES EMPLOYER QUERIES VENDOR |
Note:
This is necessary to record the fact that member data and contribution schedules or files have been received, as they may have been received but not processed and therefore incorrectly reported as having not been received or received late.
The SR status will be updated to INVEST INCOME. As per Receipt and Authorise Deposit, only the applicable transaction will be shown.
Invest Income
Once the Income Batch has been authorized, the Activity Name on the JU7AB Work Management List screen will be INVEST INCOME.
Highlight the service request on the JU7AB Work Management List screen and select Service Request from the sub-menu on the left. When the drop-down list is displayed, select Process.
The JU2BK Manual Accounting Journal or JU2FA Manual Accounting Journal screen will be displayed.
Non-Umbrella Funds:
Umbrella Funds:
Select Create Accounting Journal from the sub-menu on the left.
The JU2BK Accounting Journal Details or JU2FA Accounting Journal Details screen will be displayed.
Non-Umbrella Funds:
Umbrella Funds:

Capture the necessary details.
For more information, refer to
Accounting
Transaction Capture
Note:
For the Accounting Activity field, select PAYMENTALLOC from the JU2AF Accounting Activity List screen, and select a Portfolio from the JU1BV Scheme Portfolio List screen.
Click ALLOCATIONS. The JU2BK Accounting Activity Journal - Allocation List or JU2FA Accounting Activity Journal - Allocation List screen will be displayed.
Non-Umbrella Funds:

Umbrella Funds:
Click NEW.
The JU2BK Accounting Activity Journal or JU2FA Accounting Activity Journal screen will be displayed.
Non-Umbrella Funds:
Umbrella Funds:
Select INVESTTRAN-A for the Allocation Activity field.
Capture the necessary details for the Portfolio.
Click ACCEPT. The captured details will be displayed on the JU2BK Accounting Activity Journal - Allocation List or JU2FA Accounting Activity Journal - Allocation List screen will be displayed.
Non-Umbrella Funds:
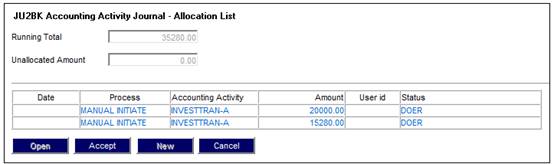
Umbrella Funds:
Once all the required information has been completed, click ACCEPT.
The JU2BK Accounting Activity Journal Details or JU2FA Accounting Activity Journal Details screen will be displayed. Click SAVE.
The following CONFIRMATION box will be displayed:

Click YES to confirm that an accounting activity journal must be created. The JU2BK Manual Accounting Journal or JU2FA Manual Accounting Journal screen will be displayed.
For more information, refer to Allocations under
Accounting
Transaction Capture
Authorise Investment
Once the Payment has been captured, the Activity Name on the JU7AB Work Management List screen will be AUTHORISE INVESTMENT.
Note:
If more than one Authoriser is required for the process, this service request will remain in this state until both Authorizations has been completed.
Highlight the service request on the JU7AB Work Management List screen and select Service Request from the sub-menu on the left. When the drop-down list is displayed, select Process.

The JU2BK Manual Accounting Journal or JU2FA Manual Accounting Journal screen will be displayed.
Non-Umbrella Funds:

Umbrella Funds:

To locate the transactions to be authorised, click SEARCH. The JU2BK Search Criteria or JU2BK Search Criteria screen will be displayed.
Non-Umbrella Funds:

Umbrella Funds:
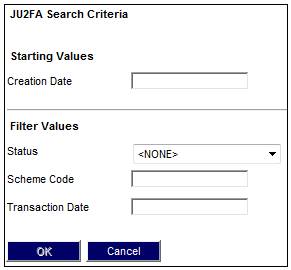
Select DOER from the drop-down list for the Status field and capture the Scheme Code. Click OK.
The JU2BK Manual Accounting Journal or JU2FA Manual Accounting Journal screen will be displayed.
Non-Umbrella Funds:

Umbrella Funds:
Select the transaction to be authorised and select Authorise / Edit Accounting Journal from the sub-menu on the left.
The JU2BK Accounting Journal Details or JU2FA Accounting Journal Details screen will be displayed.
Non-Umbrella Funds:
Umbrella Funds:

Click AUTHORISE.
The following message will be displayed:
This action cannot be reversed. Do you want to authorise this Accounting Activity Journal?
Click YES to authorise.
For more information, refer to Authorise / edit accounting journal under
Accounting
Transaction Capture
Manual Accounting Transactions
Note:
Once the Investment has been authorised, the service request has been processed and will no longer be displayed for selection in My Work.
Once the Investment has been authorized, the Activity Name on the JU7AB Work Management List screen will be CLOSED.