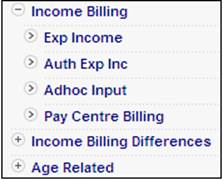
From the Income Billing menu on the top, click ![]() alongside Income Billing on the sub-menu on the left, then select Exp Income from the list of menu options below it.
alongside Income Billing on the sub-menu on the left, then select Exp Income from the list of menu options below it.
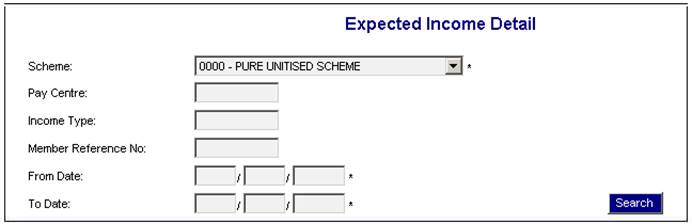
Capture the following details:
|
Scheme |
Select a scheme from the drop-down box. Note: The selection of a scheme is mandatory. |
|
Pay Centre |
Capture the pay centre code. Details for all members of the specified pay centre will be displayed. Note: The selection of pay centre is optional. |
|
Income Type |
Capture the scheme income type. Details for the selected pay centre and/or members, and with the specified income type, will be displayed. Note: The selection of income type is optional. |
|
Member Reference No |
Capture the reference number of a member. Details for the specified member will be displayed. Note: The selection of a member reference number is optional. |
|
From Date |
The date from which the specified data must be extracted. Note: This date is mandatory. |
|
To Date |
The date up to which the specified data must be extracted. Note: This date is mandatory. |
Click SEARCH. The Expected Income Detail screen will be displayed.
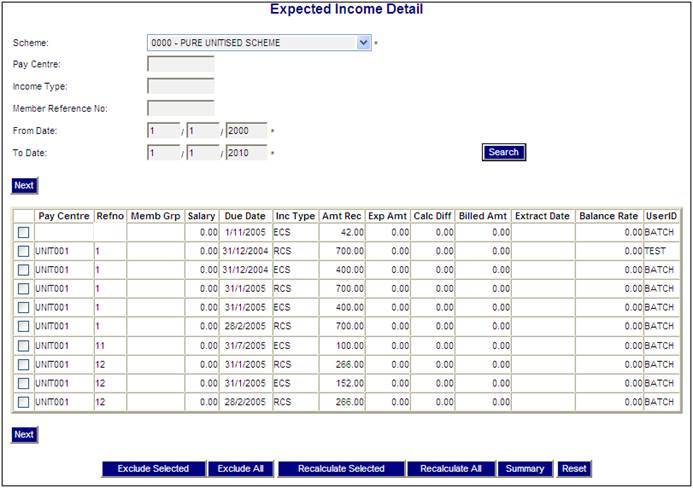
The following columns are displayed:
- Pay Centre
- Reference Number
- Membership Group
- Salary
- Due Date
- Income Type
- Amount Received
- Expected Amount
- Calculation Difference
- Billed Amount
- Extract Date
- Balance Rate
- User Id
You may choose to exclude specific calculation difference amounts from the billing process by selecting those records for which a zero amount must apply, i.e. the Billed Amt can be edited to zero.
This allows the original calculation difference amount to be retained for reporting purposes.
Note:
Where the calculation difference is zero, no accounting transaction will be generated.
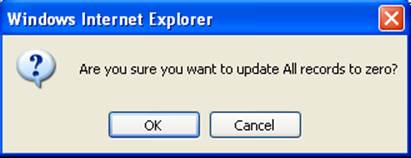
To exclude a specific calculation difference amount from the billing process, tick the box alongside Pay Centre, then click EXCLUDE SELECTED. The following confirmation message will be displayed:
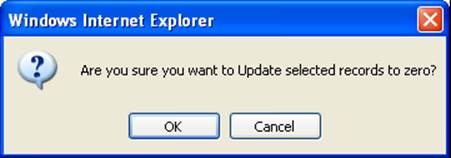
Click CANCEL to reverse the update action, or click OK to update the selected records to zero. The Expected Income Detail screen will now show zeros in the Billed Amt column for the selected records.
To exclude calculation difference amounts from the billing process for all members, click EXCLUDE ALL. A warning message will be displayed if the selected records have not yet been updated.

Click OK to ignore the message, or click CANCEL to cancel the message.
If CANCEL was selected, a confirmation message will be displayed.
Click CANCEL to reverse the update action, or click OK to update all records to zero. The Expected Income Detail screen will now show zeros in the Billed Amt column for all the records.
If EXCLUDE ALL was used to exclude all amounts in the Billed Amt column, and you want to restore them all back to the original values, leave all the boxes alongside Pay Centre unticked, then click RECALCULATE ALL. A confirmation message will be displayed.
Warning – Selected records have not been updated. Do you wish to ignore this request?
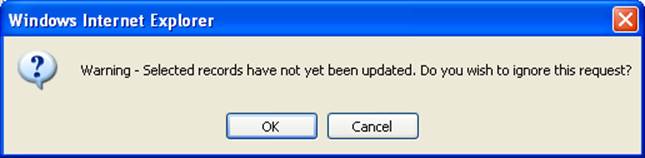
Click OK to ignore the message, or click CANCEL to cancel the message.
Are you sure you want to recalculate All Billed amounts?
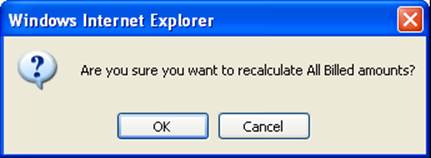
Click CANCEL to reverse the update action, or click OK to update all records to the original values. The Expected Income Detail screen will now show the original values in the Billed Amt column for all the records.
If EXCLUDE ALL was used to exclude all amounts in the Billed Amt column, and you want to restore specific items only, tick the box alongside Pay Centre, then click RECALCULATE SELECTED. A confirmation message will be displayed.
Are you sure you want to recalculate All Billed amounts?
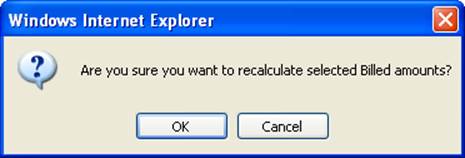
Click CANCEL to reverse the update action, or click OK to update the selected records to the original values. The Expected Income Detail screen will now show the original values in the Billed Amt column for the selected records.
To view a summary (per scheme income type) of the amounts for which the client will be billed click SUMMARY. A warning message will be displayed if the selected records have not yet been updated.
Warning – Selected records have not been updated. Do you wish to ignore this request?

Click OK to ignore the message, or click CANCEL to cancel the message.
The Authorise Expected Income screen will be displayed.
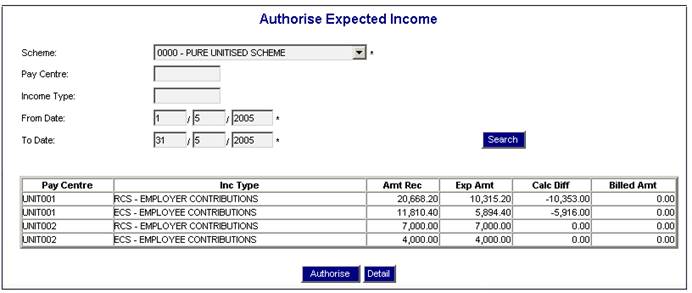
To return to the Expected Income Detail screen, click DETAIL.
To authorise the selected items, click AUTHORISE. A confirmation message will be displayed.
Are you sure you want to Authorise this selection?
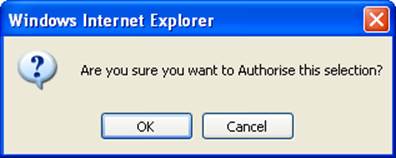
Click CANCEL to cancel the authorization, or click OK to confirm authorization.
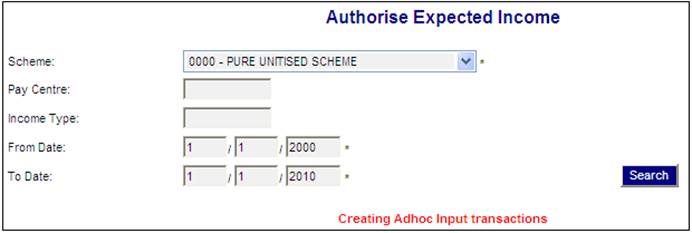
The Authorise Expected Income screen will be displayed. A message at the bottom of the screen will confirm that input transactions will be created.
Note:
This screen can also be accessed by selecting Auth Exp Inc from the menu on the left. Refer to Authorise Expected Income for a description of the authorisation process.
For information on the calculation of expected income refer to
Processes
Contributions
Income
Income Billing
Calculation of Expected Income