Member data can be loaded into the system either by manual keyboard input, or by way of an import from a payroll extract.
Note:
Only the following file extensions are allowable for the payroll load:
- .txt
- .dat
- .prn
- .csv
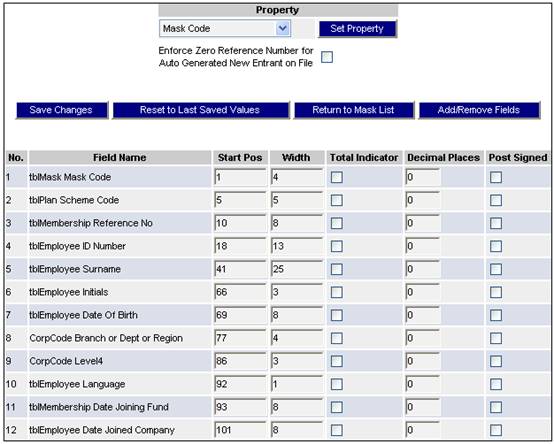
As there need be no fixed layout to the file, before it can be used initially, the content of the file must be defined in order for the system to be able to interpret it correctly. This is called masking, a process whereby a mask is created, its field properties are set, and the mask generated. Existing masks can be edited (if and when necessary).
New entrants or exited members can be uploaded via the payroll file
Example of a Mask Layout:
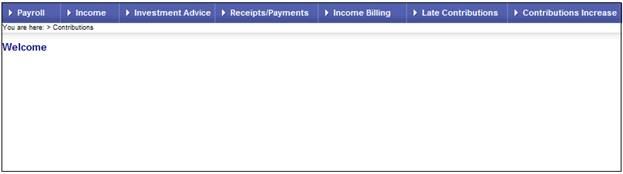
Select processes from the Main Menu, then click on contributions.
Note:
This will only be available to users with PAYROLL or SUPER USER security access.
The Welcome screen will be displayed.
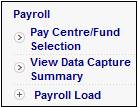
From the main menu on the top, select Payroll. The Payroll screen will be displayed.
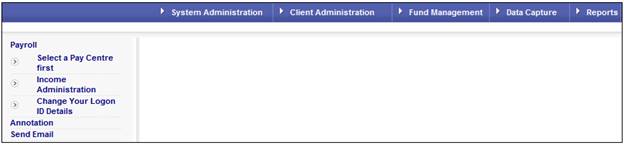
From the main menu on the top, select Data Capture.
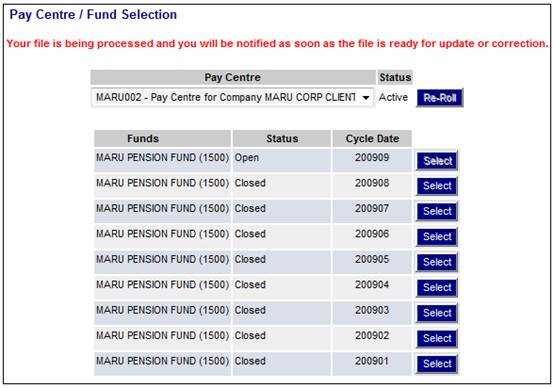
The Pay Centre / Fund Selection screen will be displayed.

Select the required pay centre from the drop-down list.
The selected pay centre will be displayed on the lower portion of the screen. Previous cycles will be listed, as well as the latest open cycle for the processing of data.
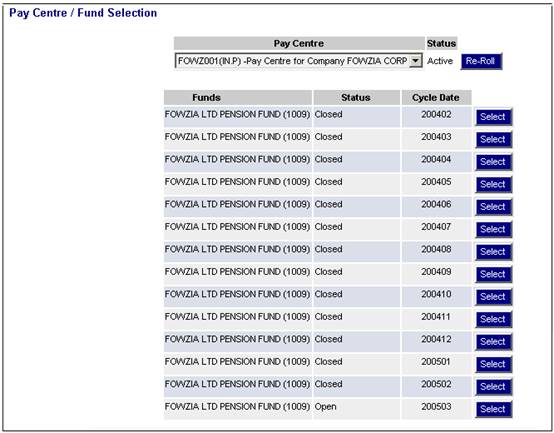
This screen displays the status of the selected pay centre (active or inactive), as well as the following information:
|
Scheme |
The name of the scheme and the scheme code in brackets |
|
Status |
Whether the cycle is open or closed |
|
Cycle Date |
The year and month of the cycle |
Select the latest open cycle by clicking SELECT alongside it. The Data Capture Summary screen will be displayed.
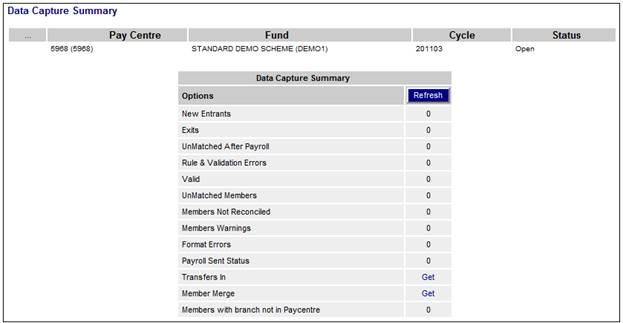
Prior to loading the payroll data, status of all members will be UnMatched.
Workflow
The View Data Capture Summary screen will not be displayed if either the Global Parameter or the Scheme Parameter for WORKFLOWENABLED has been set and the Parameter is equal to YES. This is because the Contribution Process has been switched off on Core and can only be accessed through My Work.
For more information, refer to the Switch off Core for Benefit Payment and Contribution processes section under
Product Launch Requirements
Additional Menu Options
Parameters
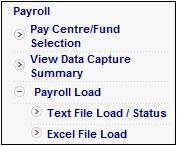
To upload payroll files in text format, click ![]() alongside Payroll Load on the sub-menu on the left. Select Text File Load / Status when the additional options are displayed.
alongside Payroll Load on the sub-menu on the left. Select Text File Load / Status when the additional options are displayed.
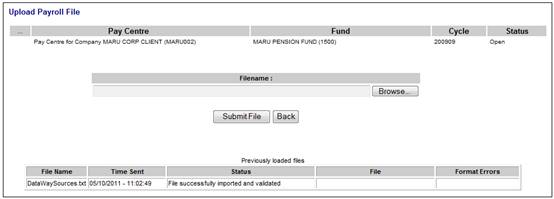
The Upload Payroll File screen will be displayed.
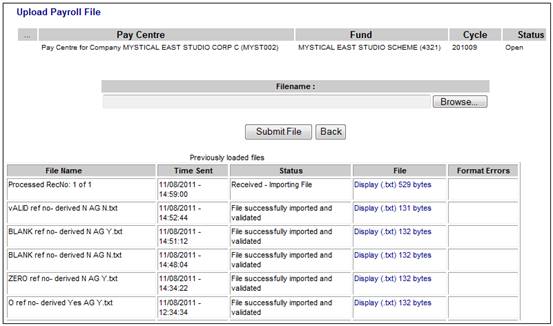
The message in the Status column displays the current status of payroll files upload in text format.
Click BROWSE. This will allow you to search the available drives (user network or local) for the file to be loaded into the selected pay centre.
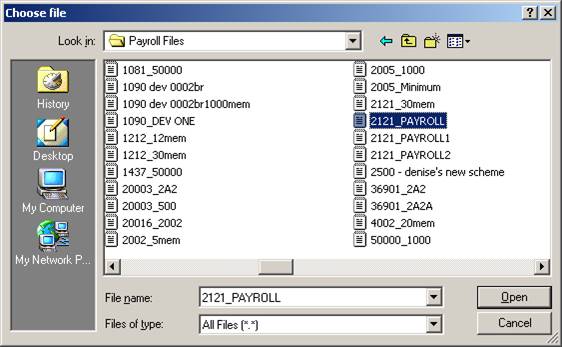
Highlight the required file, then click OPEN.

The file name will appear in the Filename: box. Click SUBMIT FILE.
The Pay Centre / Fund Selection screen will be displayed with the message:
Your file is being processed and you will be notified as soon as the file is ready for update or correction.
Once the file has been processed, the Upload Payroll File screen will display the message File successfully imported and validated in the Status column.
To define a payroll file in excel format and upload it in text format, click ![]() alongside Payroll Load on the sub-menu on the left. Select Excel File Load when the additional options are displayed.
alongside Payroll Load on the sub-menu on the left. Select Excel File Load when the additional options are displayed.
The Payroll Excel Upload screen will be displayed.

This screen consists of an In Mask and an Out Mask.
Each Mask may be selected from a list of predefined Masks available from the respective drop-down list.
An excel spreadsheet in Microsoft Office Excel 2007 must be selected for upload using BROWSE.
The Mask selected from the In Mask drop-down list maps to the excel spreadsheet being uploaded.
The Mask selected from the Out Mask drop-down list is the format that the excel file will be converted to for the upload.
Note:
A text file requires a field to have a Start Position and a Width so that the length of the field is exact. If the same field in excel is different, the Out Mask will automatically change it to the correct length.
When SUBMIT is selected, the In Mask selected will convert the excel data selected for upload to the required txt format using the Out Mask selected.
Note:
The system provides the facility to load a “Test File” and perform a test run. (The selection of this is optional).
To perform a Test Run place a tick in the tick-box. The file already specified will be used by the system. A random selection of 50 records will be made by the system and processed.
To view the results of the upload, select View Data Capture Summary from the sub-menu on the left.
The Data Capture Summary screen will be displayed.
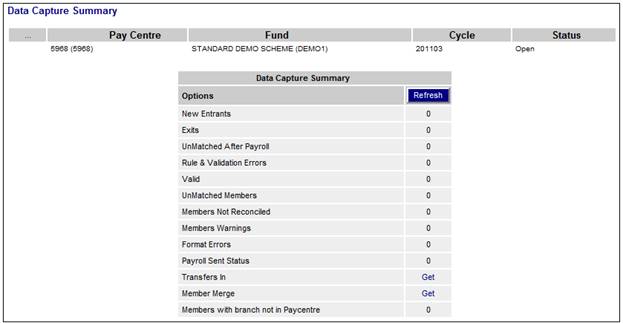
Based on the mask selected, the payroll file detail is validated against the scheme information. Any errors are reported as Rule & Validation errors, or Format Errors. To access the errors, click on the appropriate hyperlink on the Data Capture Summary screen.
Format errors (or page error messages) will be generated in the following instances:
- Where a reference number is zero and activation has not been enabled
- Where a reference number is blank or spaces and activation has not been enabled
- Where a reference number is zero, activation has been enabled, but no reference number range has been captured
- Where a reference number is zero, activation has been enabled and a reference number has been generated, but benefit and contribution category is missing
Example of error messages:
- Not a valid Income and Expense Type
- Not a valid Membership Reference Number
- Payroll record could not be linked to a Fund
- Payroll record could not be linked to a Fund - Benefit and Contribution Categories are invalid
- Company could not be linked to the current company structure
- Payroll record could not be linked to a Pay Centre
- Date of Joining Fund cannot be prior to Commencement Date of Fund
- Date of Joining Company cannot be greater than Current Cycle
- Date of Joining Fund cannot be less than Date of Joining Company / or invalid
- Date of Joining Fund cannot be greater than Current Cycle
- Duplicate: Employee already has a Membership in this fund
- Zero reference number required for new Employee details for this fund
Correct and clear format errors.
For a complete list of format error messages and how to correct them, refer to
Processes
Contributions
Payroll
Payroll Processing and Field Conversion
Format Errors and How to Correct Them
Rule and Validation Errors will relate to information you are trying to load that is against the Rules of a Fund.
Unmatched after payroll will usually mean that there are members still live on payroll, but that they were not on the file that was uploaded.
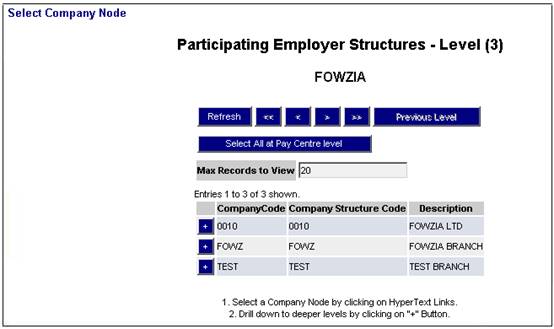
To add a new employee, from the Data Capture menu, select New Employee from the sub-menu on the left. The Select Company Node Participating Employer Structures - Level (3) screen will be displayed (level 3 is the company branch).
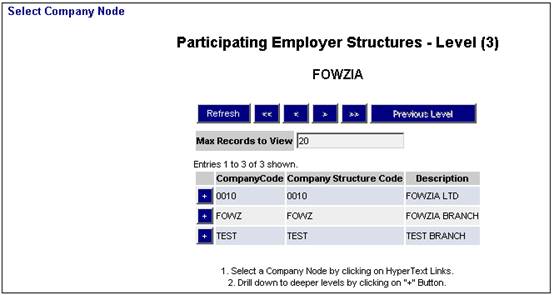
To display the associated pay centre, click the hyperlinked name in the Description column.
The New Employee screen for the selected pay centre will be displayed.
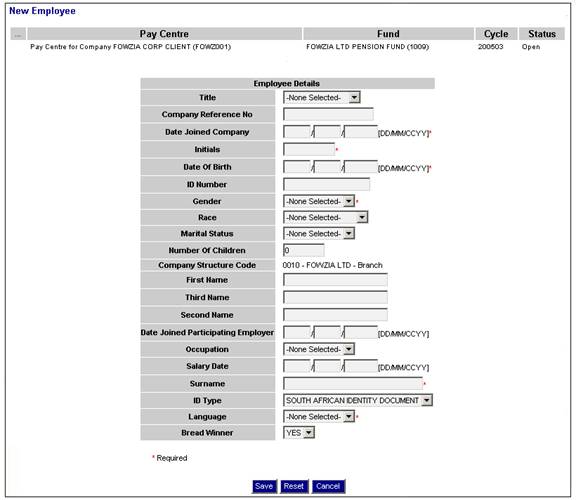
Employee Details
Complete the required data, then click SAVE.
The Amend Member Personal Details screen will be displayed.
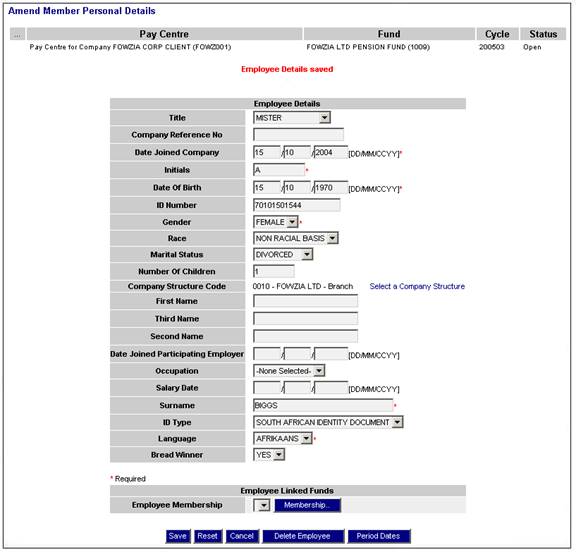
A message at the top of the screen will confirm that the employee details have been saved.
On this screen you can amend any of the employee details captured. To delete the employee, click DELETE EMPLOYEE.
Before membership details can be added, a valid range of reference numbers must exist for the pay centre.
To convert the employee details to membership details, click MEMBERSHIP.
The Add/Update Membership Details screen will be displayed.
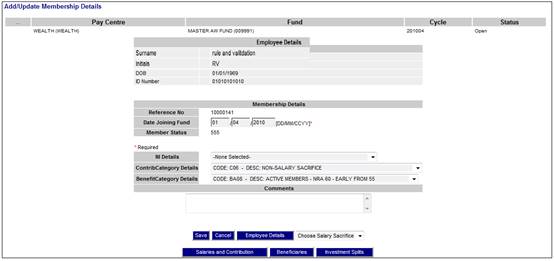
This screen displays the employee details, and additional membership fields will be displayed for completion.
Complete the required data, then click SAVE.
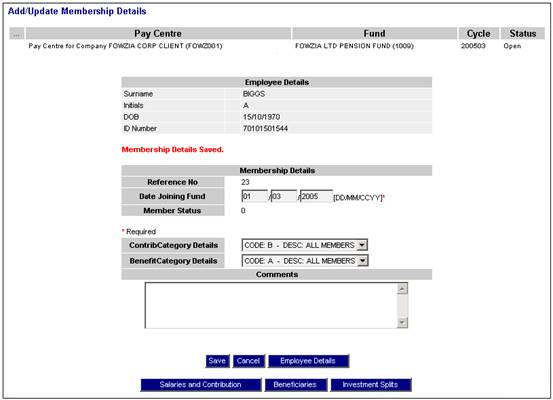
A message above Membership Details will confirm that the membership details have been saved.
To exit a member, from the Data Capture menu, select Exit Member from the sub-menu on the left. The Exit Member screen will be displayed.
Note:
The exit date can be for the previous month or the current month of the cycle, but not for a future date.
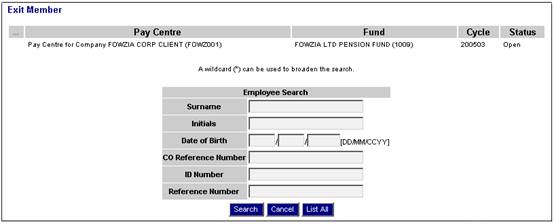
You can search for a specific member by entering the relevant information and clicking SEARCH.
Click anywhere on the line of the member to exit the member.
The Online Editor - Membership Exit screen will be displayed.

Note:
The Exit process on Payroll will check on Core whether a claim is in process on Core and show a Warning message if it is.
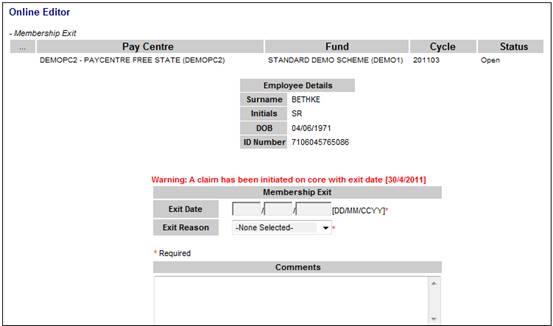
Capture the exit details, then click UPDATE to save the details.
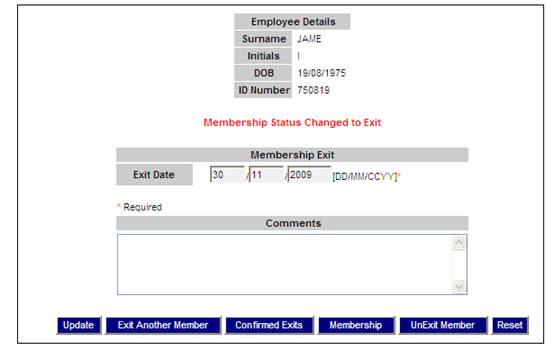
A message in the centre of the screen will confirm that the membership status has changed to exit.
The processing of transfers can be manual or via a file upload.
Note:
If you are processing transfers via file upload, members transferring out of a pay centre would most probably come up as an ‘UnMatched After payroll’ after you have uploaded a file. You can transfer the member out of a pay centre manually by following the process below. Transfer into pay centre will happen automatically as the member would have been on the payroll file being loaded.
Note:
It is possible for the transfer in to be done before the transfer out.
From the Data Capture menu, click ![]() alongside Transfer Member on the sub-menu on the left. Additional options will be displayed.
alongside Transfer Member on the sub-menu on the left. Additional options will be displayed.
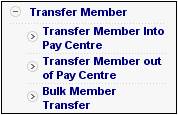
Click Transfer Member out of Pay Centre below Transfer Member.
The Transfer Member Out of Pay Centre screen will be displayed.
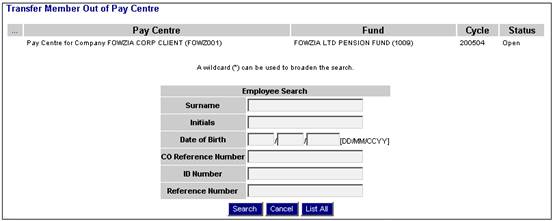
Click LIST ALL. The screen will display a list of all current members who are on the pay centre for the scheme. Select the required member by clicking on the member's details in the list.
The Membership Transfer screen will be displayed.
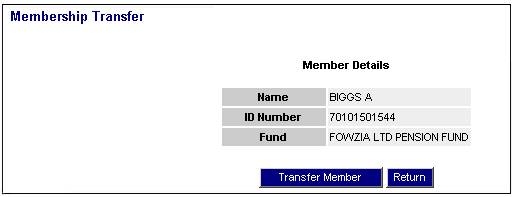
Click TRANSFER MEMBER. A dialogue box will ask you for confirmation.
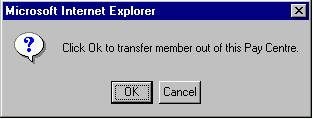
Click OK to confirm that the member can be transferred out of the pay centre.
The Membership Transfer screen will be re-displayed.

A message will confirm that the member has been successfully transferred.
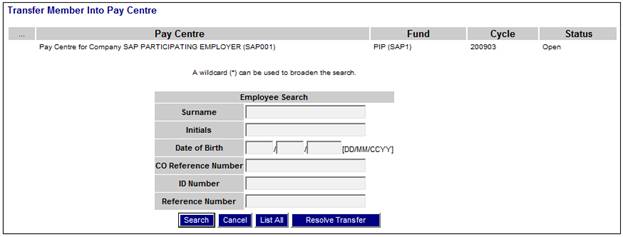
Click Transfer Member Into Pay Centre below Transfer Member.
The Transfer Member Into Pay Centre screen will be displayed.
Resolve Transfer
In cases where a Scheme has multiple Pay Centres, a member may have been transferred several times between Pay Centres, in different Payroll Cycles. This could result in the member still being linked to more than one Pay Centre. There is therefore a need to be able to easily resolve these transfers and to link the member to one Pay Centre only.
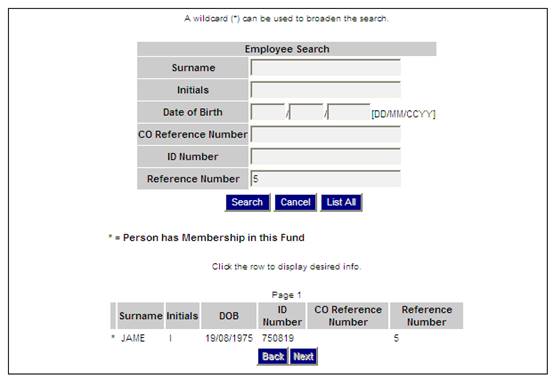
To find the Pay Centres to which a particular member is currently linked, capture the reference number of the member in the Reference Number field and click RESOLVE TRANSFER.
The screen will display all of the Pay Centres in which the Reference Number is currently found for the selected Cycle Date, at the bottom of the screen.
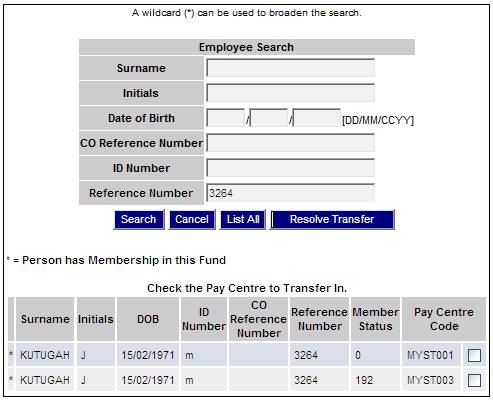
Place a tick in the appropriate tick-box to indicate the Pay Centre in which the member should reside.
Note:
An asterisk in the left column indicates that the person has a membership in this Fund.
When the tick box is ticked, the following message will be displayed:
Are you sure you want to resolve member reference ‘n’ for Pay Centre ‘abc’?
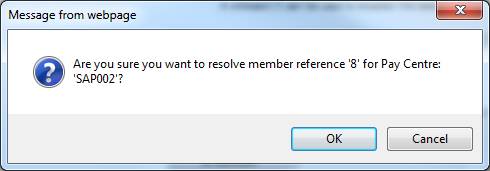
Click OK to remove the message and confirm that the selected member must be linked to the Pay Centre that has been ticked.
Note:
The member will be removed from the un-ticked Pay Centres.
Click LIST ALL. The screen will display a list of all members who are on the pay centre for the scheme, and who are available to be transferred in. Select the required member by clicking on the member's details in the list.
The Membership Transfer screen will be displayed.

Accept the Transfer In Date default of the 1st of the month, or change it to any other day of the month, if required, then click TRANSFER MEMBER INTO.
The Select Company Node Participating Employer Structures - Level (3) screen will be displayed, listing all the branches.
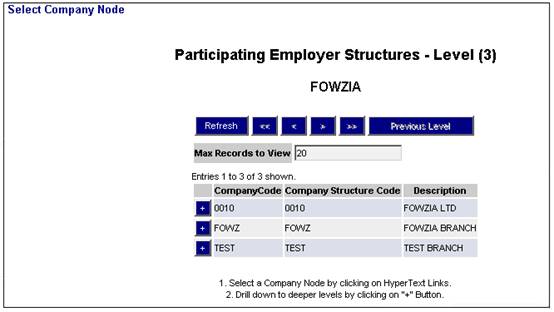
Click on the hyperlinked name of the required branch into which the member is to be transferred.
The Membership Transfer screen will be re-displayed.

A message will confirm that the member has been successfully transferred.
Click Bulk Member Transfer below Transfer Member.
The Bulk Member Transfer screen will be displayed.
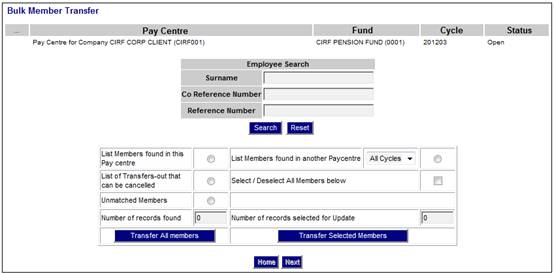
Use the List Members found in another Paycentre drop-down list (![]() ) to define whether this applies to all cycles or a specific cycle.
) to define whether this applies to all cycles or a specific cycle.
Use the radio buttons (![]() ) and tick box (
) and tick box (![]() ) to set the criteria and display the required members.
) to set the criteria and display the required members.
When the selections are made, the list of members will be displayed at the bottom of the screen, and the Total Found count field will display the total number of members found.
Note:
The Number of records selected for Update count field will be updated as selections and deselections of members are made.
Transfer members
To transfer all members click TRANSFER ALL MEMBERS.
To transfer only those members that have been selected, click TRANSFER SELECTED MEMBERS.
For either of these selections, a warning message will be displayed
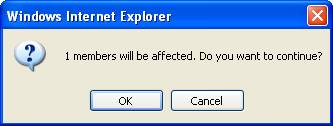
Click CANCEL to cancel the transfer, or click OK to confirm the transfer.
For more information, refer to Bulk Member Transfer under
Processes
Contributions
Payroll
Transferring Members between Pay Centres
Transfer via Keyboard Input
From the Data Capture menu, select Salaries and Contributions from the sub-menu on the left. The Select Company Node Participating Employer Structures - Level (3) screen will be displayed (level 3 is the company branch).
To display the associated pay centre, click the hyperlinked name in the Description column.
The Salaries & Contributions screen will be displayed.
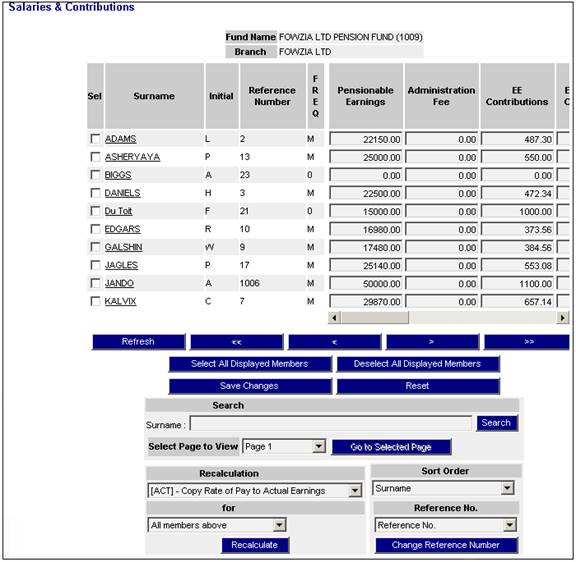
This screen shows details of all members who are existing or new as at the open cycle date (i.e. pensionable earnings, contributions, rate of pay, etc.)
Each member displayed has a pensionable earnings amount, but zero amounts may be shown for administration fee, EE contributions, ER contributions and rate of pay. You can change any of the details displayed on the screen.
Missing amounts can be calculated, or amounts can be recalculated based on the new pensionable earnings.
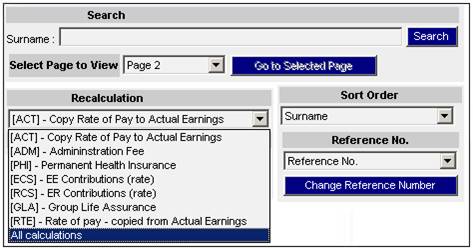
Select an option from the for drop-down list.
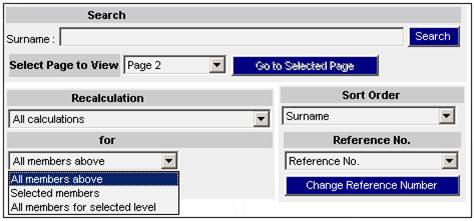
This defines the group of members for whom the calculations should be done. The following options are available from the drop-down list:
- All members above
- Selected members
- All members for selected level
Once the recalculation selections have been made, click RECALCULATE.
The Salaries and Contributions Change Confirmation screen will be displayed.
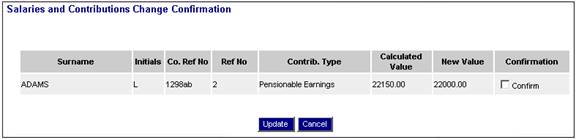
To confirm the changes made, tick the CONFIRM box in the Confirmation column alongside each member, then click UPDATE.
The Salaries & Contributions screen will be re-displayed, and the new values will be shown.
Note:
When an Income or Expense calculation is performed in Payroll, the system will read the values for Min Value (Minimum Amount) and Max Value (Maximum Amount) for the Income or Expense Type under Payroll > Fund Management > Categories > Rates (hyperlink). If a value is found, a check will be made to see if the amount calculated is greater than the maximum value or less than the minimum value. If it is greater than the maximum value, the amount calculated will be set to the maximum value. If it is less than the minimum value, the amount calculated will be set to the minimum value.
Similarly, if an amount is captured in Payroll, the system will read the values for Maximum or Minimum for the Income or Expense Type. If a value is found, the system will check if the amount captured is greater than the maximum value or less than the minimum value. If it is greater than the maximum value, the amount calculated will be set to the maximum value. If it is less than the minimum value, the amount calculated will be set to the minimum value.
From the Data Capture menu, click ![]() alongside Remittance on the sub-menu on the left. Additional options will be displayed.
alongside Remittance on the sub-menu on the left. Additional options will be displayed.
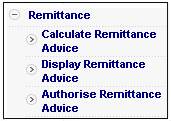
Click Calculate Remittance Advice below Remittance. The Calculate Remittance Advice screen will be displayed.

A message will confirm that the calculation is in progress.
Click Display Remittance Advice below Remittance. The Display Remittance Advice screen will be displayed.
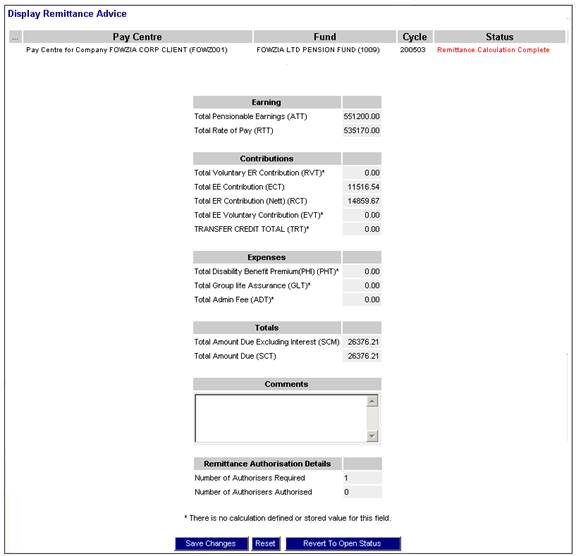
The Status column will indicate whether or not the remittance calculation is complete.
You can view the details displayed and see if the overall value adds up to the contribution amount received on the contribution schedule. You can decide whether to redo the remittance advice or to accept it. If the remittance advice is to be redone, click REVERT TO OPEN STATUS.
The Display Remittance Advice screen will be re-displayed.

A message will confirm that the fund has been reverted back to open status.
To accept the remittance advice, click SAVE CHANGES. The Display Remittance Advice screen will be re-displayed.

A message will confirm that the information has been saved.
In order to finalise the remittance advice, it must be authorised.
The remittance advice requires final confirmation.
Click Authorise Remittance Advice below Remittance. The Authorise Remittance Advice screen will be displayed.

Click CONFIRM.
The following is an example of a warning message that may be displayed, depending on the structure of the scheme.
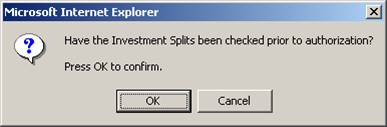
Click OK.
The Authorise Remittance Advice screen will be re-displayed.

A message will confirm that the remittance advice has been confirmed.
After authorisation of remittance advice, the premium amount deposited into the bank account must be receipted.
The accounting activity that will be used to receipt the money that was paid into the bank account will be DEPOSITALLOC
From the Main Menu select ACCOUNTING.
The Welcome screen will be displayed.

From the main menu on top, select Transaction Capture. A sub-menu will be displayed on the left.
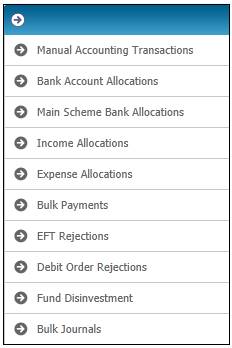
Select Bank Account Allocations.
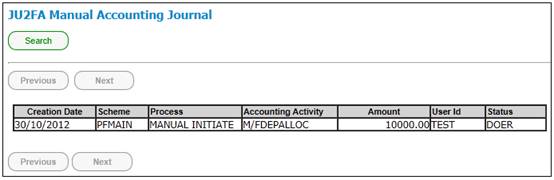
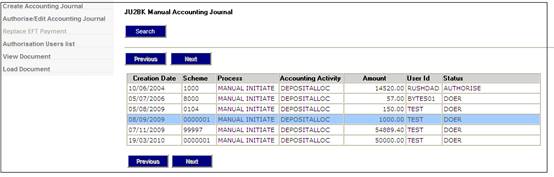
The JU2BK Manual Accounting Journal screen will be displayed.
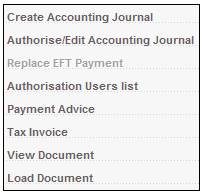
To create a new allocation, select Create Accounting Journal from the sub-menu on the left.
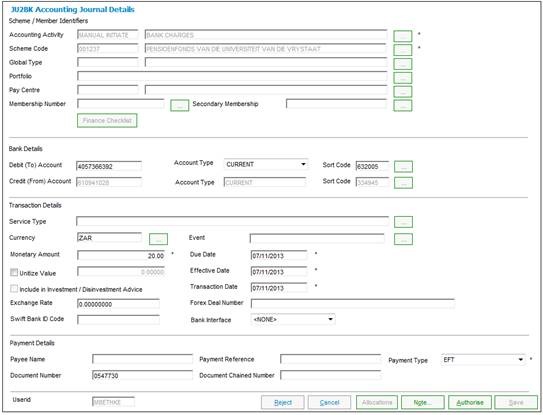
The JU2BK Accounting Journal Details screen will be displayed.
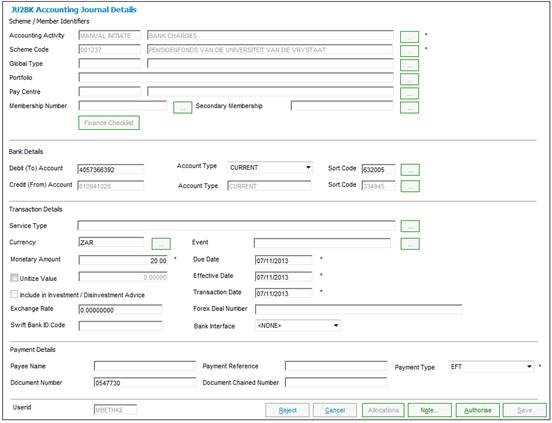
Descriptions of the required input fields on this screen appear below.
|
Scheme / Member Identifiers |
|
|
|
Accounting Activity |
The code and process associated to the selected accounting activity.
Click the LIST button at the end of the line and select DEPOSITALLOC from the list of activities displayed. |
|
|
Pay Centre |
Input pay centre details if the amount is for a specific pay centre.
Click the LIST button at the end of the line and select the appropriate pay centre. |
|
|
Finance Checklist |
Click the FINANCE CHECKLIST action button to display the Checklist.
Note: This action button will only be enabled when a Service Request for a Process of Finance is selected in My Work. For more information refer to My Work Process SR Finance
Supplements Tags Finance Checklist Income Checklist |
|
|
Bank Details |
|
|
|
Debit (To) Account |
For bank deposits – the account into which the money is deposited. |
|
|
Transaction Details |
|
|
|
Currency |
ZAR. |
|
|
Monetary Amount |
The total of the amount deposited into bank account. |
|
|
Due Date |
The date on which the transaction should have occurred e.g. 31/03/2011 |
|
|
Effective Date |
The date on which the financial implication of the transaction was expected or required to take effect. |
|
|
Transaction Date |
The date on which the business event occurred (e.g. date of deposit) |
|
|
Payment Details |
|
|
|
Document Number |
Reference number of bank deposit on bank statement. |
|
Once all the required data has been captured, click ALLOCATIONS. The JU2BK Accounting Activity Journal - Allocation List screen will be displayed.
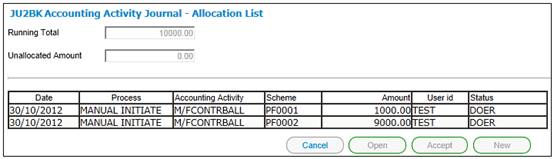
This screen displays the following details:
|
Running Total |
A cumulative total of the amounts that have already been allocated. |
|
Unallocated Amount |
The amount that still has to be allocated. |
The initial screen does not display any entries as no allocations have been made yet. The UNALLOCATED AMOUNT field will show the total amount to be allocated and the RUNNING TOTAL field will be 0.00, as no allocations have yet been made.
To add an allocation split, click NEW. The JU2BK Accounting Activity Journal screen will be displayed.

Descriptions of the required input fields on this screen appear below.
|
Allocation Activity Process |
The code and process associated to the selected allocation activity. Click the LIST button at the end of the line. Select CONTRIBALLOC from the list of activities displayed. |
|
Income / Expense Type |
The code and description of the selected income type. Click the LIST button at the end of the line and select the required income type, e.g. ECS for Employee Contributions and RCS for Employer Contributions. |
|
Due Date |
The date on which the transaction should have occurred. This date defaults to the due date captured on the previous screen. |
|
Effective Date |
The date on which the financial implication of the transaction was expected or required to take effect. This date defaults to the effective date captured on the previous screen. |
|
Amount |
The amount to be allocated in terms of the details provided on this screen. |
Once all the required information has been completed, click ACCEPT.
The JU2BK Accounting Activity Journal - Allocation List screen will be displayed.
Details of each amount allocated will be displayed on the screen. This information is updated as each allocation is made.
Continue the process until all allocations have been completed (i.e. the UNALLOCATED AMOUNT field will be 0.00 and the RUNNING TOTAL field will show the total amount to be allocated).
The following CONFIRMATION box will be displayed:
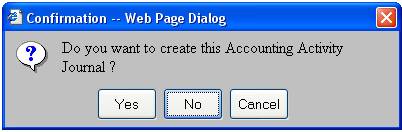
Click YES to confirm that an accounting activity journal must be created.
Once the allocation has been created, the transaction needs to be authorized.
From the JU2BK Manual Accounting Journal screen, highlight the required transaction in a DOER status and select Authorise/Edit Accounting Journal from the sub-menu on the left.
The JU2BK Accounting Journal Details screen will display.
To authorize the information, click AUTHORISE. The following Confirmation box will be displayed:

Click YES to authorise the Accounting Activity Journal, or click NO or CANCEL to cancel the request.
You also have the option to reject the transaction on this screen if you need to
Once you have authorised the transaction, the payroll process has been completed.
Umbrella Schemes
For information on the receipting of deposits for multiple sub-funds (Participating Employers) within an Umbrella Fund and the processing of a single payment at the Main Fund level for multiple Sub-Funds, refer to Main Scheme Bank Allocations under.
Accounting
Transaction Capture
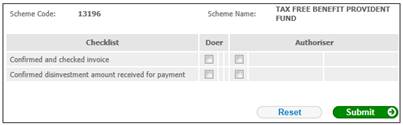
The payroll checklist allows the user to tick off a step in the monthly cycle process as and when it is completed.
The Payroll Checklist allows the user to tick off a step in the monthly cycle process as and when it is completed.
Select Payroll Checklist from the sub-menu on the left.
The following screen displays a Checklist with separate tick boxes for the Doer and the Authorizer.
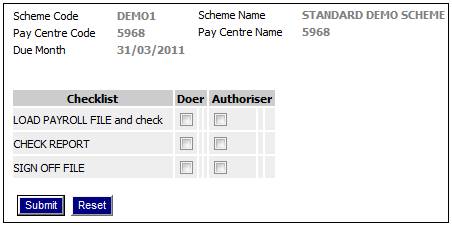
Click the appropriate boxes and click SUBMIT.
The User ID and Date Timestamp will be displayed.

Processing
When the Checklist screen is opened, the system will retrieve and display the data as per the Document Template, i.e. display the Heading and row per checklist item containing the text, tick box indicator, Date and Timestamp, and User ID.
If any item has been ticked previously then a value of Y will appear in the Tick column, the date and timestamp it was ticked in the Date column and the User ID of the person who ticked the item in the User ID column.
The data will be enabled for update.
Note:
If an item was ticked and then subsequently un-ticked, the Date and Timestamp will indicate that it was previously ticked and subsequently un-ticked. The Date and Timestamp will be that of the date and time it was un-ticked and the User ID will be that of the person who un-ticked it.