Select Payment Request from the sub-menu on the left.
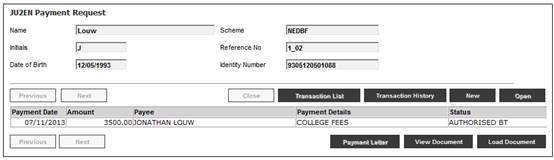
The JU2EN Payment Request screen will be displayed.
The user can create a Service Request in My Work with a Process of BENEFICIARY PMT, Activity Name of INITIATE and with the Scheme Code and Membership Number of the Beneficiary Fund Membership with a Status of BENEFICIARY and a Status of OPEN.
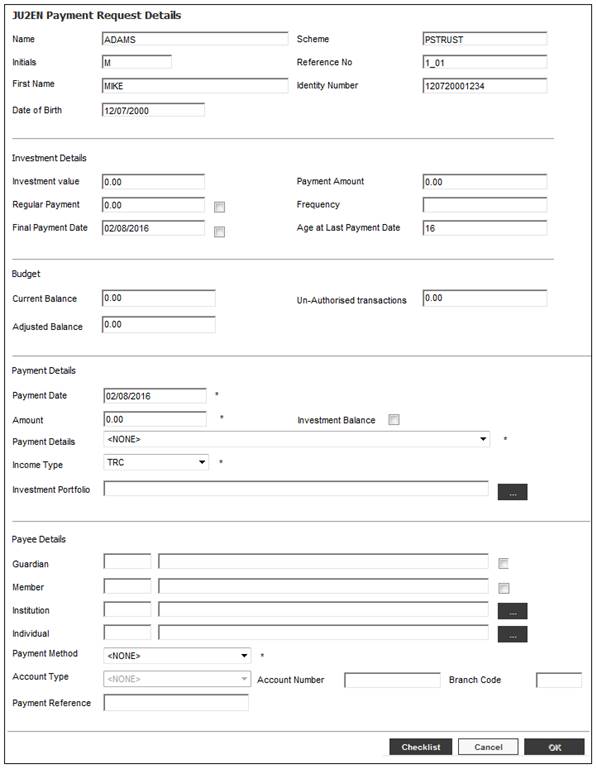
When the Service Request is selected and the Process Service Request menu option is selected, the JU2EN Payment Request Details screen will be displayed with the details of the Membership captured.
When the Submit button is selected and the pre-authorised BT’s have been created successfully, the Activity Name on the My Work Service Request will be updated to AUTHORISE PMT.
When a Service Request is selected on the My Work screen with a Process of BENEFICIARY PMT and an Activity Name of AUTHORISE PMT and the Process Service Request menu option is selected, the JU2EN Payment Request Details screen will be displayed with the details of the pre-authorised BT for the Membership captured.
When the BT’s have been created successfully the Status on the Service Request will be updated to COMPLETED.
To capture payment details, click NEW. The JU2EN Payment Request Details screen will be displayed.
Note:
Ad Hoc payments will not be able to be captured on the JU2EN Payment Request Details screen if the Membership Status in not BENEFICIARY.
Descriptions of the input fields on this screen appear below.
|
Budget |
|
|
Current Balance |
The member’s capital budget as at the current date. |
|
Adjusted Balance |
The adjusted balance is equal to the Current Balance minus the Un-Authorised Transactions. |
|
Un-Authorised transactions |
The value of all transactions awaiting authorisation. |
|
Payment Details |
|
|
Payment Date |
The date that payment must be effected.
Note: The value for this field will be defaulted to the current date and will not be enabled for update.
Mandatory |
|
Amount |
The amount to be paid. Mandatory |
|
Investment Balance (Tick Box) |
When the box is ticked, the system will determine the value of the member’s investment account and display this value in the Amount field.
If the Portfolio for which a balance is retrieved is a BONUS portfolio, the balance of the member’s INVESTMEMB account will be displayed.
If the Portfolio is UNITISED, the value will be calculated by multiplying the unit balance by the latest unit price.
If there are balances for multiple Portfolios the values will be summed. |
|
Payment Details |
Select the reason for the payment from the drop-down list. The following values are displayed for selection: BOARDING FEES BOOKS CASUAL CLOTHING COLLEGE FEES COMPUTER DISINVESTMENT EXCURSIONS INITIAL PAYMENT LUMP SUM MEDICAL EXPENSE OTHER SCHOOL FEES SCHOOL UNIFORM STATIONERY TERMINATION UNIVERSITY FEES
Note: The system will read the Benefit Package linked to the Benefit Event selected and calculate the benefit amount. The value for the Amount captured will be validated against the benefit amount calculated. If the amount is greater than the calculated value the following error message will be displayed:
The amount exceeds the allowable maximum payment.
Mandatory |
|
Income Type |
Select an Income Type from the drop-down list. |
|
Investment Portfolio |
Click the LIST button to flow to the JU1BV Scheme Portfolio List screen and select the required investment portfolio. All investment portfolios for which there is a balance for the member will be displayed. If no investment portfolio is selected, the payment amount will be disinvested according to the investment membership group split or scheme default split. Optional |
|
Payee Details |
|
|
Guardian |
If payment must be made to the guardian, tick the box on the right. The guardian’s name and account details will be displayed. |
|
Guardian (Tick Box) |
When the box is ticked, the system will populate the fields under Payee Details with the Guardian’s details. |
|
Member |
If payment must be made to the member, tick the box on the right. The member's name and account details will be displayed. Mandatory |
|
Member (Tick Box) |
When the box is ticked, the system will populate the fields under Payee Details with the Member’s details. |
|
Institution |
Click the LIST button at the end of the line. This links to the JU1AP Corporate Client screen. Optional |
|
Individual |
Click the LIST button at the end of the line. This links to the JU1BA Client List screen. Optional |
|
Payment Method |
Select the payment method from the drop-down list. If EFT is selected, the Account Type, Account Number and Branch Code will display the details on the Guardian’s Bank Account. Mandatory |
|
Account Type Account Number Branch Code |
Capture the account details Mandatory (if PAYMENT METHOD is EFT). Refer to Note below. |
|
Payment Reference |
A custom reference value for the transaction. |
Note:
- If the payee selected is the guardian, the details of the bank account linked to the guardian will be displayed.
- If the payee selected is the member, the details of the bank account linked to the membership will be displayed.
- If the payee selected is a corporate client, the details of the bank account linked to the corporate client will be displayed.
- If the payee selected is a natural person, the details of the bank account linked to the person will be displayed.
Checklist
When CHECKLIST is selected, the system will display the Document Template with a Template Type of CHECKLIST and a PDF Process of AD HOC PAYMENT.
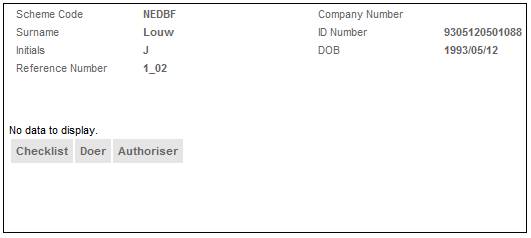
If no Checklist is found for the Scheme, the OK button will be enabled without validating that all of the items on the Checklist have been ticked.
Capture the relevant information, then click OK. The system will update the Activity Name on the Service Request to AUTHORISE PMT. The JU2EN Payment Request will be re-displayed.
If there is no bank account linked to any of the entities selected, an error message will be displayed.
To view existing payment details, highlight a line and click OPEN. The JU2EN Payment Request Details screen will be displayed.
Also refer to Beneficiary Static Data under
System Reports
Beneficiary Fund
MI
Note:
The doer will not be able to authorise or reject transactions.
To authorise or reject transactions, click TRANSACTION LIST. The JU2EN Payment Request Authorise screen will be displayed.
If a transaction is rejected the system will update Activity Name on the Service Request to INITIATE.
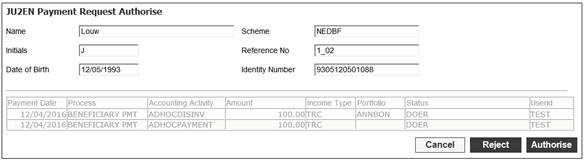
To authorise the transactions, click AUTHORISE.
The system will read the EFT cut-off time and if the current time is before the cut-off time, the BT’s will be created with a Due Date, Transaction Date and Effective Date equal to current date plus the value for Settlement Delay Days. If current time is after the cut-off time, the BT’s will be created with a Due Date, Transaction Date and Effective Date equal to the next working day immediately after the current date plus Settlement Delay Days, and the Payment Reference equal to the value captured.
To reject the transactions, click REJECT. The system will update the Activity Name on the Service Request to INITIATE.
Note:
Ensure a template has been loaded for the scheme. Refer to
Infrastructure
System Data
Document Templates
In order to view the payment letter, there must be a contact person linked to a participating employer. Refer to Contact person under
Infrastructure
System Entities
Corporate Client
To create the payment letter, click PAYMENT LETTER. The JU2EO Payment Advice screen will be displayed.

To upload documents, click LOAD DOCUMENT.
The Document Upload screen will be displayed.
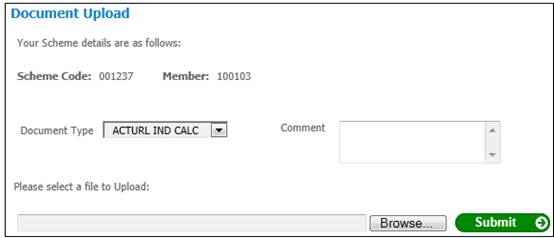
Click ![]() alongside Document Type, then select the required type of document to be loaded (e.g. Assessment, Claim Form, Quote, Underwriting etc.) from the drop-down list.
alongside Document Type, then select the required type of document to be loaded (e.g. Assessment, Claim Form, Quote, Underwriting etc.) from the drop-down list.
Capture any free form text about the document being uploaded in the Comment field.
Click BROWSE. This will allow you to search the available drives (user network or local) for the file to be loaded.
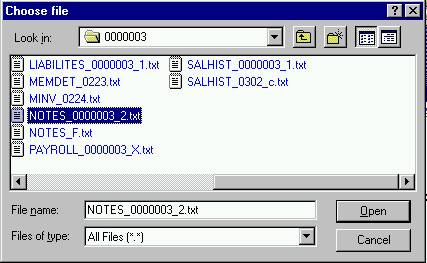
Highlight the required file, then click OPEN.
The file name will appear in the box. Click SUBMIT.
A message will confirm whether or not the upload was successful.

To view documents previously uploaded, click VIEW DOCUMENT. The Documents Uploaded screen will be displayed.
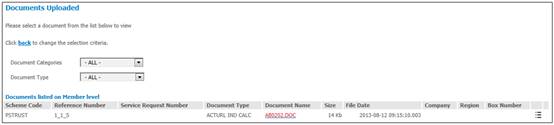
This screen displays any documents already uploaded.
Click ![]() alongside Document Categories, then select the required document category to be viewed (e.g. Accounting etc.) from the drop-down list. The Document Categories field value selected will determine which Document Types are displayed for selection.
alongside Document Categories, then select the required document category to be viewed (e.g. Accounting etc.) from the drop-down list. The Document Categories field value selected will determine which Document Types are displayed for selection.
Click ![]() alongside Document Type, then select the required type of document to be viewed (e.g. benefit letter, trust payment, claim form, tax directive, etc.) from the drop-down list.
alongside Document Type, then select the required type of document to be viewed (e.g. benefit letter, trust payment, claim form, tax directive, etc.) from the drop-down list.
The Document Type field values displayed for selection are determined by the Document Category selected in the Document Categories field.
Note:
The system will only display the document categories and document types relevant to the particular menu and to which the user has access.
Click the hyperlinked document name to view the document.
To capture Storage Information for the document, click ![]() at the end of the line.
at the end of the line.
The Storage Information screen will be displayed.
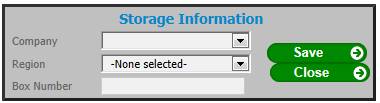
Capture information as follows:
|
Company |
Select a Company from the drop-down list. |
|
Region |
Select a Region from the drop-down list. |
|
Box Number |
The Box Number where the document is stored
This field is alphanumeric. |
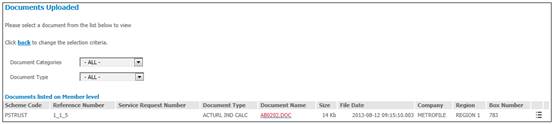
Click SAVE.
The Documents Uploaded screen will display the data captured in the Company, Region and Box Number fields.
For more information, refer to
Infrastructure
System Entities
File Storage Company