Log in to the system from the Logon page.
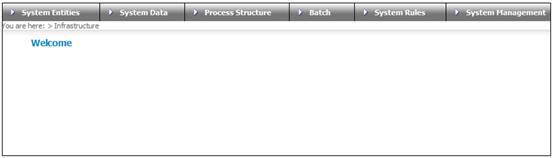
Click infrastructure.
The Welcome screen will be displayed.
From the main menu on top, select System Entities. A sub-menu will be displayed on the left.
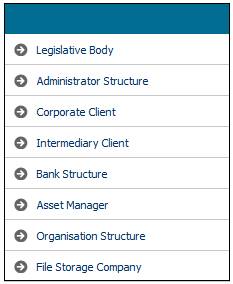
From the menu select Corporate Client. The JU1AP Corporate Client screen will be displayed.
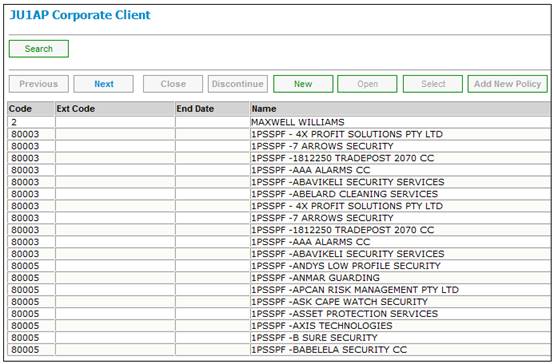
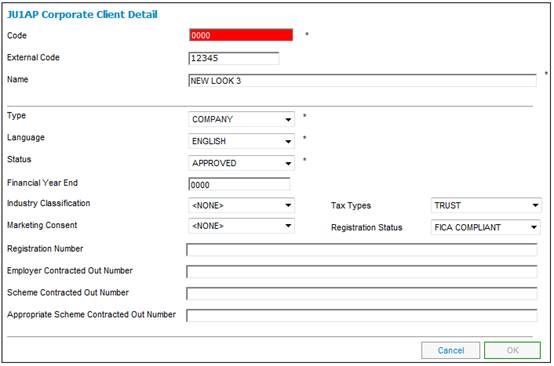
To add a new corporate client, select NEW. The JU1AP Corporate Client Detail screen will be displayed.
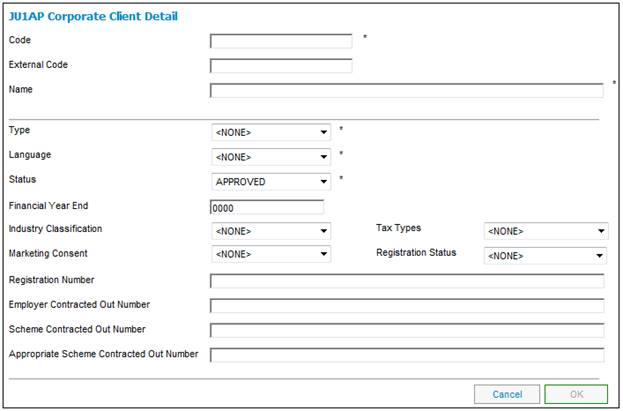
Capture the necessary client details. Set up all partners such as underwriters, intermediaries, clients and brokers.
Note:
An asterisk (*) alongside a field indicates that completion of that field is mandatory. The system will not process the screen until the required data has been provided.
Descriptions of the input fields on this screen appear below.
|
Client Details |
|
|
Code |
This should be a unique code that you will assign to the client. A maximum of 6 digits is allowed |
|
External Code |
The number identifying a Corporate Client or Person for external system purposes.
Optional |
|
Name |
The name of the Corporate Client |
|
Type |
The following options are available in the drop down box: - Accident - Assurer - Boiler - Building Plan - Clinic - Company - Elevator - Escalator - Factory - Insurance Co - Intermediary - Intermediary GP - Medical Aid - Reassurer - Scheme - Underwriter |
|
Language |
The following options are available in the drop down box: - English - Afrikaans - Xhosa |
|
Status |
Indicates if the Organization Unit is approved or if it has been blacklisted. Select one of the following values from the drop-down list: - APPROVED - BLACKLISTED |
|
Financial Year End |
Represents the Financial Year End of the Company |
|
Industry Classification |
The following options are available: - Financial Institution - Alcoholic Beverage - Advertise - Agriculture - Chem Oil Ind - Domestic - Education - Engineering - Financial Inst - Government - Health - IT and Telecom - Motor Ind - Other - Small Business - Textiles - Tourism - Union - Wholesale |
|
Marketing Consent |
Indicates whether a client has opted in or out for marketing information to be forwarded to them.
Select Yes or No from the drop-down list. |
|
Tax Types |
Indicates the type of entity for tax purposes.
Select a value from the drop-down list. E.g. COMPANY/CC, SOCIETY, TRUST. |
|
Registration Status |
Indicates if a company is FICA registered.
Select one of the following values from the drop-down list: EXEMPT FICA |
|
Registration Number |
Represents the Registration Number of the Company |
|
Employer Contracted Out Number |
The Employer Contracted Out Number for the termination of a contracted out product. |
|
Scheme Contracted out Number |
The Scheme Contracted Out Number for the termination of a contracted out product. |
|
Appropriate Scheme Contracted out Number |
The Appropriate Scheme Contracted Out Number for the termination of a contracted out product. |
Once the above information has been captured, click OK. The new client will appear on the JU1AP Corporate Client screen.
Validation
The System will validate the Type and Code, and if a Corporate Client already exists with the same Type and Code, the following message will be displayed:
A Corporate Client exists with the Code keyed in. Please change the Code and resubmit.
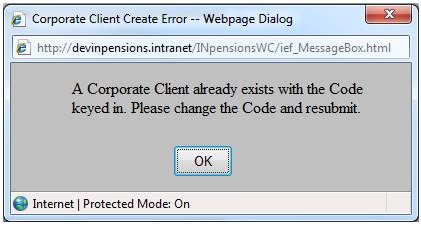
Click OK to remove the message.
The JU1AP Corporate Client Detail screen will be displayed with the Code field highlighted.
Change the Code and resubmit the new Corporate Client.
To add a new policyholder to a Corporate Client, highlight a Corporate Client and click ADD NEW POLICY. The Policyholder Details screen will be displayed.
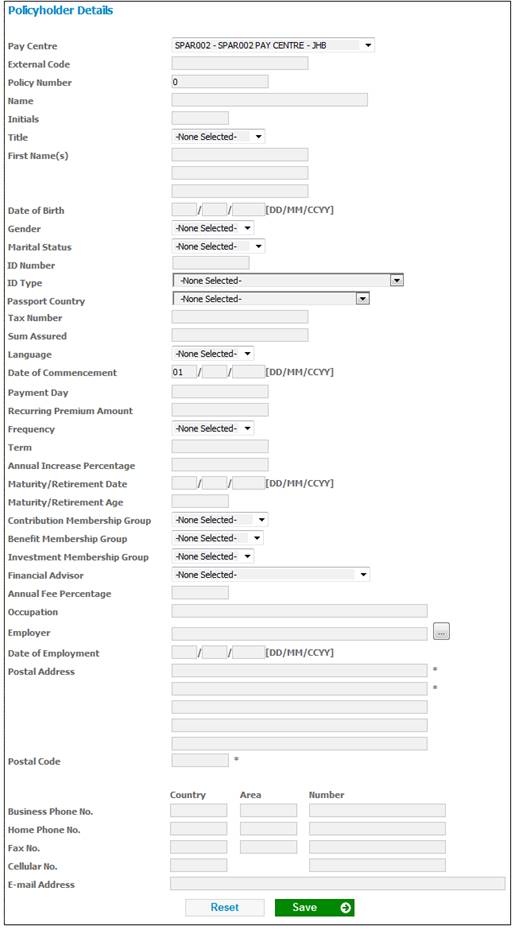
Descriptions of the input fields on this screen appear below.
|
Pay Centre |
The Pay Centre from which the policyholder’s contribution/ premium data is collected. Select a Pay Centre from the drop-down list. |
|
External Code |
The number identifying a Corporate Client or Person for external system purposes.
Optional |
|
Policy Number |
The number of the Policyholder. If this field is left blank, a number will be generated by the system. |
|
Name |
The policyholder’s name.
Note: If the Membership is linked to a Corporate Client, the Corporate Client Name will be displayed in this field |
|
Initials |
The policyholder’s initials. |
|
Title |
Select the required title for the policyholder from the drop-down box. |
|
First Name(s) |
The policyholder’s first names. |
|
Date of Birth |
The policyholder’s date of birth. |
|
Gender |
Select the policyholder’s gender from the drop-down box. |
|
Marital Status |
Select the policyholder’s marital status from the drop-down box. |
|
ID Number |
The policyholder’s identity number. |
|
ID Type |
Select the type of ID from the drop-down box. |
|
Passport Country |
The country which issued the Passport. Select a Country from the LIST.
This field is mandatory if the Identity Type selected is PASSPORT. |
|
Tax Number |
The Tax Number of the policyholder.
Optional |
|
Tax Status |
The status of the policyholder’s tax. Select a status from the drop-down box. The following values may be selected: · TAX EXEMPT · UNTAXED · TAXED · UNTAXED – EXEMPT FROM DIVIDENDS WITHHOLDING TAX · TAXED - EXEMPT FROM DIVIDENDS WITHHOLDING TAX |
|
Sum Assured |
The guaranteed maturity value that the Policyholder will receive when the policy matures.
Mandatory if Type of Fund is ENDOWMENT. |
|
Language |
Select the policyholder’s preferred language from the drop-down box. |
|
Date of Commencement |
The date on which this membership commences. |
|
Payment Day |
The day on which payments must be made.
Optional |
|
Recurring Premium Amount |
The recurring amount of premium that the policyholder will pay.
Optional |
|
Frequency |
The frequency of payments. Select a value from the drop-down list.
Optional |
|
Annual Increase Percentage |
The percentage by which an annuity must be increased annually.
Optional |
|
Term |
The term of a payment. |
|
Maturity / Retirement Date |
The date on which the Endowment Policy matures.
Optional |
|
Maturity / Retirement Age |
The policyholder age at which the Endowment Policy matures.
Optional |
|
Contribution Membership Group |
The membership group to which the policyholder is allocated for contributions. |
|
Benefit Membership Group |
The membership group to which the policyholder is allocated for benefits. |
|
Investment Membership Group |
The membership group to which the policyholder is allocated for investments. |
|
Financial Advisor |
Select the policyholder’s Financial Advisor from the drop-down box.
Note: The system will display a list of the Intermediaries linked to the Participating Employer to which the Member is linked. If the Membership is not linked to a Participating Employer or there are no Intermediaries linked to the Participating Employer, a list of all Organisation Units with an EXTERNAL ORG UNT value of INTERMEDIARY will be displayed. |
|
Annual Fee Percentage |
The annual fee percentage charged. |
|
Occupation |
The policyholder's occupation. Select a value from the drop-down box.
Optional field |
|
Employer |
The name of the Employer. Select an Employer from the drop-down list.
Optional field |
|
Date of Employment |
The date the policyholder commenced employment with the current employer.
Optional field |
|
Postal Address |
The policyholder’s postal address. |
|
Postal Code |
The postal code of the policyholder’s postal address. |
|
Business Phone No. |
The policyholder’s business phone number. |
|
Home Phone No. |
The policyholder’s home phone number. |
|
Fax No. |
The policyholder’s fax number. |
|
Cellular No. |
The policyholder’s cellular number. |
|
E-mail Address |
The policyholder’s e-mail address. |
Once all the necessary details have been added, click SAVE.
A confirmation message will be displayed.
Are you sure you want to save your changes?
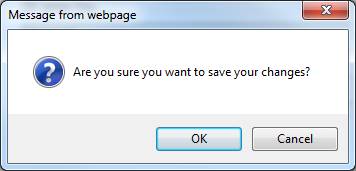
Click OK to confirm that the changes must be saved.
The Policyholder Details screen will be displayed, and a message will confirm that the data has been successfully captured.