
A payroll file can only be uploaded to the system in text format.
Text format requires that the correct spacing be defined so that the system reads the data from the correct starting point. However, a payroll file may be easier to define in excel format as excel only requires that the correct data be in the correct column.
The system has a facility that allows for a payroll file to be defined in Excel (xlsx) format and then converted to text with user defined masks.
For more information on creating a payroll mask, refer to Loading the Payroll File under
Processes
Contributions
Payroll
Payroll Processing and Field Conversion
Payroll files can therefore be defined in either text or excel format and then uploaded.
Payroll files in text format can be uploaded using the Payroll Load/Status menu selection.
Payroll files in excel format can be uploaded using the Payroll Load/Excel menu selection.
From the main menu on the top, select Data Capture.
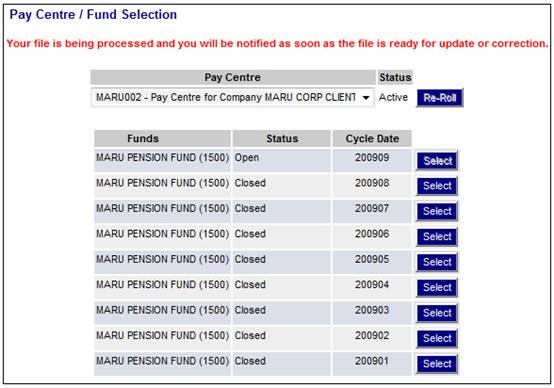
The Pay Centre / Fund Selection screen will be displayed.
Select the required pay centre from the drop-down list.
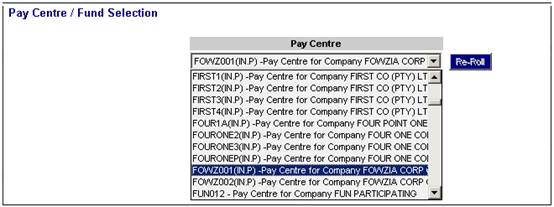
The selected pay centre will be displayed on the lower portion of the screen. Previous cycles will be listed, as well as the latest open cycle for the processing of data.
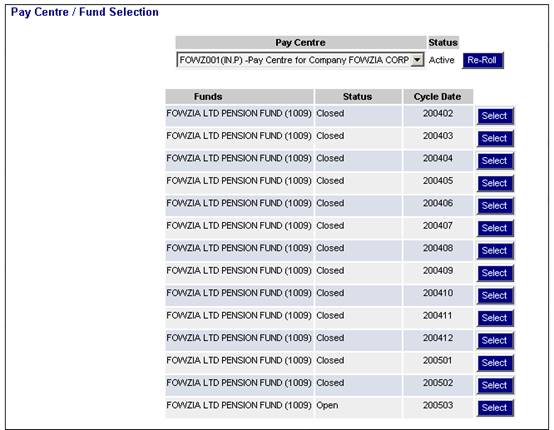
Select the latest open cycle by clicking SELECT alongside it. The Data Capture Summary screen will be displayed.
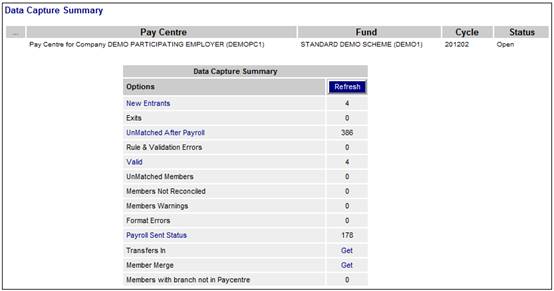
Prior to loading the payroll / conversion data, this screen will show no values.
Workflow
The View Data Capture Summary screen will not be displayed if either the Global Parameter or the Scheme Parameter for WORKFLOWENABLED has been set and the Parameter is equal to YES. This is because the Contribution Process has been switched off on Core and can only be accessed through My Work.
For more information, refer to the Switch off Core for Benefit Payment and Contribution processes section under
Product Launch Requirements
Additional Menu Options
Parameters
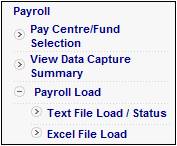
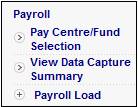
To upload payroll files in text format, click ![]() alongside Payroll Load on the sub-menu on the left. Select Text File Load / Status when the additional options are displayed.
alongside Payroll Load on the sub-menu on the left. Select Text File Load / Status when the additional options are displayed.
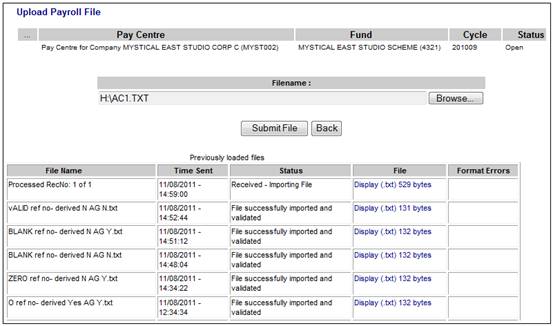
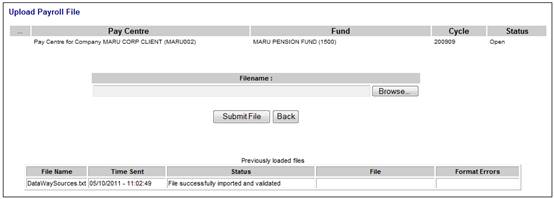
The Upload Payroll File screen will be displayed.

The message in the Status column displays the current status of payroll files upload in text format.
Click BROWSE. This will allow you to search the available drives (user network or local) for the file to be loaded into the selected pay centre.
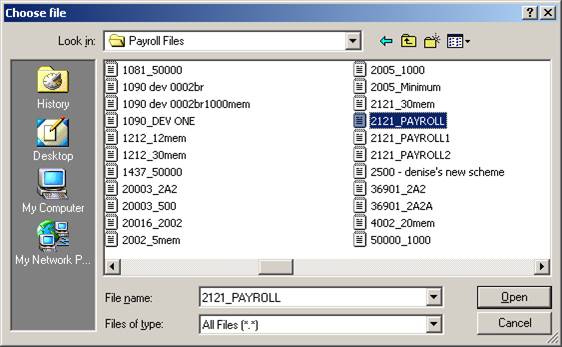
Highlight the required file, then click OPEN.
The file name will appear in the Filename: box. Click SUBMIT FILE.
The Pay Centre / Fund Selection screen will be displayed with the message:
Your file is being processed and you will be notified as soon as the file is ready for update or correction.
Once the file has been processed, the Upload Payroll File screen will display the message File successfully imported and validated in the Status column.
To define a payroll file in excel format and upload it in text format, click ![]() alongside Payroll Load on the sub-menu on the left. Select Excel File Load when the additional options are displayed.
alongside Payroll Load on the sub-menu on the left. Select Excel File Load when the additional options are displayed.
The Payroll Excel Upload screen will be displayed.
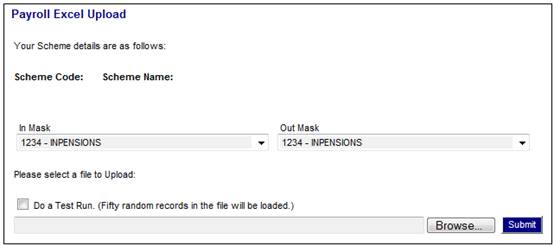
This screen consists of an In Mask and an Out Mask.
Each Mask may be selected from a list of predefined Masks available from the respective drop-down list.
An excel spreadsheet in Microsoft Office Excel 2007 must be selected for upload using BROWSE.
The Mask selected from the In Mask drop-down list maps to the excel spreadsheet being uploaded.
The Mask selected from the Out Mask drop-down list is the format that the excel file will be converted to for the upload.
Note:
A text file requires a field to have a Start Position and a Width so that the length of the field is exact. If the same field in excel is different, the Out Mask will automatically change it to the correct length.
When SUBMIT is selected, the In Mask selected will convert the excel data selected for upload to the required txt format using the Out Mask selected.
Note:
The system provides the facility to load a test file and perform a test run (the selection of this is optional).
To perform a test run place a tick in the tick-box. The file already specified will be used by the system. A random selection of 50 records will be made by the system and processed.
To view the results of the upload, select View Data Capture Summary from the sub-menu on the left.
The Data Capture Summary screen will be displayed.
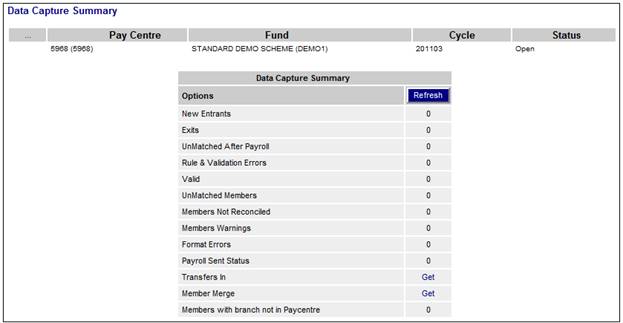
A message confirms that the file is being processed.

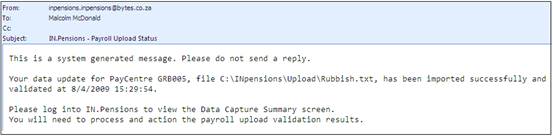
The user linked to the pay centre will receive an e-mail advising that the file submitted has been received.
Return to the Data Capture Summary screen.
Note:
If a payroll file is loaded and has one or more rows at the bottom that do not have mask codes, these will be ignored when the file is uploaded.
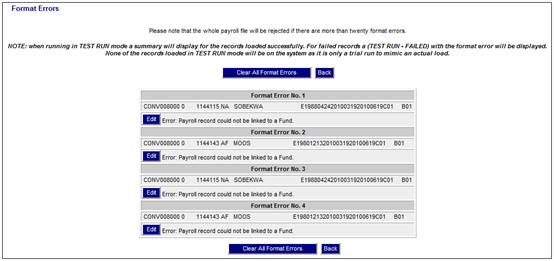
To view any errors, click the hyperlinked Format Errors. The Format Errors screen will be displayed.
Note:
When running in TEST RUN mode a summary will display for the records loaded successfully. For failed records a (TEST RUN - FAILED) with the format error will be displayed.
None of the records loaded in TEST RUN mode will be on the system as it is only a trial run to mimic an actual load.
This screen allows you to correct the errors displayed. Once all of the errors have been corrected, you can continue with the process. However, if you choose to rather make the changes into your original file and then upload the data again, click CLEAR ALL FORMAT ERRORS. All format errors will be removed and the system will return to the Data Capture Summary screen. The Format Errors item on the Data Capture Summary screen will no longer be hyperlinked.
If you choose to correct the errors displayed on the Format Errors screen, please note the following details displayed for each error:
Each error is displayed in 3 sections:
Example

The first section displays the number identifying the error.
![]()
The second section displays the text in the actual text file.
![]()
The third section displays an Edit button and text describing the error.
![]()
To edit an error in the text file, click EDIT.
The Fix Format Error screen will be displayed.
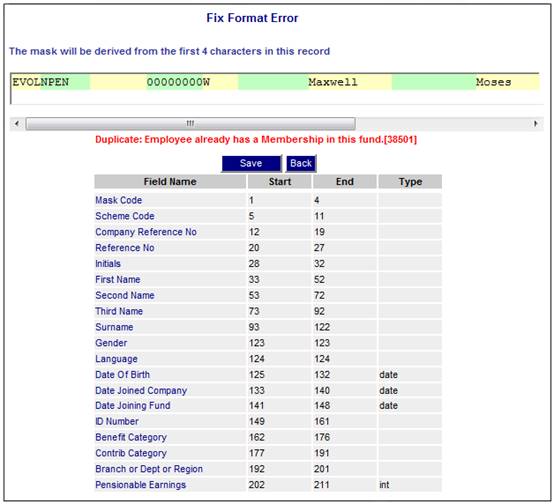
This screen displays the actual text data for the selected member and allows you to edit the text. When the text has been modified and the change has been saved, the system will validate the changes and if no errors are found for that member, the member will be removed from the Format Errors screen.
The Fix Format Error screen displays the following:
The top line displays the actual text in the text file for the selected member.
![]()
The horizontal scroll bar can be used to display all text.
![]()
If the text is displayed in more than one line, use the vertical scroll bars on the right to navigate between the upper and lower lines of text.
![]()
The error message is displayed below the scroll bar.
![]()
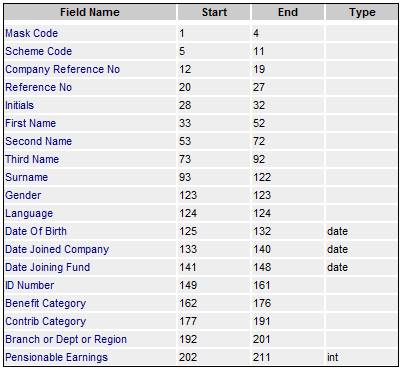
The complete Mask defined for the text file is displayed.
The text in the text file can be edited on the screen. Fields can be modified by adding or deleting text directly into the text file.

If you are not sure of the position of the text field or fields that are to be edited then rather select the required field in the Mask to establish its exact position. Click on the name in the Field Name column to highlight the text.
Example 1
Select Date OF Birth from the Mask.
![]()
The field is highlighted in red in the text file.

Example 2
Select Company Reference No from the Mask.
![]()
This member does not have a value for Company Reference No. The position of the field is highlighted in red in the text file.

Note:
When adding text or spaces to any field, whether a value is currently displayed or not, ensure that the text is aligned to the left.
When text is added or deleted, the text in the fields to the right are increased or decreased by the same number of spaces. If this is not corrected, then the data on the right will be in the incorrect position. Ensure that you always decrease these spaces by the same number before saving the changes.
Example
If no company reference number is displayed and you want the value to be 14379648:
Locate the position of the field in the text file.
![]()
Capture the text into the field.
![]()
Delete the additional spaces created.
![]()
Once the necessary editing has been completed, click SAVE.
The system will return to the Format Errors screen.
If the update is valid, then the member will no longer be displayed in the list of format errors.
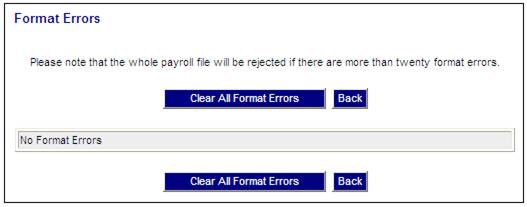
When all of the format errors have been corrected, the Format Errors screen will display the message:
No Format Errors
Example:
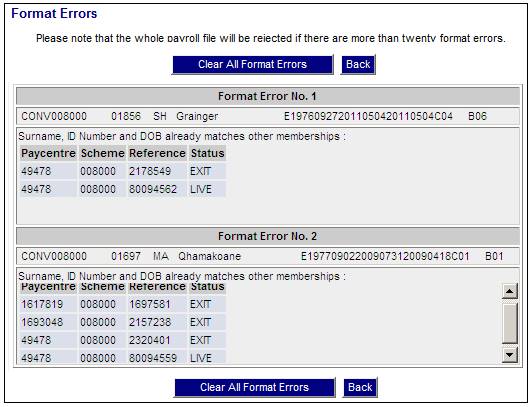
The members displayed on this screen will appear when the membership is not EXIT FINALISED on the system.
- When the other memberships are all EXIT CONFIRMED on the system, then the last remaining LIVE membership will be selected automatically.
- When there is more than one membership that is LIVE (not EXIT FINALISED), the format error above applies (shows the multiple membership).
- When there are no more LIVE membership (i.e. all memberships are EXIT FINALISED), a new reference number is created.
For a complete list of format error messages and how to correct them, refer to Format errors and how to correct them below.
Under certain error conditions a fatal error may be encountered with a particular record in the middle of an upload. The upload will stop and subsequent records will be ignored. A message will be written to the error log. The following messages will be written when such a situation arises:
- On the Data Capture Summary screen, the message UPLOAD INTERRUPTED BY FATAL ERROR. SEE ERROR LOG will be displayed.
- On the Upload Payroll File screen, the message UPLOAD INTERRUPTED BY FATAL ERROR. SEE ERROR LOG will be displayed.
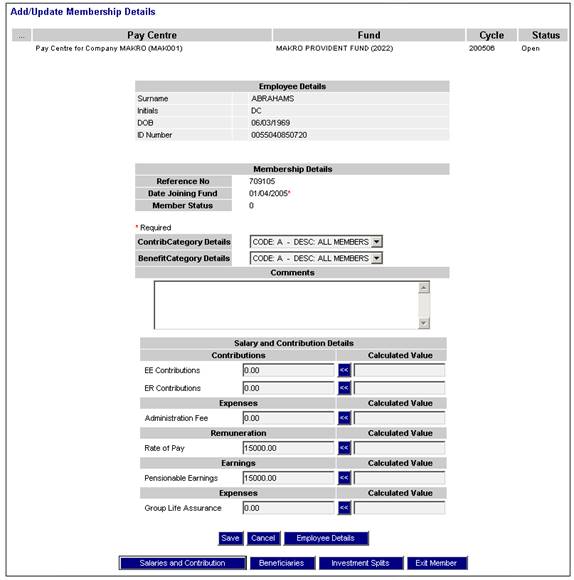
The data that has been loaded via the payroll process will now have been validated against scheme rules and the various fields will have been translated with the conversion values.
The following is a sample of the payroll take-on data file layout that was used to load data for the above fund and pay centre:
12341021 000100018009306107080 00011101FENDRO O 19800930010000000000 E2004010120040101FWMY02BA0001000000+MN 000000000000000020040131001000000+00050000+00100000+00000000+00000000+00000000+00000000+00000000+00000000+ 00000000
If it is not important to record the transaction date, then this file can be used to take on the members' values. The transaction date will be set to the actual date that the transactions are created within the ledger. The transaction date for unitized schemes is used to calculate the market/unit value.
In addition, any members on the payroll file who have a reference number of 00000000 will be treated as new entrants, and a reference number will automatically be allocated from the predefined range. This will only happen, however, after the system successfully validates that the member's surname, initials and date of birth combination (and the ID number, if on the payroll record) do not already exist on the client database. Refer to Pay centre reference numbers and payment method under
Product Launch Requirements
Company Structure and Initial Load
Initial Load
The above process will also apply to schemes that have an alternate fund code. Refer to
Product Launch Requirements
Company Structure and Initial Load
Company Structure Setup
The following is an example of a member's screen showing the data that will display after the payroll file has been loaded:
Note:
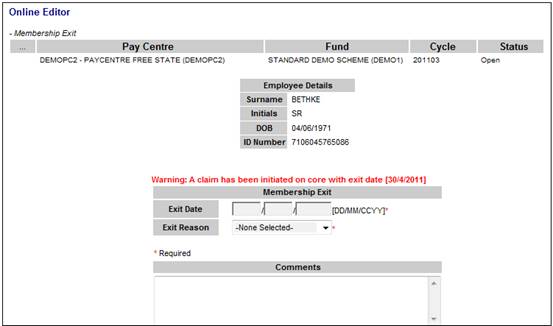
The Exit process on Payroll will check on Core whether a claim is in process on Core and show a Warning message if it is.
Data can be reset to the previous cycle's data. This can only be done during the first open cycle, i.e. before the remittance calculation process has been done.
To reset the data back to the last closed cycle, click RE-ROLL. A warning message will be displayed.
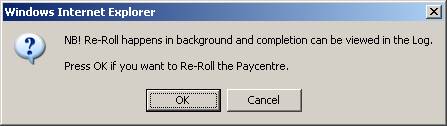
Click OK to continue.