This activity enables you to maintain records of the intermediaries.
These intermediaries may be brokers, unions, employer provincial regions, etc.
From the System Entities menu on the top, select Intermediary Client from the sub-menu on the left.
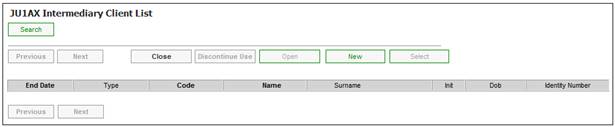
An empty JU1AX Intermediary Client List screen will be displayed.
To populate the screen with Intermediary data, click SEARCH, and the JU1AX Search Criteria screen will be displayed

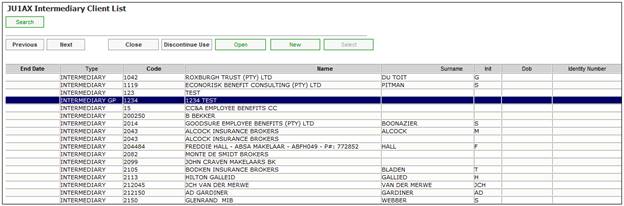
After the selection has been made, the JU1AX Intermediary Client List screen will be redisplayed with the data selected.
To add a new intermediary client, click NEW. The JU1AX Intermediary Client Detail screen will be displayed.
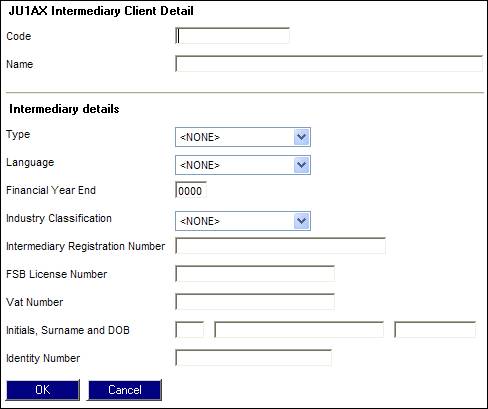
Descriptions of the input fields on this screen appear below.
|
Client Details |
|
|
Code |
External organisation unit code supplied by the intermediary. |
|
Name |
Intermediary's legal name |
|
Intermediary Details |
|
|
Type |
Intermediary or intermediary group. Select from the drop down box. |
|
Language |
The language in which the Intermediary operates. Select from the drop down box. |
|
Financial Year End |
The month and day of the financial year end of the intermediary. |
|
Industry Classification |
The industry in which the intermediary operates. Select from the drop down box. |
|
Intermediary Registration Number |
Client company legal registration number |
|
FSB License Number |
The FSB license number of the intermediary or intermediary group. |
|
VAT Number |
The VAT number of the intermediary or intermediary group. |
|
Initials, Surname and DOB |
The initials, surname and date of birth of the individual intermediary. |
|
Identity Number |
The identity number of the individual intermediary. |
Once all the necessary details have been added, click OK.
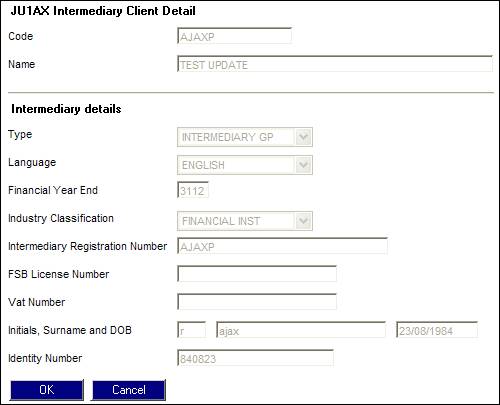
To view the intermediary details, highlight the required intermediary, then click OPEN. The JU1AX Intermediary Client Detail screen will be displayed.
From the JU1AX Intermediary Client List screen, click DISCONTINUE USE. The JU1AX Intermediary Client Details screen will be displayed.
Click OK. You will be asked for confirmation.
When use of an intermediary client is discontinued, an end date will be displayed on the Intermediary Client List screen.
You can list all the bank accounts for an intermediary. There are facilities to capture and update account details and to set the account limits.
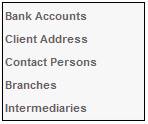
From the JU1AX Intermediary Client List screen, select Bank Accounts from the sub-menu on the left.
The JU1CN Bank Account List screen will be displayed.
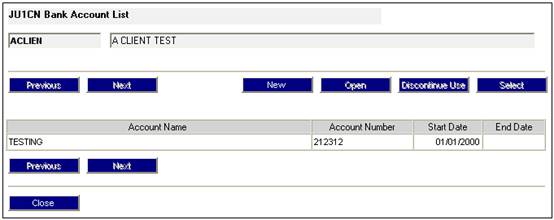
From the JU1CN Bank Account List screen, click NEW. The JU1CN Bank Account Details screen will be displayed.
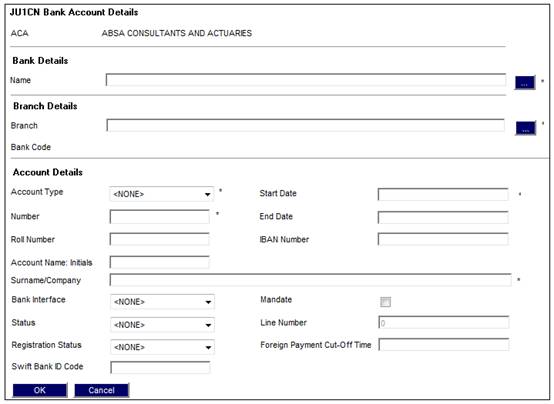
Descriptions of the input fields on this screen appear below.
|
Bank Details |
|
|
Name |
Call Bank List (i.e. List of Banking Institutes) to select from (See Bank Structure section) Links: With reference to the section Bank Details, the Bank List and Bank Branch Info must be set up in SYSTEM DATA>BANK STRUCTURE |
|
Branch Details |
|
|
Branch |
Call Bank Branch Info List (i.e. List of Branch(es) linked to Bank) to select from (see Bank Structure section) |
|
Bank Code |
Populated as a result of the call made for the branch in Branch details. |
|
Account Details |
|
|
Account Type |
Type of operating account, e.g. Current Account or Savings Account. |
|
Number |
Bank account number The Account Type and Account number must be checked to be correct as allocated by the bank. This data is used in "downstream" processes making or receiving payments and should it fail validation against the bank then the payment will NOT take place. |
|
Roll Number |
The Building Society Roll Number.
Note: If the Account Type selected is BUILDING SOCIETY, then Roll Number will be enabled for capture. This field will accept special characters.
This field has a sort code of 6 digits and an account number of 8 digits, and in addition a roll number of 15 characters, 5 digits followed by a forward slash and then 10 digits e.g. 0505/1111111111. The forward slash can be captured anywhere in the number. |
|
IBAN Number |
International Bank Account Number. |
|
Start Date |
Effective date from which account can be used |
|
End Date |
Date of termination of the use of the account |
|
Account Name: Initials |
The initials of a person who is the account holder. |
|
Surname/Company |
The surname of a person who is the account holder, or the name of the Company who is the account holder. |
|
Bank Interface |
The bank interface service that must be used for this bank account. The drop down box displays a list of the different types of services available, i.e. Barclays Kenya, Barclays Zambia, Cashfocus, Nedinform, CPS, ACB, LDC, CPY, FNB Online, BIB, etc. |
|
Mandate |
A tick in this box indicates that a Mandate agreement is in place with this client, allowing the client to collect funds from this Bank Account. Note: This field is only enabled if the Bank Interface selected is Nedinform. |
|
Line Number |
In cases where a Mandate exists, the Line Number is used by the Bank to identify the bank account to be used when processing EFT’s (Electronic fund transfers) between banks. This is a form of authorisation that the Client uses to approve the movement of funds from their Client. This number must be checked to be correct as allocated by the bank. The number is used in downstream processes making or receiving payments, and should it fail validation against the bank, payment will NOT take place. Note: In the case of regular payments to a foreign bank, e.g. annuity payments, this field will be used for the number used by the bank for the set up of the member’s banking details. In the case of UK this is known as the Line Sheet Number. |
|
Status |
The status of the account holder validation, e.g. NOT VALIDATE, VALIDATED, REJECTED, USER VALIDATED, etc.
When any of the fields on the bank account record are updated, the status field will be updated to NOT VALIDATED.
Only needed if BANK INTERFACE is LDC.
Note: The account holder validation (AHV) via LDC only validates account numbers for ABSA, First National Bank (FNB) and Standard Bank (SBSA). Where the account is held at any other bank, the status will be able to be updated to MANUAL VALIDATE and the user ID of the person who updated the status will be displayed. The authorizer can take this into account when checking the status of the account. |
|
Registration Status |
The FICA registration status of the bank account. |
|
SWIFT Bank ID Code |
Society for Worldwide Interbank Financial Telecommunication Bank Identifier Code.
Note: This field is 15 characters long and can be alphabetical or numerical. |
|
Foreign Payment Cut-Off Time |
The cut-off time for foreign currency payments. |
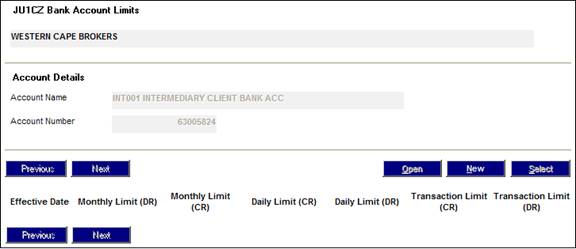
You can list all the limits for the selected bank accounts for an intermediary. There is a facility to capture and update account limit details.
From the Bank Account List screen, highlight the required account, then select Account Limits List. The JU1CZ Bank Account Limits screen will be displayed.
From the JU1CZ Bank Account Limits screen, click NEW. The New JU1CZ Bank Account Limits screen will be displayed.
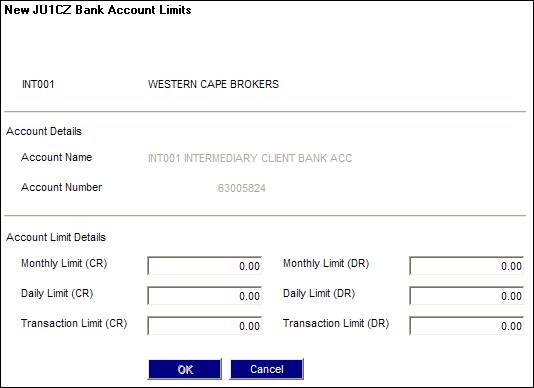
Descriptions of the input fields on this screen appear below.
|
Account Holder |
Name of the registered account holder. |
|
Account Details |
Account holder and account number. |
|
Account Limit Details |
|
|
Monthly limit (CR) |
Account Limit Credit value. |
|
Monthly limit (DR) |
Account Limit Debit value. |
|
Daily Limit (CR) |
Account Limit Credit value. |
|
Daily Limit (DR) |
Account Limit Debit value. |
|
Transaction limit (CR) |
Account Limit Credit value. |
|
Transaction limit (DR) |
Account Limit Debit value. |
Refer to Corporate client - client address under Corporate Client.
Refer to New corporate client address details under Corporate Client.
Refer to Corporate client pay centre under Corporate Client.
Refer to New pay centre under CorporateClient.
Refer to Contact person under Corporate Client.
Refer to New contact person under Corporate Client.
Refer to Corporate client contact persons under Corporate Client.
The facility to set up a separate branch structure for all Intermediaries or Intermediary Groups.
From the JU1AX Intermediary Client List screen, select Branches from the sub-menu on the left.
Note:
This menu item will only be enabled for selection if the Intermediary selected is an Intermediary Group i.e. the value for External Organisation Unit is INTERMEDIARY GP.
The JU1DV Client Relationship Select screen is displayed.
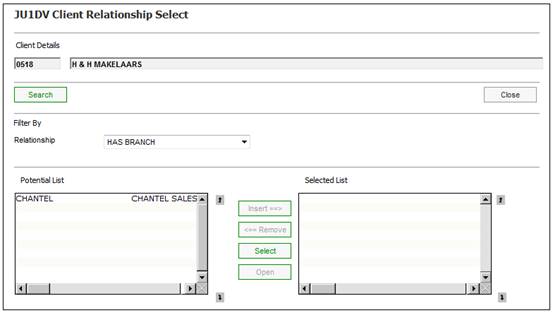
This screen displays a list of the Organisation Units for which the value for EXTRNL ORG UNT is SALES BRANCH.
Capture details as follows:
|
Filter By |
|
|
Relationship |
Select a value from the drop-down list to display the specific relationship for which Organisation Units must be displayed in the Potential List column.
e.g. If Relationship = Broker is selected, a list of Brokers will be displayed. |
|
Potential Users |
Select on one or more Organisation Units and click INSERT or REMOVE. |
|
Selected Users |
Select on one or more Organisation Units and click INSERT or REMOVE. |
Once the intermediary details have been set up, the intermediary must be associated to an intermediary company.
From the JU1AX Intermediary Client List screen, highlight the required intermediary group (i.e. the client with a type of INTERMEDIARY GP), then select Intermediaries.
The JU1DV Client Relationship Select screen will be displayed.
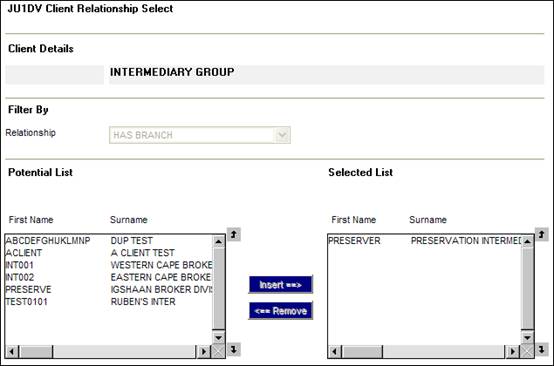
The Potential List pane on the left displays all the intermediaries that are available for selection. Highlight the required intermediary and click INSERT.
The Client Relationship Details screen will be displayed.
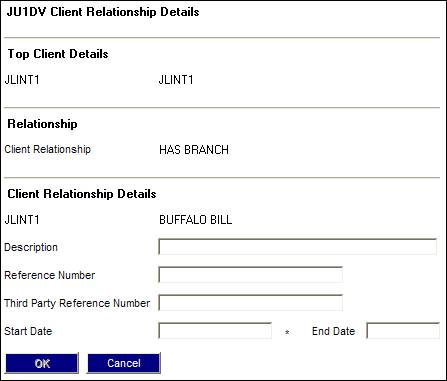
Descriptions of the input fields on this screen appear below.
|
Description |
A description of the relationship. |
|
Reference Number |
A reference number applicable to the relationship. |
|
Third Party Reference Number |
Not currently in use. |
|
Start Date |
The date the relationship commenced. |
Once all the necessary details have been added, click OK. The JU1DV Client Relationship Select screen will be re-displayed, showing the selection in the Selected List on the right.
To view relationship information, from the Client Relationship Select screen, highlight the intermediary group in the Selected List on the right, then select File>Open from the menu on the left. The Client Relationship Details screen will be displayed.
To remove an intermediary, highlight the intermediary in the Selected List pane on the right and click REMOVE.
The JU1DV Client Relationship Details screen will be displayed.
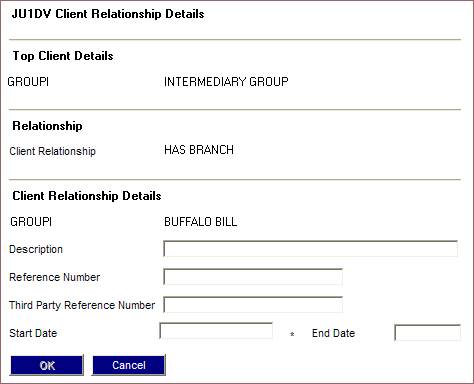
Enter the END DATE, then click OK. The Client Relationship Select screen will be re-displayed, showing the selection in the Potential List on the left.