When the remittance advice has been authorised, an e-mail is sent to designated users to inform them that there are contributions to be processed (done by administrator's staff only).
The status for the current cycle month is changed to "closed".
Member data and money will be collected by an automated scheduled batch job run.
When the batch run has been successfully completed, the designated user will authorise the movement of the data and monies.
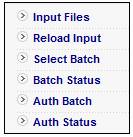
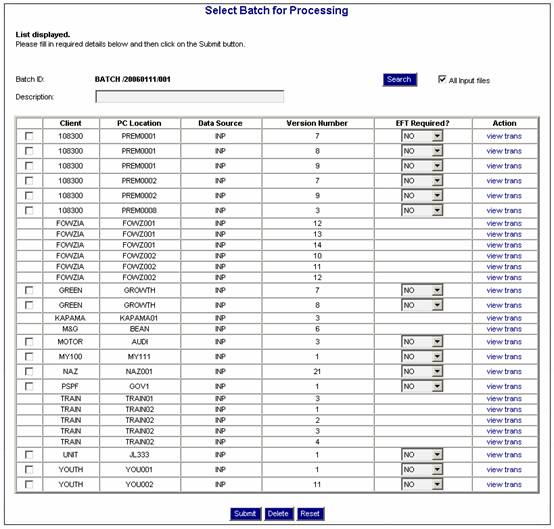
From the Income menu, select Select Batch from the sub-menu on the left.
The Select Batch for Processing screen will be displayed.
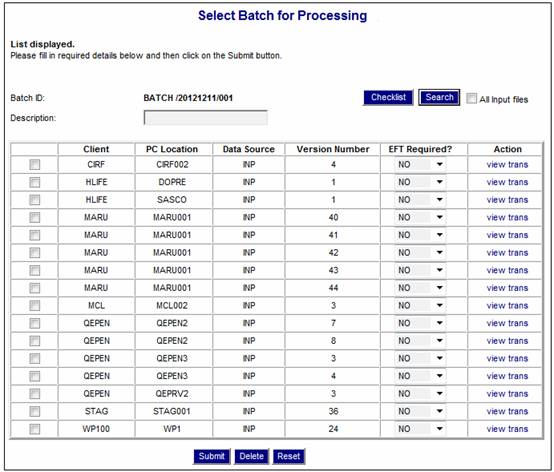
To view the Checklist, click on the tick box to select a single batch and click CHECKLIST.
The Checklist allows the user to tick off a step in the process as and when it is completed.
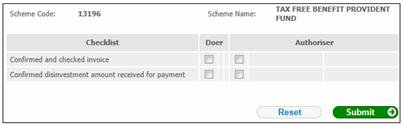
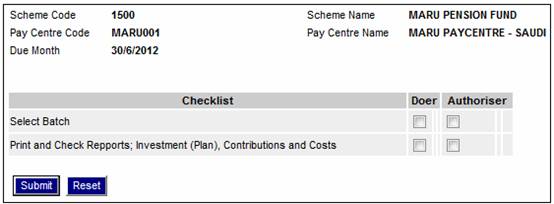
The following screen displays a list of Checklist items with a tick box for the Doer and the Authoriser.
If CHECKLIST is selected but none of the batch tick boxes were selected, the following message will be displayed:
No batches selected. Only one batch must be selected to continue with Checklist.

Click OK to remove the message. Select a single batch and click CHECKLIST.
If CHECKLIST is selected and more than one of the batch tick boxes were selected, the following message will be displayed:
More than one batch selected. Only one batch must be selected tp continue with Checklist.

Checklist processing
When the Checklist screen is opened, the system will retrieve and display the data as per the Document Template, i.e. display the Heading and row per checklist item containing the text, tick box indicator, Date and Timestamp, and User ID.
If any item has been ticked previously then a value of Y will appear in the Tick column, the date and timestamp it was ticked in the Date column and the User ID of the person who ticked the item in the User ID column.
The data will be enabled for update.
Note:
If an item was ticked and then subsequently un-ticked, the Date and Timestamp will indicate that it was previously ticked and subsequently un-ticked. The Date and Timestamp will be that of the date and time it was un-ticked and the User ID will be that of the person who un-ticked it.
To view details of the contents of the files, click view trans in the Action column. The Input Transactions screen will be displayed.
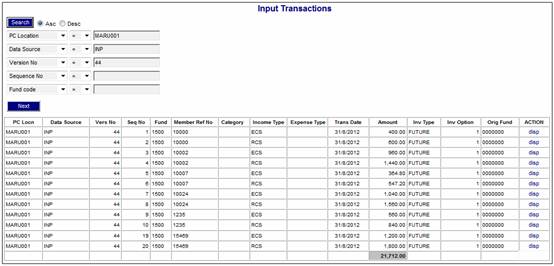
This screen displays the details of each member in the file selected.
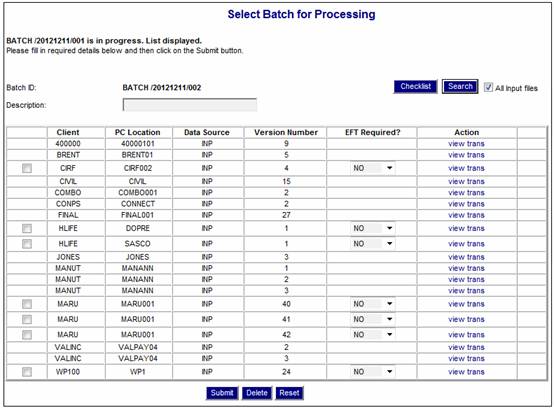
Once the file data for the batch run has been viewed, return to the Select Batch for Processing screen.
To submit the batch run:
- Tick the relevant check box to specify the client
- Select a value from the drop-down box in the EFT Required? This column defaults to NO which is the required selection for your process.
Once the screen selections have been made, click SUBMIT on the screen. The following message will display
Are you sure you want to Submit selected batches?

Click OK to continue
The Select Batch for Processing screen will be displayed.
You have the option to Delete or Reset the transaction if required.
After the file has been submitted, go back to the Income menu, select Batch Status. The Status/Results of Batch Processing screen will be displayed.

The job submitted will be in a Successful status. You can view the reports in the Action column before authorisation.
![]()
There are 3 reports available for checking:
- Expense apportionment report
- Investment apportionment report
- Plan report
Click on the reports hyperlink in the Action column.
The Report Selection screen will be displayed.
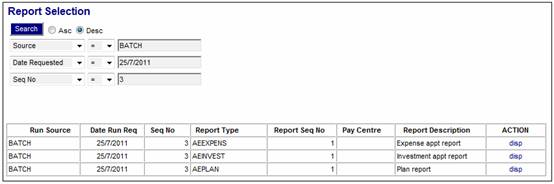
The reports are displayed in the Report Description column.
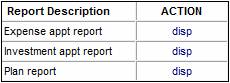
To select a report, click on the dsp hyperlink alongside the appropriate report.
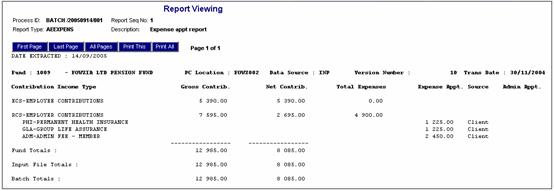
Expense Apportionment report
This report details how expenses were apportioned (split) for the contribution income types displayed.
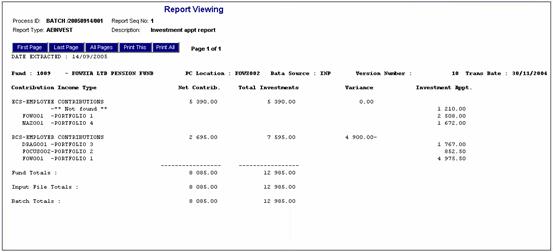
Investment Apportionment report
This report details how investments were apportioned (split) for the contribution income types and portfolios displayed.
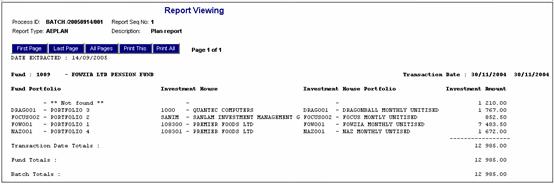
Plan report
This report details how investments were apportioned (split) between the investment house portfolios displayed.
After you have viewed the reports and agree with the results, the batch may be authorised.
From the Income menu, select Auth Batch from the sub-menu on the left.

The Authorise/Reject Batches screen will be displayed.
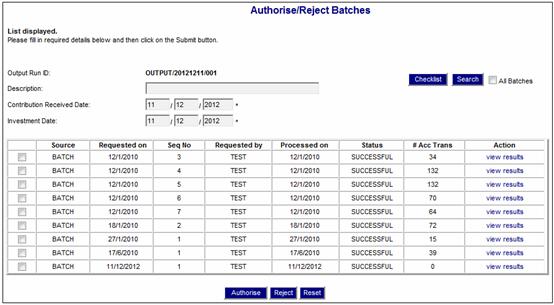
To view the Checklist, click on the tick box to select a single batch and click CHECKLIST.
The Checklist allows the user to tick off a step in the process as and when it is completed.
The following screen displays a list of Checklist items with a tick box for the Doer and the Authoriser.

If CHECKLIST is selected but none of the batch tick boxes were selected, the following message will be displayed:
No batches selected. Only one batch must be selected to continue with Checklist.
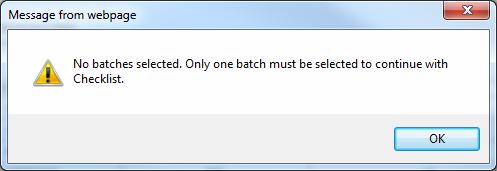
Click OK to remove the message. Select a single batch and click CHECKLIST.
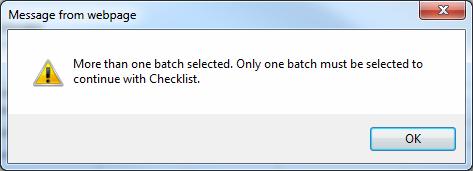
If CHECKLIST is selected and more than one of the batch tick boxes were selected, the following message will be displayed:
More than one batch selected. Only one batch must be selected to continue with Checklist.
Checklist processing
When the Checklist screen is opened, the system will retrieve and display the data as per the Document Template, i.e. display the Heading and row per checklist item containing the text, tick box indicator, Date and Timestamp, and User ID.
If any item has been ticked previously then a value of Y will appear in the Tick column, the date and timestamp it was ticked in the Date column and the User ID of the person who ticked the item in the User ID column.
The data will be enabled for update.
Note:
If an item was ticked and then subsequently un-ticked, the Date and Timestamp will indicate that it was previously ticked and subsequently un-ticked. The Date and Timestamp will be that of the date and time it was un-ticked and the User ID will be that of the person who un-ticked it.
If the batch is incorrect, click REJECT. The status for the batch will become REJECTED.
To cancel any selections made on the screen, click RESET.
To authorise the batch, tick the relevant check box, then click AUTHORISE. The following confirmation message will be displayed.
Are you sure you want to Authorise selected batches?
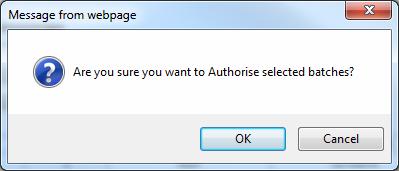
Click OK to continue.
The Authorise/Reject Batches screen will be displayed.
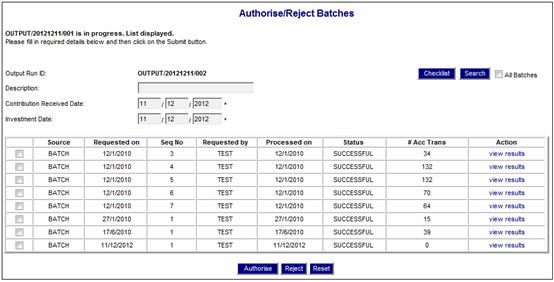
To verify that the batch has been authorised, from the Income menu, select Auth Status. The Status/Results of Authorisation Processing screen will be displayed.

If the value SUCCESSFUL appears in the Status column for the batch job, then the authorisation has been successful.
After the income has been authorised, an accounting transactions to facilitate the payment of the investment, can be created.
Log in to the system from the Logon page.
Click ACCOUNTING.
The Welcome screen will be displayed.
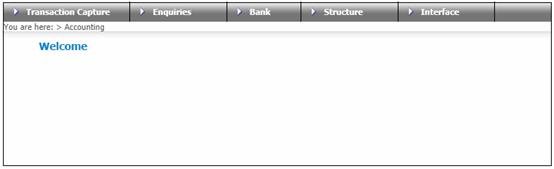
From the main menu on top, select Transaction Capture. A sub-menu will be displayed on the left.
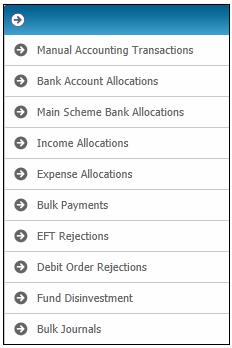
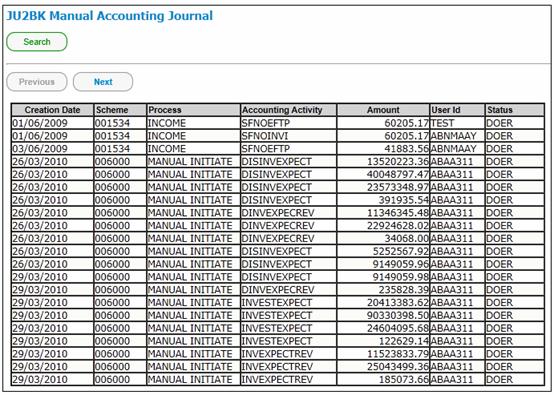
Select Manual Accounting Transactions
The JU2BK Manual Accounting Journal screen will be displayed.
Create Accounting Journal
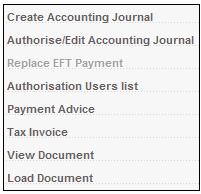
Select Create Accounting Journal from the menu on the left.
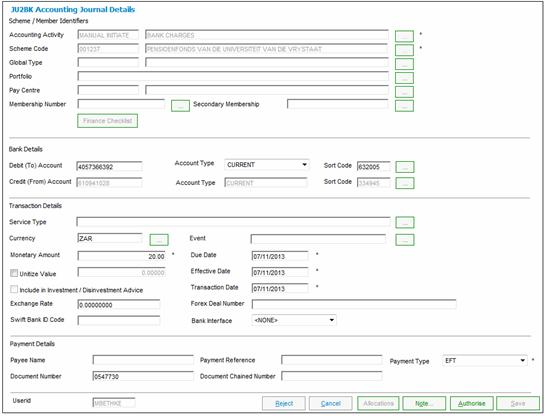
The JU2BK Accounting Journal Details screen will be displayed.
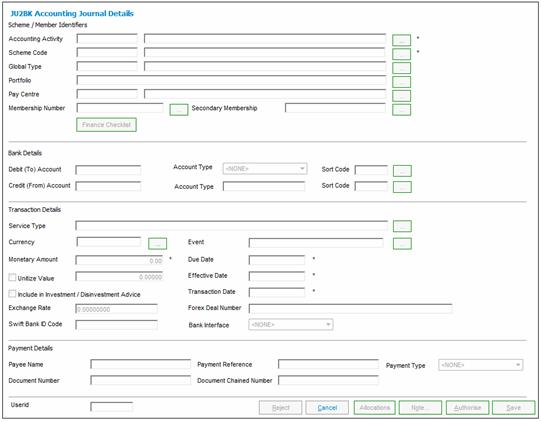
Descriptions of the required input fields on this screen appear below.
|
Scheme / Member Identifiers |
|
|
|
Accounting Activity |
The code and process associated to the selected accounting activity. Click the LIST button at the end of the line and select INVESTMENT from the list of activities displayed. |
|
|
Scheme Code |
The code and name of the selected scheme. |
|
|
Portfolio |
The description of the selected portfolio. Click the LIST button at the end of the line and select the appropriate investment portfolio you are investing into. |
|
|
Membership Number |
Not required for the purpose of this transaction. |
|
|
Secondary Membership |
Not required for the purpose of this transaction. |
|
|
Finance Checklist |
Click the FINANCE CHECKLIST action button to display the Checklist.
Note: This action button will only be enabled when a Service Request for a Process of Finance is selected in My Work. For more information refer to My Work Process SR Finance
Supplements Tags Finance Checklist Income Checklist |
|
|
Bank Details |
|
|
|
Debit (To) Account |
For EFT payments – the account into which the money is to be transferred. Ensure that the appropriate EFT Rule is set up for this accounting activity |
|
|
Credit (From) Account |
For cheque payments and EFT’s – the account out of which the money is to be paid. |
|
|
Transaction Details |
|
|
|
Currency |
ZAR |
|
|
Monetary Amount |
The total of the business transaction. |
|
|
Due Date |
The date on which the transaction should have occurred. |
|
|
Effective Date |
The date on which the financial implication of the transaction was expected or required to take effect. |
|
|
Transaction Date |
The date on which the business event occurred (e.g. date of deposit). |
|
|
Payment Details |
|
|
|
Payee Name |
Account Holder Name. |
|
|
Payment Type |
Mode of payment e.g. EFT |
|
|
Document Number |
Automatically generated if the payment type is EFT. |
|
|
Userid |
The system user ID of the person who captured the manual accounting activity. |
|
Once all the required information has been completed, click SAVE.
If the Account Number Format specified for the selected Bank is numeric and text characters have been captured in the Account Number fields, the following error message will be displayed:
The Account number is not numeric.
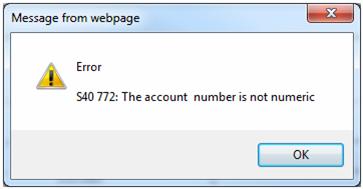
Click OK to remove the message and capture numeric Account Numbers.
Note:
For foreign bank accounts, the bank account number field must allow for text characters.
For more information refer to
Infrastructure
Systems Entities
Bank Structure
Capturing a Transaction on a Saturday
When SAVE is selected and one of the Accounts in the Accounting Rule linked to the Accounting Activity selected is INVESTMEMB or INVSTMEMUNIT, or if the Money Movement Indicator on the Accounting Activity is Y and the Payment Method is EFT, the existing Transaction Date validation will be applied, i.e. if the Status of the Date on the Calendar is WEEKEND or PUBLIC HOLIDAY, an error message will be displayed.
For all other Accounting Activities, the system will read the Status on the Calendar for the Date equal to the Transaction Date, and if it is WEEKEND, will check if the Date is a Saturday. If it is, the journal will be enabled to be saved.
When SAVE is selected on the JU2BK Accounting Journal Details screen, and all validation requirements have been met, the following confirmation message will be displayed:
Do you want to create this Accounting Activity Journal?
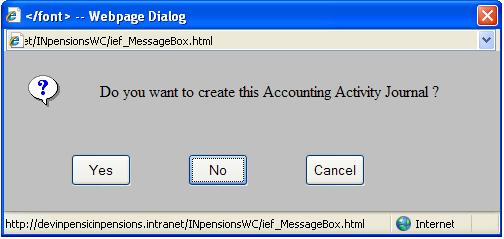
Click YES to confirm that the Accounting Activity Journal must be created.
This transaction is now available for authorisation.
Authorisation of the payment transaction
Highlight the relevant transaction and select Authorise/Edit Accounting Journal from the sub-menu on the left.
The JU2BK Accounting Journal Details screen will be displayed.
On this screen you will have the option to authorise or reject the payment.
When selecting AUTHORISE, the following warning message will display:
Click YES and the transaction will be authorised.
The Status of this transaction will now be AUTHORISED BT.
If the Money Movement Indicator on the Accounting Activity selected is Y and the Payment Method selected is EFT, the system will read the value for Description on the Global Parameter with a Parameter Type of EFT CUT-OFF.
If the current time is greater than the value found and the Transaction Date is equal to the current date current date, the following message will be displayed:
It is after the cut-off time for EFT payments. The transaction date will be set to the next working day
When the OK button is selected on the message, the Business Transaction will be created with the Transaction Date and Effective Date equal to the next working day.
If the Transaction Date is less than current date, the following error message will be displayed:
The transaction date must be equal to current date or greater than current date.
Umbrella Schemes
For information on the receipting of deposits for multiple sub-funds (Participating Employers) within an Umbrella Fund and the processing of a single payment at the Main Fund level for multiple Sub-Funds, refer to Main Scheme Bank Allocations under.
Accounting
Transaction Capture