Navigation: Processes > Contributions
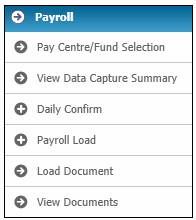
Select Payroll from the top menu.
![]()
Select Data Capture from the top menu.
![]()
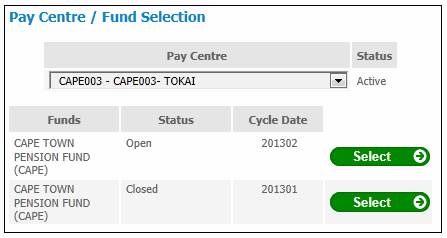
The Pay Centre / Fund Selection screen will be displayed.
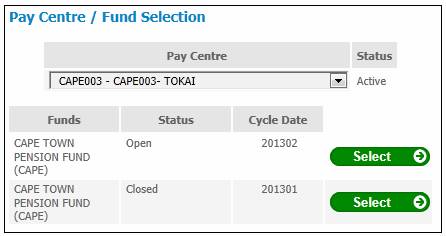
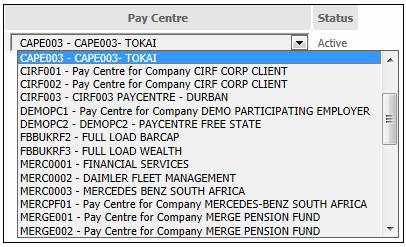
Select a Pay Centre from the drop-down list.
Click SELECT alongside a cycle with a Status of Open.
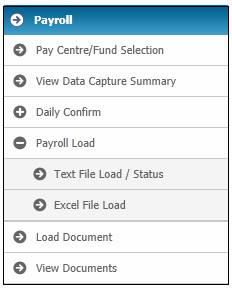
Select Payroll Load > Excel File Load from the menu on the left
The Payroll Excel Load screen will be displayed.
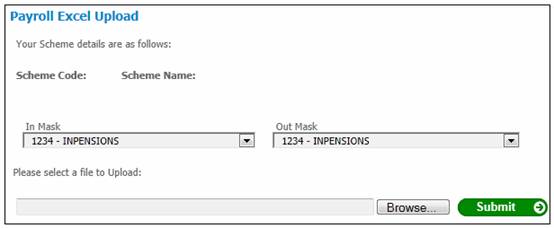
Browse to locate the excel file (without headings).
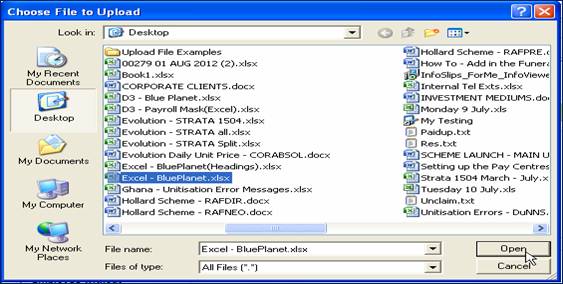
Once you have located the file, click OPEN.
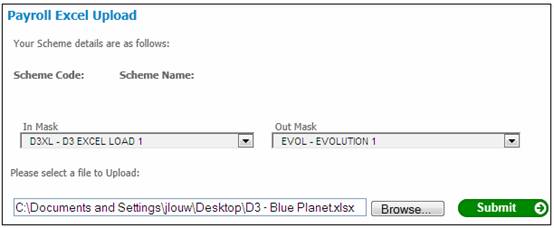
Click SUBMIT to upload the file.
Select View Data Capture Summary from the sub-menu on the left to view the results of your upload.
The Data Capture Summary screen will be displayed.
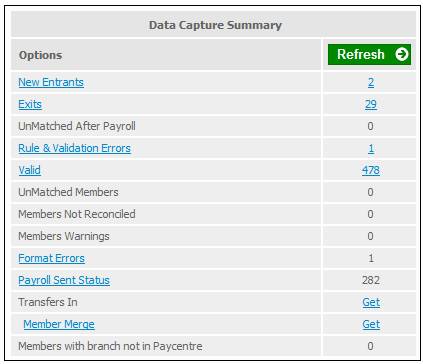
If you have any errors, click the hyperlinked Format Errors in the Options column.
![]()
The Format Errors screen will be displayed.
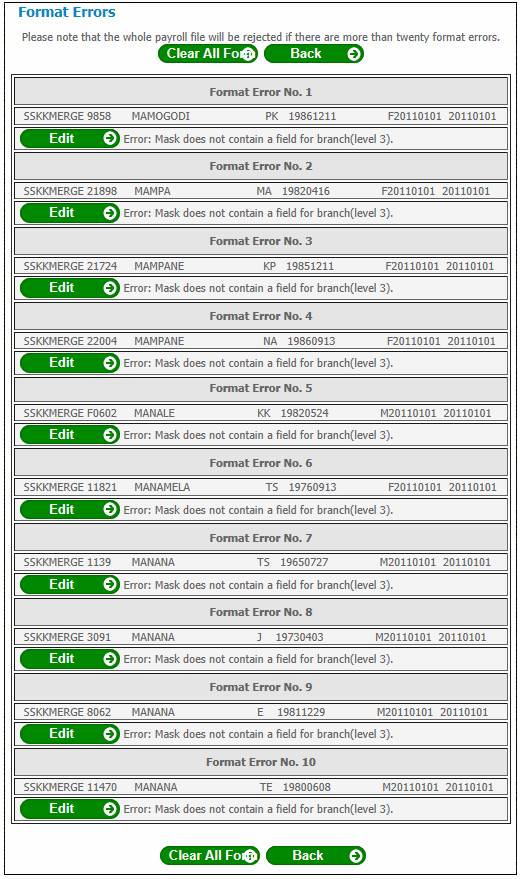
The following is a list of typical Format Errors and their resolution:
|
Format Error |
How to resolve |
|
Invalid Surname, Initials |
Remove the full stops or invalid characters |
|
Invalid characters in the dates |
Refer to Fixing data Errors below |
|
Member exceeds retirement age (New Entrants) |
Change the member’s date of birth for this cycle.
Note: Remember to change it back in the next month. |
|
Date Joining the Fund is < the Commencement Date of the Fund |
Change the Date Joining Fund = Commence Date (Scheme > Scheme Details) |
|
Company cannot be linked to the fund |
Invalid Branch Code |
Should you have an error, click EDIT next to the error message.
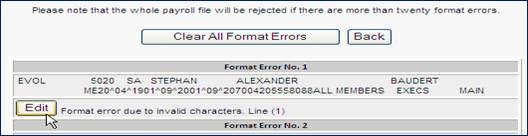
The row of data will be displayed.

Some errors can be fixed on this screen.
Close \cancel until you can CLEAR ALL FORMAT ERRORS.

Open your excel file.
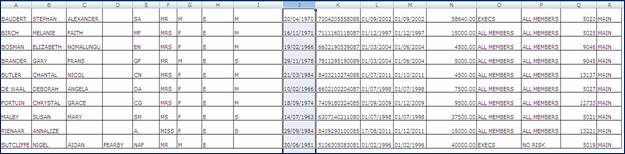
Highlight the column that contains a date.
Select Data from the top menu.
![]()
Select Text to Columns from the sub-menu on top.

A screen called Convert Text to Columns Wizard – Step 1 of 3 will be displayed.
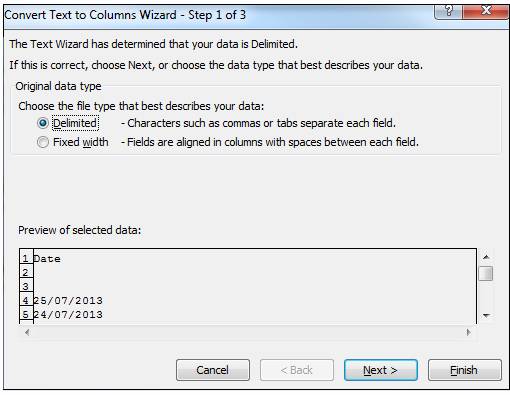
Click NEXT.
A screen called Convert Text to Columns Wizard – Step 2 of 3 will be displayed.
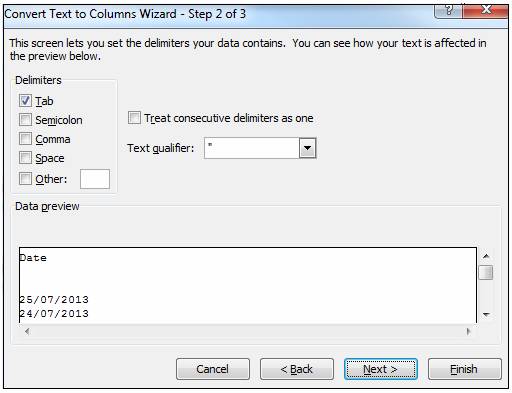
Click NEXT.
A screen called Convert Text to Columns Wizard – Step 3 of 3 will be displayed.
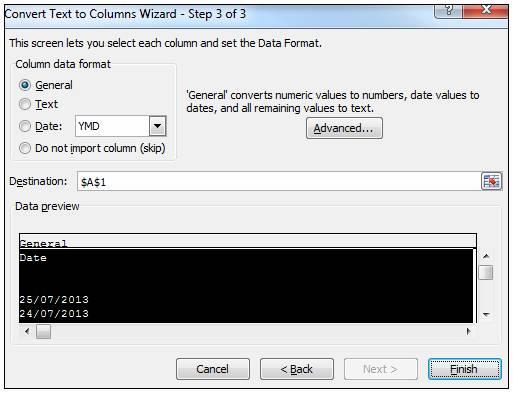
Click the Date radio button (change the format to the format in your file).
Select DMY (Date/Month/Year) from the Date drop-down list.
Click FINISH.
Repeat the steps for all the Date Columns.
Upload the file again.
For more detailed information, refer to the following sources:
Processes
Contributions
Payroll
Payroll Processing and Field Conversion
Loading the Payroll File
Format Errors and How to Correct Them
Supplements
Processes
Payroll Processing
Processes
File Transfer
File Layouts
Payroll