The INpPatcher relies on a number of configurable parameters in order to apply the patches to the correct folder structures, etc. These parameters would also specify whether you would like to use local folders or the web as a source for the PTF’s and whether you make use of a proxy server to access the web, etc.
The following screen will step you through the configuration options and requirements.
Note:
Normal (manual or automated) execution would not prompt for any parameters as it would read these from the previously configured parameters.
Execute the following to invoke the configuration options:
\Program Files\Bytes Software\Tools\AutoPatch\INpPatcher.exe config
Note:
(INpPatcher [space]config)
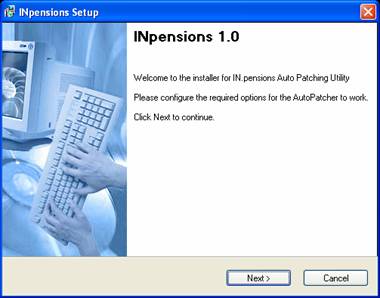
The Welcome Screen will be displayed (it will read registry settings in case of previous/current configuration).
Click ![]() to continue.
to continue.
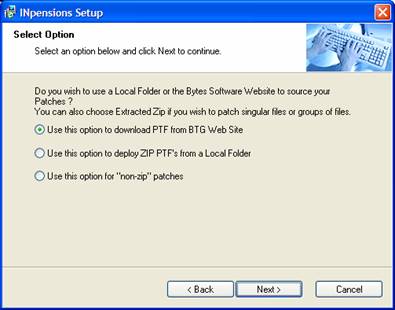
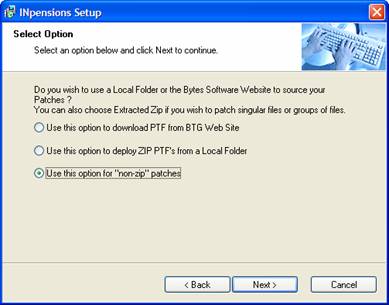
You are prompted whether you wish to use the Vendor web site, a local folder for ZIP files or NON-ZIP/EXTRACTED-ZIP as your PTF source. The difference is that the web option would download the required PTF’s for you, whereas the local folder option will require the user or administrator to manually download the PTF’s and then copy them to the specified folder. The non-zip option would require you to extract the actual files from the .ZIP and place those in the folder structure supplied.
For Vendor web site option, click ![]() .
.
The following screen will depend on your choice.
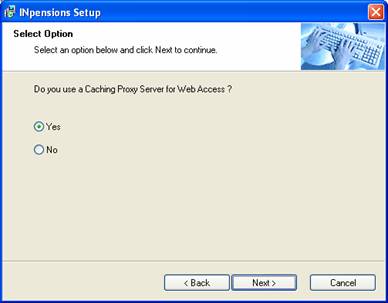
You are prompted whether you access the Internet via a proxy/ISA server or not. The following screen will depend on your choice.
Click ![]() to continue.
to continue.
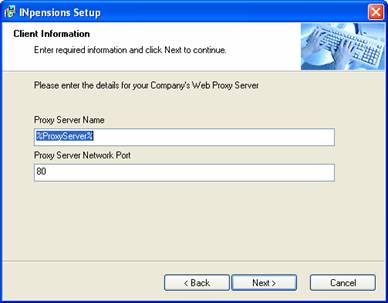
Enter your proxy server name or IP address and the required TCP/IP port (i.e. 80 or 8080 etc.)
Click ![]() to continue.
to continue.
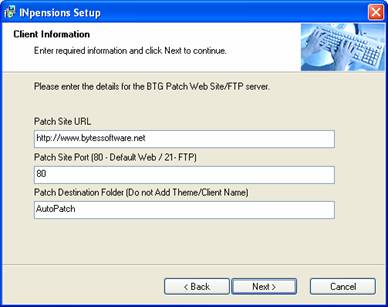
You will be prompted to enter the path to where the PTF’s are released. This path is different for each client on the Vendor side, but should be the same for all clients.
Note:
On the Vendor side this refers to http://www.bytessoftware.net/ClientName/Autopatch where <ClientName> is automatically added by the INpPatcher form the client’s current theme.
Click ![]() to continue.
to continue.
Should you have chosen a local folder or non-zip option instead of the web site, you would be prompted for the following screen instead of the web options.
Click ![]() to continue.
to continue.
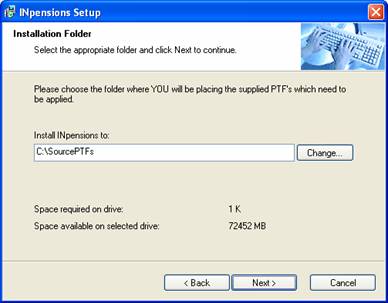
Enter the name of the folder where you or the client will be placing the PTF’s that need to be applied.
Note:
These patches will have to be downloaded manually from the Vendor web site. You can place patches here at any time. They will only be applied when the application is executed. Non-zip will provide you with a copy of all the necessary folders.
Click ![]() to continue.
to continue.
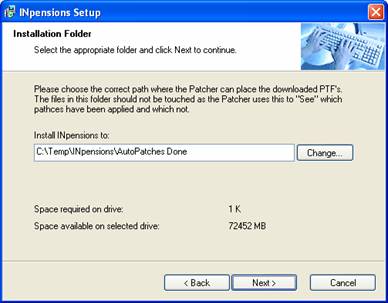
Enter the name of a folder where the already applied PTF’s will be kept. This folder should not be touched once configured, as the INpPatcher will always reference back to this folder to check which patches in the source folder have been applied and which have not. The INpPatcher will only apply patches not listed in this folder.
Note:
If you wish to re-apply a patch, you could delete that patch from this folder and the INpPatcher would automatically re-apply it at next runtime (be careful of data scripts though).
The non-zip option will re-zip the provided files and place them in this folder as a timestamped zip file as an additional check/backup of files changed.
Click ![]() to continue.
to continue.
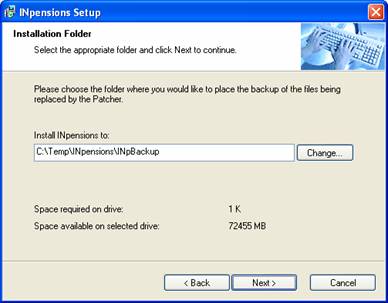
Enter the name of the folder where you would like the INpPatcher to save the backup files.
Note:
The INpPatcher will not clean up this folder, so normal housekeeping will have to be done to delete old backup files which are no longer required.
Click ![]() to continue.
to continue.
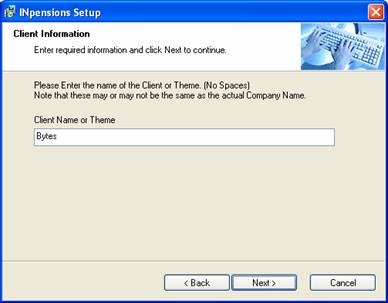
Confirm or verify the client's theme. This should be the same as the registry entry:
HKEY_LOCAL_MACHINE\SOFTWARE\Dataway\Settings\Theme
Click ![]() to continue.
to continue.
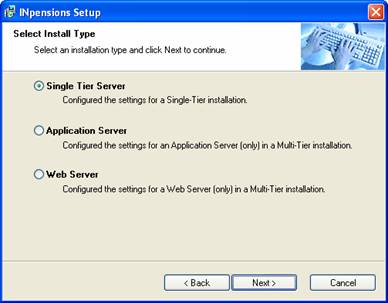
Choose your server installation option.
Click ![]() to continue.
to continue.
Note:
You would be prompted for an application server name should you choose the web server option.
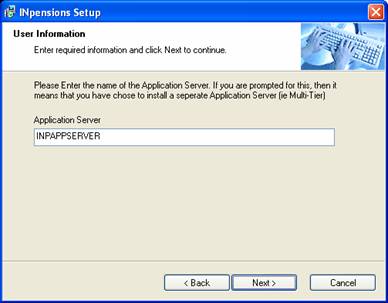
Enter the application server’s name.
Click ![]() to continue.
to continue.
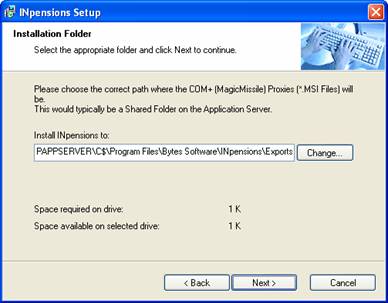
Provide the path to the application server’s exported COM+ proxies. This would typically be a share on the application server.
Example:
\\<AppserverName>\Exports$
or
\\<AppserverName>\C$\Program Files\Bytes Software\INpensions\Exports
Click ![]() to continue.
to continue.
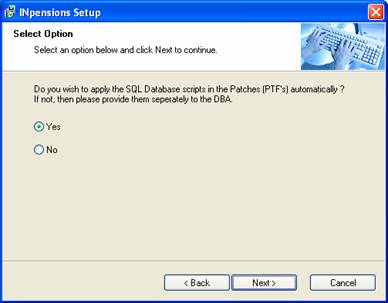
You are given the option whether you wish to apply the database scripts as part of the patch or whether you wish to apply them manually.
Note:
Answering NO here would result in you or the client having to supply the relevant scripts separately to the DBA(s).
Click ![]() to continue.
to continue.

You are prompted for the default installation folders of the application. Verify the drive letter and path for AllFusion Gen.
This would typically be C:\Program Files\CA\AllFusion Gen
Click ![]() to continue.
to continue.
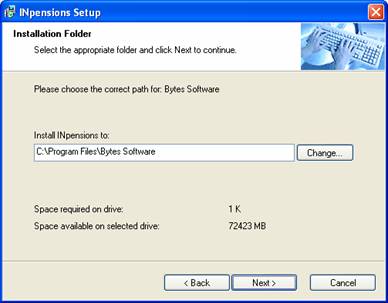
Choose the correct drive and path to the folder. This would typically be C:\Program Files\Bytes Software.
Click ![]() to continue.
to continue.

Provide the correct drive and path to the working folder. This would typically be C:\INpensions
Click ![]() to continue.
to continue.
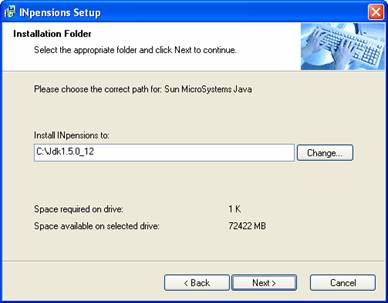
Provide the correct drive and path to the Java Development Kit folder.
This would typically be C:\jdk1.5.0_12
Click ![]() to continue.
to continue.

Provide an email address, which will be used by the INpPatcher to e-mail its completion report.
Click ![]() to continue.
to continue.
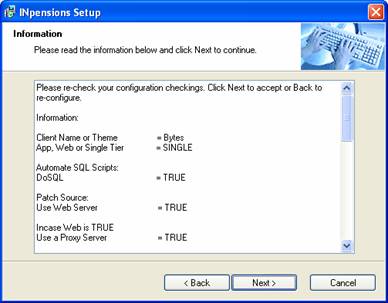
You will be shown a summary report of the parameters you have just configured.
Click ![]() to change any setting, or click
to change any setting, or click ![]() to save the settings and exit the configuration utility.
to save the settings and exit the configuration utility.