The Client Structure which is to be captured onto the website needs to mirror the structure that has been used on the Product Administration system. In the example that follows, the following structure will be created:
|
Structure Code |
Description |
Hierarchy Code |
|
1 |
EMPLOYER GROUP ABC |
Principal Employer |
|
EMPA |
EMPLOYER A |
Participating Employer |
|
1 |
Employer A 1 (Sales) |
Branch |
|
2 |
Employer A 2 (Admin) |
Branch |
|
EMPB |
EMPLOYER B |
Participating Employer |
|
1 |
Employer B 1 (Sales) |
Branch |
|
2 |
Employer B 2 (Admin) |
Branch |
The system provides for this to be done either manually, or via a file import facility. Whichever method is used, the Principal Employer (level 1) and the Participating Employer (level 2) must always be set up manually.
To start the process, from the Client Administration menu, select Client Companies from the sub-menu on the left.
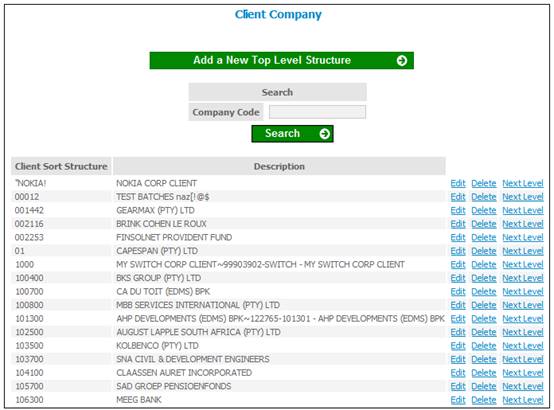
The Client Company screen will be displayed.
This screen is used to capture the client hierarchy.
Click ADD A NEW TOP LEVEL STRUCTURE.
The Add a New Top Level Employer Structure screen will be displayed.
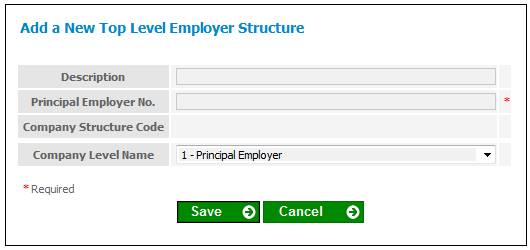
Descriptions of the input fields on this screen appear below.
|
Description |
The name of the principal employer being keyed in. |
|
Principal Employer No |
A code to identify the principal employer |
|
Company Level Name |
At this level, 1 - PRINCIPAL EMPLOYER is the only selectable item |
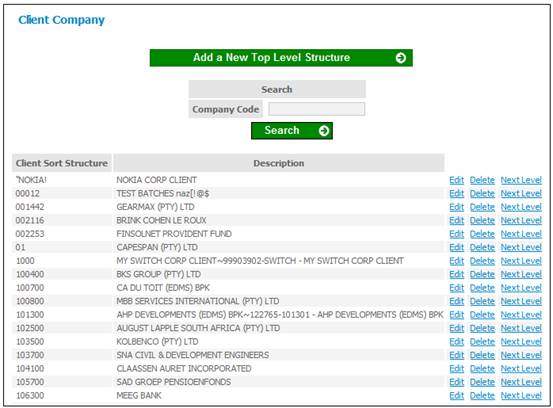
Once the relevant data has been captured, click SAVE. The Client Company screen will be re-displayed. The details just added will be listed.
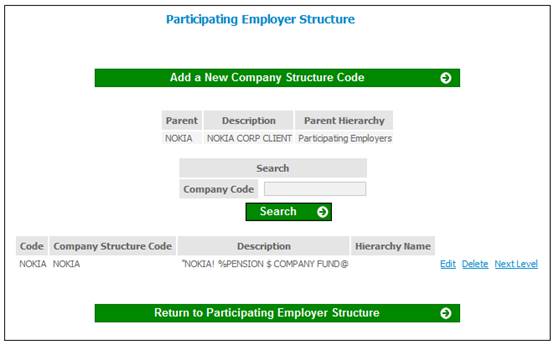
To capture the next level of the employer structure (i.e. participating employers), click Next Level>> alongside the required client. The Participating Employer Structure screen will be displayed.
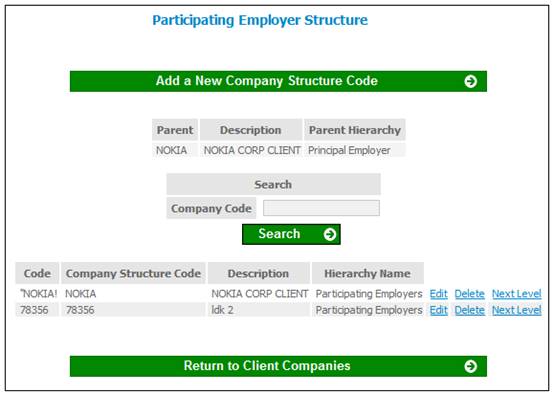
To capture a participating employer, click ADD A NEW COMPANY STRUCTURE CODE. The Add a New Company Structure Code screen will be displayed.
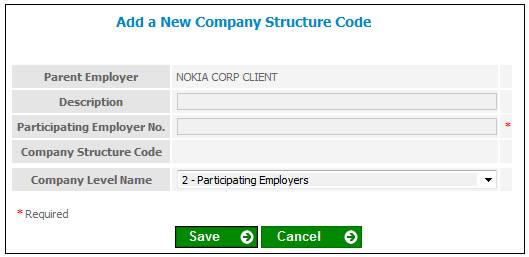
Descriptions of the input fields on this screen appear below.
|
Description |
The name of the participating employer being keyed in. |
|
Participating Employer No |
A code to identify the participating employer |
|
Company Level Name |
At this level 2 - PARTICIPATING EMPLOYER is the only selectable item |
After the employer (Employer A in this example) has been captured, click SAVE. The Participating Employer Structure screen will be displayed. The details just added will be listed.
Repeat the process to capture Employer B, etc.
Note:
If you will be setting up the company structure via a file import (refer to Setting up the company structure via a file import below), skip this section.
In order to capture the branches that will be linked to a participating employer, click Next Level>> alongside the required employer. The Participating Employer Structure screen will be displayed for the selected employer.
Click ADD A NEW COMPANY STRUCTURE CODE. The Add a New Company Structure Code screen will be displayed.

Descriptions of the input fields on this screen appear below.
|
Description |
The name of the paycentre being keyed in. |
|
Client Sort Code |
A code to identify the participating employer |
|
Company Level Name |
Select the required option from the drop-down box. The current values are: - 0 - NONE SELECTED - 60 - BRANCH - 62 - DEPARTMENT - 61 - DIVISION Note: For this example, select BRANCH. |
|
Company Node Type |
For this example, select BRANCH FLAG. |
After the employer (Employer A1 (Sales) in this example) has been captured, click SAVE. The Participating Employer Structure screen will be displayed. The details just added will be listed.
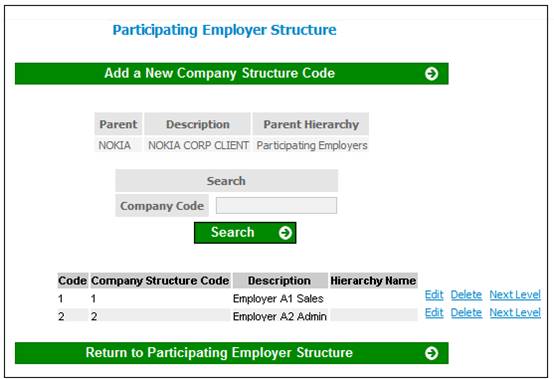
Repeat the process to capture Employer A2 (Admin), etc. The same procedure should then be followed for Employer B in order to complete the capturing of all the branches.
Note:
If you have set up the company structure manually (refer to Setting up the company structure manually above), skip this section.
While there is no limit to the number of levels that can be created, having more levels than is necessary could be cumbersome to work with. From a practical perspective, a maximum of (say) 5 levels would be manageable.
The file to be imported is an ordinary comma delimited text file. As level 1 (Principal Employer) and level 2 (Participating Employer) already exist, the system starts creating the structure from level 3 onwards. The various structure levels are separated by commas, in the following format:
- x,y,z,{name} where
- x = the level 3 code
- y = the level 4 code
- z = the level 5 code
- {name} = the level name / description
File layout
|
|
Field Name |
Field Size |
ATTR |
O/M |
|
1 |
Code |
Unlimited |
A/N |
M |
|
2 |
Description |
Unlimited |
A/N |
M |
O = Optional field
M = Mandatory
Example of a straightforward input file
1028,ABC Company
1029,The Association of Professionals
348555,Network International
9,The Antique Society
Loading the above file would set up four level 3 structures, each with their own code and description.
Example of a multi-level input file
The file can contain multiple levels, but each level must be on a new line, e.g.
- 1028,ABC Company
- 1028,4632Sales
- 1028,4633Administration
- 1028,4633,6897Support
Loading the above file would set up a level 3 structure of 1028 (and name it ABC Company), two level 4 structures (4632 Sales and 4633 Administration) and a level 5 structure (6897 Support), which will fall under 4633 Administration. The codes can be alpha or numeric or a combination of each (e.g. ABC123).
The sequence of the entries in the file is not critical, i.e. lower structure levels can appear ahead of higher levels. The import process will do the necessary sorting, and as long as all the required levels are in the file, the correct structures will be created. If no name is provided for a level, the system will still create the level, but the description will be "Unknown Company Description". This can be edited manually.
The system expects the datafile to have a specific name (dept.dat), and expects that it be present in a specific directory on the application server, e.g. C:\INpensions\Batch\Data\CompanyDatafile\ . The layout of the file is explained above. To view the required directory details, go to the Global Configuration Settings screen (from the main System menu, select the Global Settings sub-menu). The details will appear in the Company Datafile Path field.
The file must be imported prior to the uploading of the monthly payroll extract.
From the Client Administration menu, select Load Company Datafile from the sub-menu on the left. The Select Company Node (Principal Employers) screen will be displayed.

Click ![]() to drill down to the next level. The Select Company Node (Participating Employer Structures) screen will be displayed.
to drill down to the next level. The Select Company Node (Participating Employer Structures) screen will be displayed.
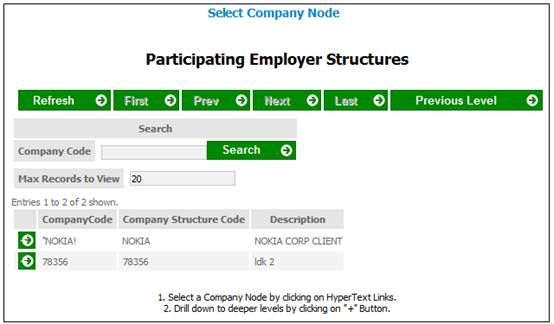
This screen shows the next level of detail.
Click on the required name in the Description column. The Load Company Datafile screen will be displayed.
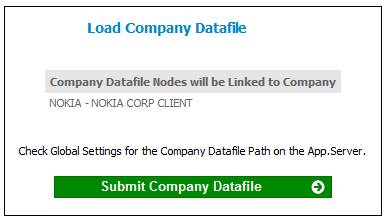
Click SUBMIT COMPANY DATAFILE.
A message will confirm that the company datafile has been successfully loaded.
Once the above company structure has been set up, the initial load process can be done. Refer to Initial Load.