
In cases where all members with individual investment splits in a portfolio need to re-allocate their allocation to a new portfolio, the system is able to process investment allocations in bulk.
Bulk allocations are processed for selected groupings of members. The investment allocations are then performed for each member in the specified grouping.
Note:
This functionality can also be performed using the My Work functionality. For more information on My Work functionality, refer to
My Work
Process SR
Switching
Bulk Allocation
Note:
On completion of the bulk allocation, the effect of the change will only take place when the effective date of the allocations coincides with the relevant calendar month.
Example
|
Today's date |
Effective date of bulk allocation |
Current cycle |
Change takes place? |
|
11 March |
1 April |
March |
No (will only happen in April) |
|
14 April |
1 April |
March |
Yes |
|
19 March |
1 May |
April |
No (will only happen in May) |
|
18 March |
1 March |
February |
Yes |
The following member groupings are applicable:
- all the members in a specified membership group
- all the members invested in a specified investment portfolio
- all the members invested in a specified investment portfolio who are a specified age
Log in to the system from the Logon page.
Click processes, then click switches.
The Welcome screen will be displayed.
From the main menu on top, select Bulk Allocations.
The JU3CA Bulk List screen will be displayed.
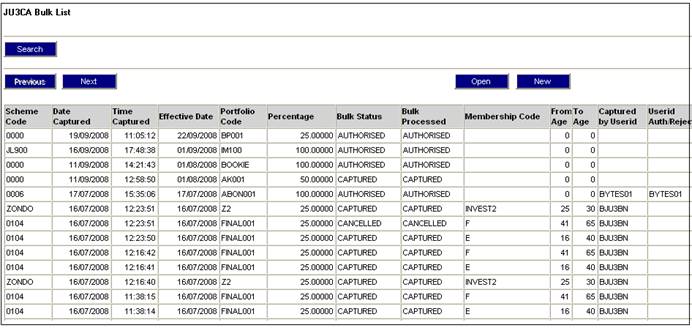
Highlight the required bulk switch, then select Authorise Bulk Type from the sub-menu on the left.

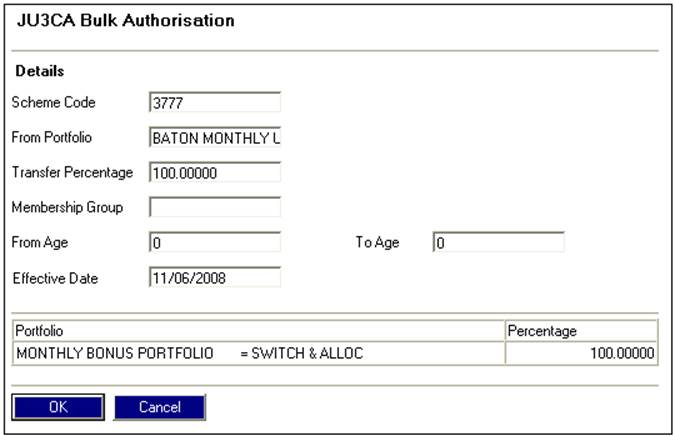
The JU3CA Bulk Authorisation screen will be displayed.

This screen displays details of bulk allocations.
Click OK.
Note:
Batch run BJU3AO Bulk Invest Allocation will be started, and will load the member allocation percentages.
A separate batch job to update any open payroll cycle with the member allocation percentages will be triggered. Where the remittance calculation has already been completed or authorized, the cycle will be regarded as closed for the purposes of applying new allocation percentages. When any open cycle is closed, the member allocation percentages will be applied to the next payroll cycle (as before).
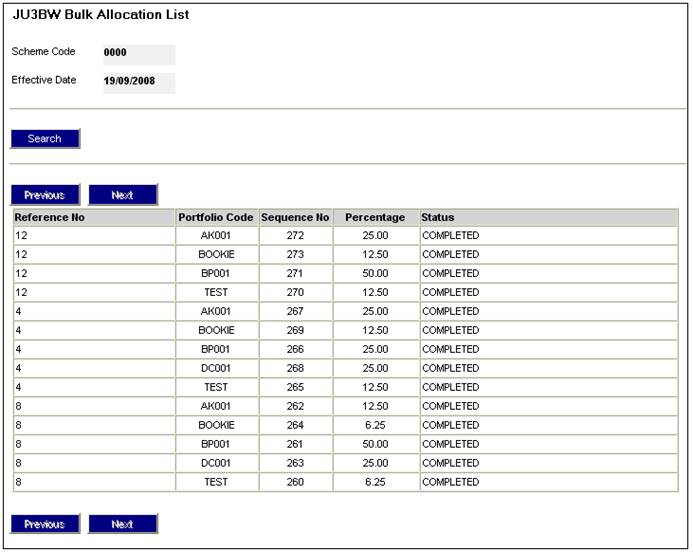
To view the details of a bulk allocation, highlight the allocation and select Bulk Details from the sub-menu on the left.
The JU3BW Bulk Allocation List screen will be displayed.
In order to cancel an allocation from the details of a bulk allocation, highlight the required allocation on the JU3CA Bulk List screen, then select Cancel Bulk Type from the sub-menu on the left.
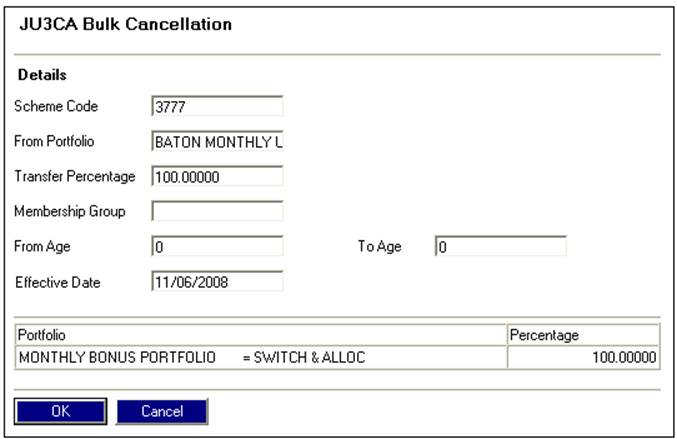
The JU3CA Bulk Cancellation screen will be displayed.
Note:
Allocations can only be cancelled if the value in both the BULK STATUS and BULK PROCESSED columns is CAPTURED. Refer to Bulk Status Explanation.
This screen displays the bulk allocation selected for cancellation. To cancel the bulk allocation, click OK. The JU3CA Bulk List screen will be re-displayed.
The value in both the BULK STATUS and BULK PROCESSED columns will be changed to CANCELLED.
In order to authorise bulk allocations, highlight the required bulk allocation on the JU3CA Bulk List screen, then select Authorise Bulk Type from the sub-menu on the left.
The JU3CA Bulk Authorisation screen will be displayed.
Note:
Allocations can only be authorised if the value in both the BULK STATUS and BULK PROCESSED columns is CAPTURED. Refer to Bulk Status Explanation.
This screen displays the bulk allocation selected for authorisation. To authorise the bulk allocation, click OK. The JU3CA Bulk List screen will be re-displayed.
The value in both the BULK STATUS and BULK PROCESSED columns will be changed to AUTHORISED.
To create a new bulk allocation, from the JU3CA Bulk List screen, select NEW. The JU3CA Bulk Allocation From screen will be displayed.
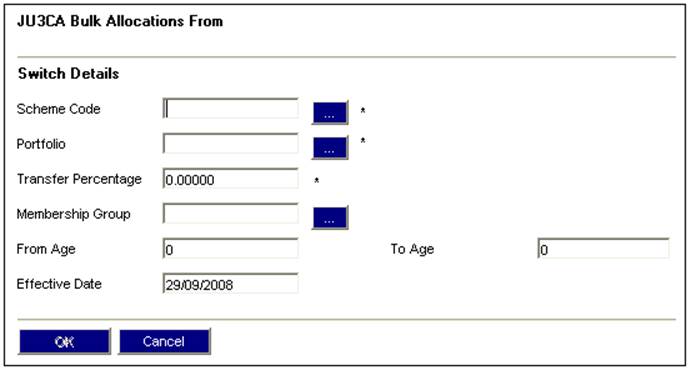
Descriptions of the input fields appear below:
|
Scheme Code |
Click the LIST button the LIST button. This links to the JU1BK List screen and displays a list of schemes to select from. Once a selection has been made, click SELECT. |
|
|
Investment Membership Group |
If the grouping criteria must be that of membership group, click the LIST button. This links to the JU1BR Scheme Membership Group List screen and displays a list of membership groups to select from. Once a selection has been made, click SELECT. Note: This field is optional. |
|
|
Portfolio |
If an investment membership group has been selected, then the portfolios displayed for selection will be those that are linked to that membership group (including portfolios for which the member on-line access is NONE or ALLOCATION for the selected membership Group). Click the LIST button. This links to the JU1BU Scheme Portfolio List screen and displays a list of portfolios to select from. Once a selection has been made, click SELECT. Note: This field is mandatory. |
|
|
From Age |
If the grouping criteria is for all members invested in a specified investment portfolio who are a specified age, then capture the member age from which this applies.
Note: This field is optional. |
|
|
To Age |
If the grouping criteria is for all members invested in a specified investment portfolio who are a specified age, then capture the member age up to which this applies.
Note: This field is optional.
In order to limit the age range to a single age, the value captured for TO AGE must be the same as the value captured for FROM AGE. |
|
|
Transfer Percentage |
The percentage which must be allocated to the new portfolio. |
|
|
Effective Date |
The effective date on which an allocation must take place. |
|
Capture the necessary information, then click OK. The JU3CA Transfer to Available Investments screen will be displayed.
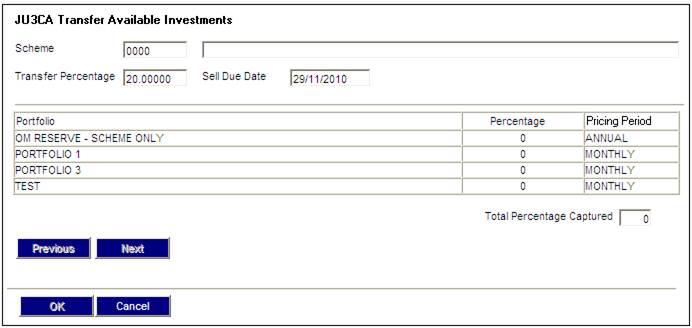
To capture the TOTAL PERCENTAGE CAPTURED, highlight and double-click the portfolio. The JU3CA Percentage screen will be displayed.
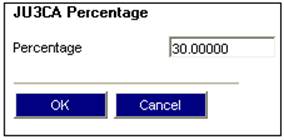
Enter the percentage and click OK. The percentage will be displayed in the TOTAL PERCENTAGE CAPTURED field on the JU3CA Transfer Available Investments screen.
Note:
On the JU3CA Transfer Available Investments screen, OK will only be enabled when the value in the TOTAL PERCENTAGE CAPTURED field is 100.
You may continue to add several portfolios and percentages by following the same procedures outlined above. Each successive percentage captured updates the TOTAL PERCENTAGE CAPTURED field. If the TOTAL PERCENTAGE CAPTURED field exceeds 100, then OK will not be enabled until the value is 100.
In order to correct a percentage for a portfolio, double-click on that portfolio. The JU3CA Percentage screen will display the percentage already allocated. Change the percentage, then click OK.
Once the TOTAL PERCENTAGE CAPTURED shows 100, click OK. The JU3CA Confirmation Details screen will be displayed.
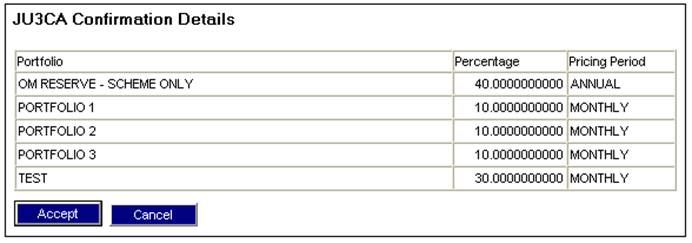
This screen displays the portfolio and percentage selections made. Click CANCEL to return to the previous screen, or click ACCEPT to save the details. The JU3CA Bulk List screen will be displayed.
The captured details will be displayed.
Note:
The Bulk Details menu option will remain disabled until the list is refreshed (e.g. by exiting from the JU3CA Bulk List screen, and then reloading it).
Clicking ACCEPT starts batch run BJU3AO Bulk Invest Allocation, which creates individual allocation detail per member, as per the allocation criteria specified.
Note:
An open payroll cycle will be updated with the member allocation percentages.
Where the remittance calculation has already been completed or authorized, the payroll cycle will be regarded as closed for the purposes of applying new allocation percentages.
If an open cycle is closed, then the member allocation percentages will be applied to the next payroll cycle.
In order to monitor the progress of this batch run, click reports, and select a scheme from the Scheme Selection screen. Select General from the menu at the top, and then select Error Log Report from the menu on the left. Refer to
Reports
General
Error Log Report
The number of members processed in the run will be displayed in an information message available in the error log.