To view authorisation details (if any), highlight the required line, then select Authorisation Details from the sub-menu on the left.
The JU4BN Benefit Details screen will be displayed.
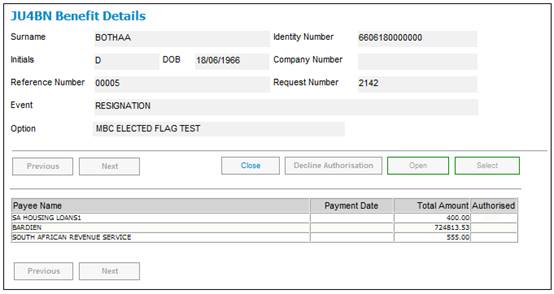
To view authorisation details, highlight the required line, then click OPEN.
Note:
If this is a Workflow case, and the benefit has been authorised, then the Decline Authorization button will be enabled to reverse the authorisation.

To decline an authorisation, highlight a payment line and click DECLINE AUTHORISATION.
The following message will be displayed:
Are you sure you wish to decline the authorisation and revert back to the Benefit Payment Process window?
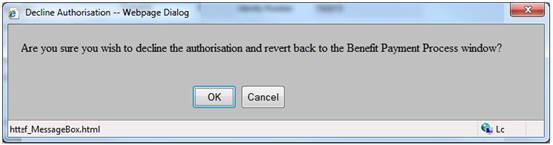
Click OK to confirm that the authorisation must be declined.
Note:
If the scheme uses the flexible benefit rules, a View Accounting button will be displayed. Select a payment and click VIEW ACCOUNTING.
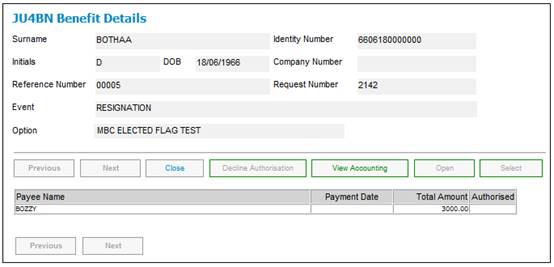
The Benefit Details screen will be displayed with a list of the pre-authorised BT’s that have been summed, i.e. with the same PAYEE and FROM BANK ACCOUNT as the payment record selected.
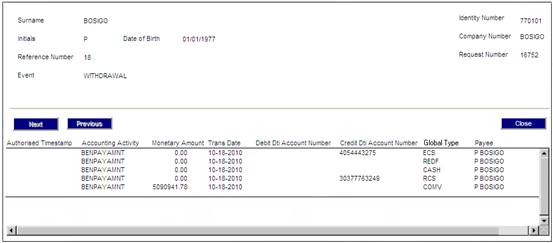
Click CLOSE to return to the JU4BN Benefit Details screen.
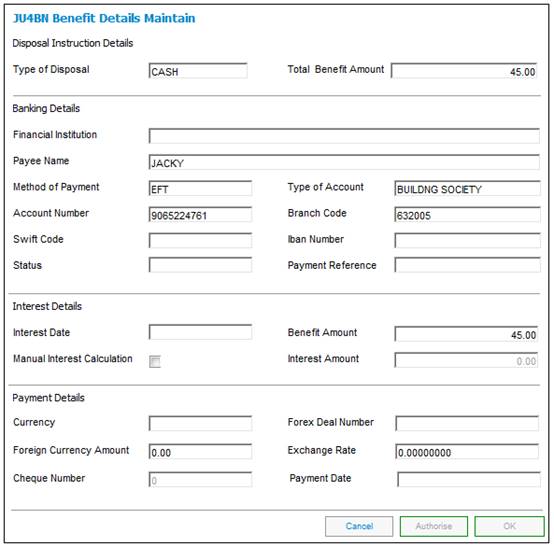
One of the following JU4BN Benefit Details Maintain screens will be displayed.
Authorisation Details
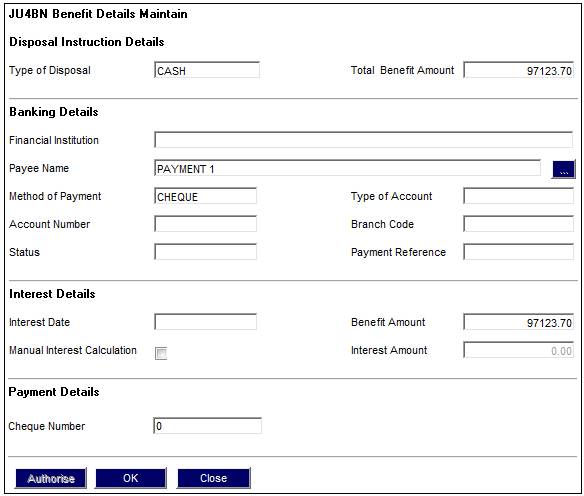
Disposal Instruction Details
Most of the options available from the screen have been described above. However, the following additional menu options are only available from this screen.
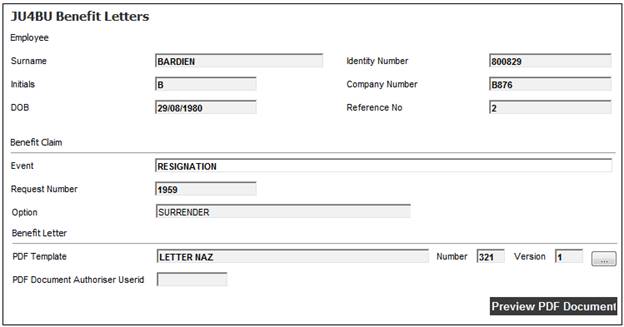
The JU4BU Benefit Letters screen will be displayed.

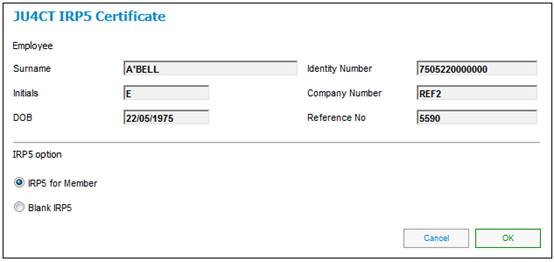
The JU4CT IRP5 Certificate screen will be displayed.
Note:
If a Business Address is not defined for the Administrator, the IRP5 will not be generated and an Error Message will be displayed.
Note:
If a Business Address is not defined for the Administrator, the IRP5 will not be generated and an Error Message will be displayed.
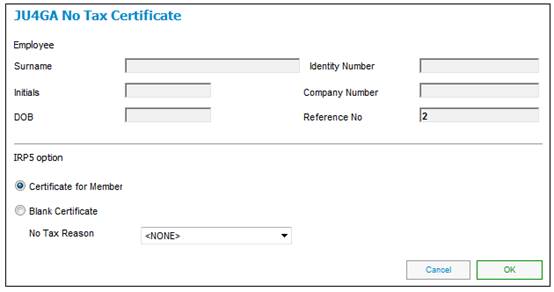
The JU4GA No Tax Certificate screen will be displayed.
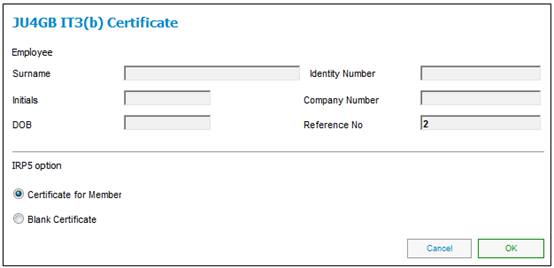
The JU4GB IT3(b) Certificate screen will be displayed.
The Documents Uploaded screen will be displayed.

This screen displays any documents already uploaded.
Click ![]() alongside Document Categories, then select the required document category to be viewed (e.g. Accounting etc.) from the drop-down list. The Document Categories field value selected will determine which Document Types are displayed for selection.
alongside Document Categories, then select the required document category to be viewed (e.g. Accounting etc.) from the drop-down list. The Document Categories field value selected will determine which Document Types are displayed for selection.
Click ![]() alongside Document Type, then select the required type of document to be viewed (e.g. benefit letter, claim form, tax directive, etc.) from the drop-down list.
alongside Document Type, then select the required type of document to be viewed (e.g. benefit letter, claim form, tax directive, etc.) from the drop-down list.
A list of documents previously uploaded will be displayed for the Document Type selected.
The Document Type field values displayed for selection are determined by the Document Category selected in the Document Categories field.
Note:
The system will only display the document categories and document types relevant to the particular menu and to which the user has access.
Click the hyperlinked document name to view the document.
To capture Storage Information for the document, click ![]() at the end of the line.
at the end of the line.
The Storage Information screen will be displayed.

This screen allows for the capture of the Company, Region and Box Number for the selected document.
Capture information as follows:
|
Company |
Select a Company from the drop-down list. |
|
Region |
Select a Region from the drop-down list. |
|
Box Number |
The Box Number where the document is stored
This field is alphanumeric. |
Click SAVE.
The Documents Uploaded screen will display the data captured in the Company, Region and Box Number fields.

For more information, refer to
Infrastructure
System Entities
File Storage Company