Log in to the system from the Logon page.
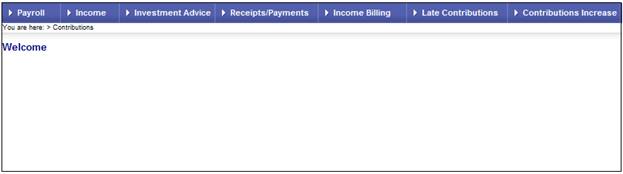
Click processes, then click contributions.
Note:
This will only be available to users with PAYROLL or SUPER USER security access.
The Welcome screen will be displayed.
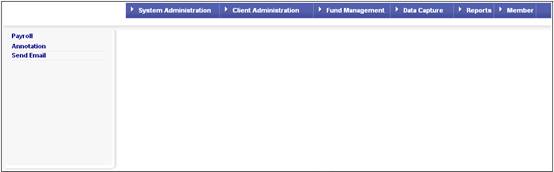
From the main menu on the top, select Payroll. The Payroll screen will be displayed.
Select System Administration from the menu on the top. The Payroll screen will be displayed with the Payroll sub-menu on the left.
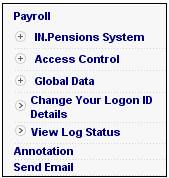
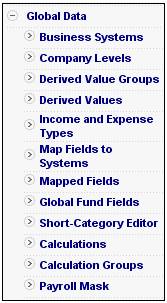
Click ![]() alongside Global Data on the sub-menu. The following additional options will be displayed.
alongside Global Data on the sub-menu. The following additional options will be displayed.
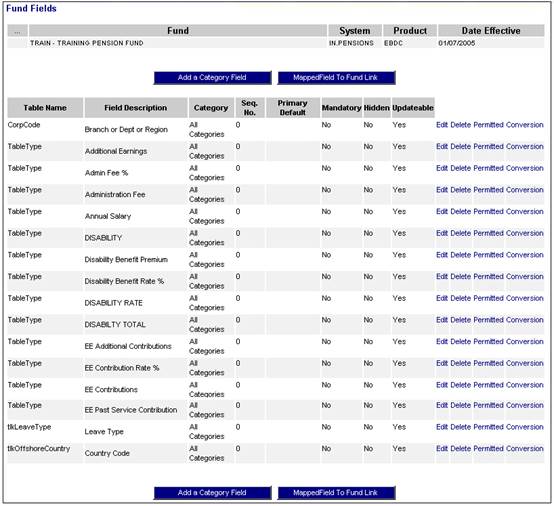
Select Global Fund Fields from the sub-menu. The Update Global Fund Fields screen will be displayed.
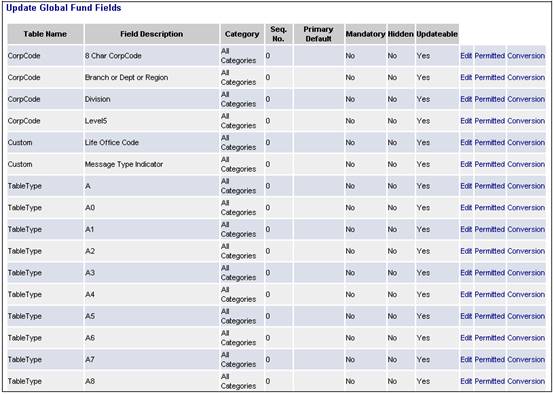
This screen displays a list of all global fund fields currently available. Scroll to the following permitted value, then click Permitted hyperlink on the right:
- Table Name = Employee
- Field Description = Occupation
- Category = All Categories
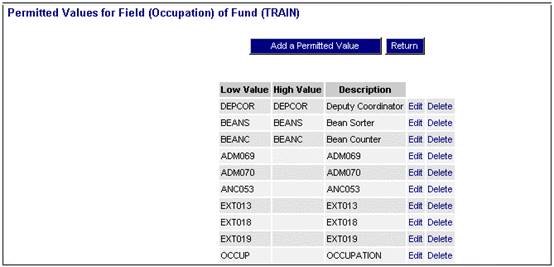
The Permitted Values for Global Field (Occupation) screen will be displayed.

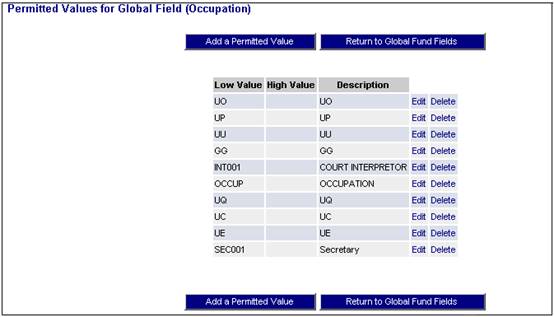
The current permitted values for OCCUPATION will be displayed.
Click ADD A PERMITTED VALUE.
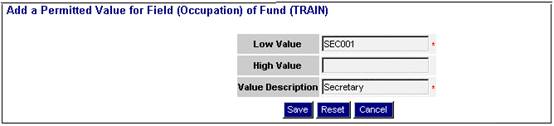
The Add a Permitted Value for Global Field (Occupation) screen will be displayed.
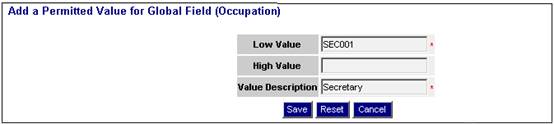
Capture the details of the new field, then click SAVE.
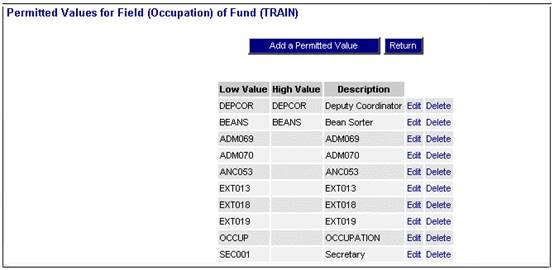
The Permitted Values for Global Field (Occupation) screen will be re-displayed, and will show the values that you have just captured.
The permitted value that was added on GUI must be linked to the permitted value that has just been captured on the web.
Click Map Fields to Systems below Global Data.
The Select Business System screen will be displayed.
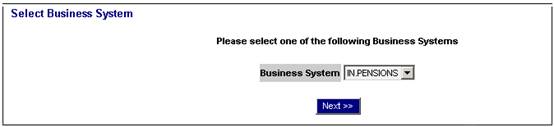
Select the required business system from the drop-down box, then click NEXT.
The Link Mapped Fields to a Business System screen will be displayed.
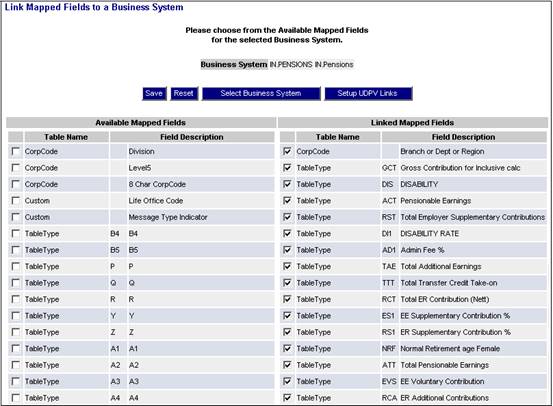
A list of available fields to select from will be displayed on the left, and a list of fields already selected will be displayed on the right.
Click SETUP UDPV LINKS. The Link UDPV to Mappedfields screen will be displayed.

Scroll to the following field, then click Link up UDPVs hyperlink on the right:
- Table Name = tblEmployee
- Description = Occupation
The Map Below Listed fields to "Occupation" screen will be displayed.
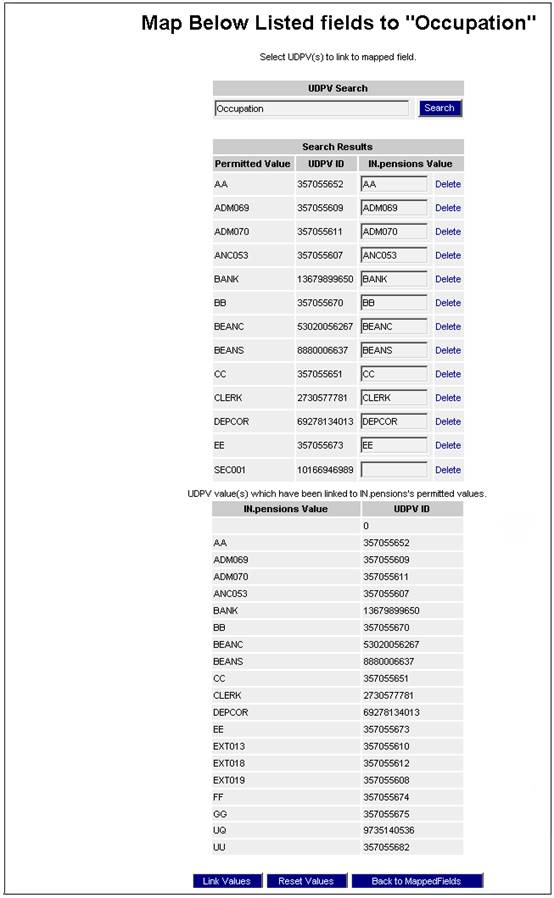
The newly captured field will appear, and the value for IN.pensions Value will be blank. Enter a value for the new field, then click LINK VALUES.
The Map Below Listed fields to "Occupation" screen will be re-displayed, and the captured value will be displayed.
Select Fund Management from the top menu. The Select Fund and Date Effective screen will be displayed.
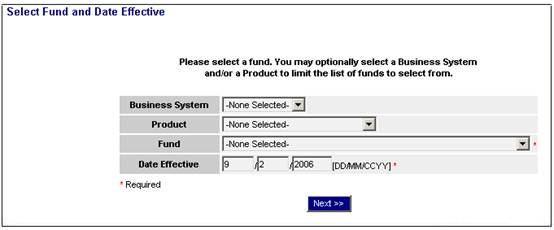
Select the required Fund (scheme) and Date Effective, then click NEXT.
Note:
Ensure the effective date is the cycle month from which the new field should be available.
The Fund Management screen will be displayed.
Select Fund Fields from the sub-menu on the left. The Fund Fields screen will be displayed.
Scroll to the following field, then click Permitted hyperlink on the right:
- Table Name = Employee
- Field Description = Occupation
The Permitted Values for Field (Occupation) of Fund (xxxx) screen will be displayed.
Click ADD A PERMITTED VALUE. The Add a Permitted Value for Field (xxxx) of Fund (Occupation) screen will be displayed.
Note:
The value for LOW VALUE is the code as it will appear on a payroll site where a payroll file is loaded each month.
The value for DESCRIPTION is the text that will be displayed on the member screen under DATA CAPTURE. Refer to Field available for use.
Enter the required details, then click SAVE.
The Add a Permitted Value for Field (Occupation) of Fund (xxxx) screen will be re-displayed, and the captured value will be displayed.
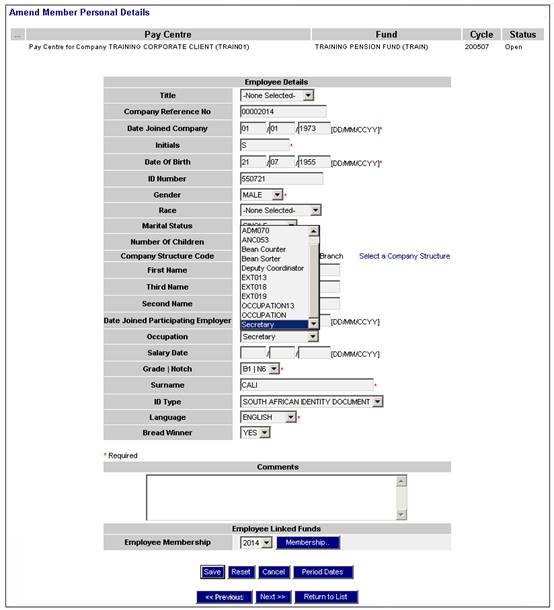
The occupation code will now be available for selection on the Amend Member Personal Details screen.