Participating Employers are companies whose Employees may be Members of a Product. This could be a single company or several companies, e.g. a company and its subsidiary companies.
The Participating Employers are set up as Corporate Clients in the Infrastructure and when they are associated to a Product, they are selected from the list of Corporate Clients.
A Participating Employer could be linked to more than one Product where Employees of the same company belong to different Products.
This section describes how to add a Participating Employer.
Log in to the system from the Logon page.
Click infrastructure.
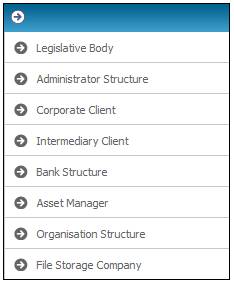
From the main menu on top, click SYSTEM ENTITIES.
Create a new Corporate Client
Select Corporate Client from the sub-menu on the left.
Click NEW on the JU1AP Corporate Client screen and create a new Corporate Client.
For more detailed information, refer to Corporate Client under
Infrastructure
System Entities
Add a Client Address
For the new Corporate Client, select Client Address from the sub-menu on the left.

Click NEW on the JU1BE Client Address Maintain screen and create a Client Address.
For more detailed information, refer to Corporate Client under
Infrastructure
System Entities
Add Contact Details
For the new Corporate Client, select Contact Persons from the sub-menu on the left.
Click NEW on the JU1CP Contact Person screen and create a Contact Person.
For more detailed information, refer to Corporate Client under
Infrastructure
System Entities
Add Pay Centre
For the new Corporate Client, select Pay Centres from the sub-menu on the left.
Click NEW on the JU1CF Corporate Client Pay Centre List screen and create a Pay Centre.
For more detailed information, refer to Corporate Client under
Infrastructure
System Entities
Upload Documents
For the new Corporate Client, select Document Load from the sub-menu on the left.
Upload any documents by specifying the document on the Document Loadscreen.
For more detailed information, refer to Corporate Client under
Infrastructure
System Entities
Add Facility Details
For the new Corporate Client, select Facility Details from the sub-menu on the left.
Click NEW on the JU1JO Facilities List screen and create a Facility.
For more detailed information, refer to Corporate Client under
Infrastructure
System Entities
Add Notes
For the new Corporate Client, select Notes from the sub-menu on the left.
Click NEW on the JV0AA Maintain Notation screen and create a Note.
For more detailed information, refer to Corporate Client under
Infrastructure
System Entities
Note:
The Complete Employer Registration process menu item is only enabled for the launching of a New Employer via My Work with a Process of NEW EMPLOYER and an Activity of CREATE EMPLOYER.
Log in to the system from the Logon page.
Click products.
From the main menu on top, click LIST.
Process the Participating Employer Product Update Type and link the pay centres to the participating employer.
Select a Participating Employer on the JU1BW Scheme Participating Employers screen and select Associate Pay Centres to Scheme from the sub-menu on the left.
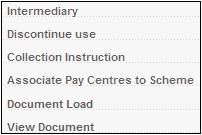
Link a pay centre to the participating employer.
For more detailed information, refer to Product Update Type: Participating Employer under
Product Launch Requirements
Product Launch
Product Update
Log in to the system from the Logon page.
Click processes then click contributions.
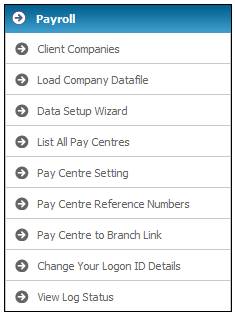
The following selections are displayed on the top menu.
![]()
From the top menu, select PAYROLL and then CLIENT ADMINISTRATION.
Add Client Companies
Once the pay centre has been linked to the Product, select Client Companies from the sub-menu on the left.
For more detailed information, refer to
Product Launch Requirements
Company Structure and Initial Load
Add Pay Centre settings
Select Pay Centre Setting from the sub-menu on the left.
For more detailed information, refer to
Auxiliary Activities
Adding a New Pay Centre
Create Pay Centre to Branch link
Select Pay Centre to Branch Link from the sub-menu on the left.
For more detailed information, refer to
Auxiliary Activities
Adding a New Pay Centre
Log in to the system from the Logon page.
Click processes then click contributions.
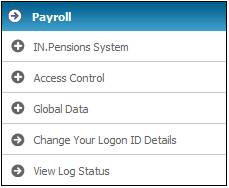
The following selections are displayed on the top menu.
![]()
From the top menu, select PAYROLL and then SYSTEM ADMINISTRATION.
Create User access to Pay Centre
Select Access Control from the sub-menu on the left.
Additional options will be displayed.
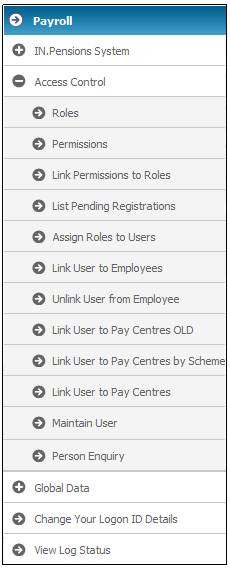
Select Link User to Pay Centres or Link User to Pay Centres by Scheme from the sub-menu on the left.
For more detailed information, refer to
Product Launch Requirements
Company Structure and Initial Load
Security
Access & Team Definition